Dec 30 11
by cara
at 10:19 PM

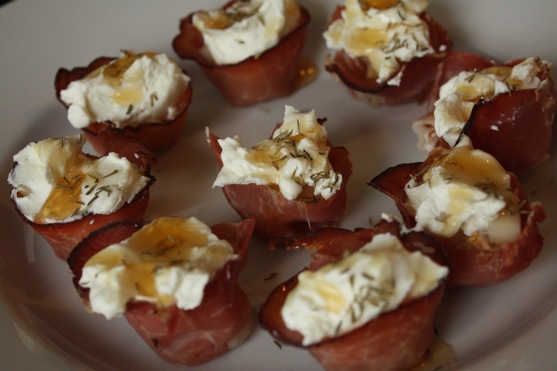
Pancetta Cups with Goat Cheese and Pear

I’ll have one more “Best Of 2011″ post for you tomorrow, but these little morsels of deliciousness were too amazing not to share today.  If you’re still trying to figure out a an easy, fun appetizer to serve for New Year’s Eve, here you go!  The Picky Apple doesn’t care for goat cheese, so I got the whole batch of these to myself.  And yes, I did eat them all.  Pretty much in one sitting.  I called it…”lunch.”  If I had more ingredients on hand, I would absolutely make these again for New Year’s Eve (or any other excuse to eat them again.)!

Pancetta Cups with Goat Cheese and Pear

recipe from The Galley Gourmet

Ingredients:

  • 16 thin slices (about 1/2 pound) of pancetta (not paper thin)
  • 1 large or 2 small pears, peeled, cored and diced
  • 1 Tablespoon lemon juice
  • 4 ounces mild goat cheese
  • 1 Tablespoon half-and-half
  • 1 Tablespoon fresh thyme leaves
  • Honey to drizzle

Snuggly fit the slices of pancetta into the wells of a mini-muffin pan.  To help keep their shape while baking, ball up a small piece of aluminum foil and place into a pancetta cup.  Repeat with the remaining cups.  Place the pan into a cold oven and close the door.  Turn the oven to 400º F and bake for 15-20 minutes or until the pancetta is browned and crisp.  Carefully remove the cups, discarding the foil ball, and place them on a paper towel-lined rack to cool.  The cups will continue to crisp as they cool.

Meanwhile, toss the pears with the lemon juice in a medium bowl; set aside.  In a separate bowl, stir together the goat cheese and half-and-half.

Transfer the pancetta cups to a serving plate.  FIll each cup with a spoonful of pears.  Pipe using a piping bag or place dollops of the cheese mixture onto the pears.  Sprinkle with the thyme leaves and drizzle with honey.  Serve immediately.  Enjoy!

Dec 29 11
by cara
at 11:07 PM

Top 10 Projects of 2011

Onward with the year in review!  I had so many great projects in mind this year (and a huge list for next year, thanks to Pinterest), but not many of them actually came to fruition.  Mostly because I’ve been working on the biggest project of all, growing Baby Slingshot!  So here are my Top 10 Projects of 2011 (and I use the term “projects” loosely, as you’ll see….)

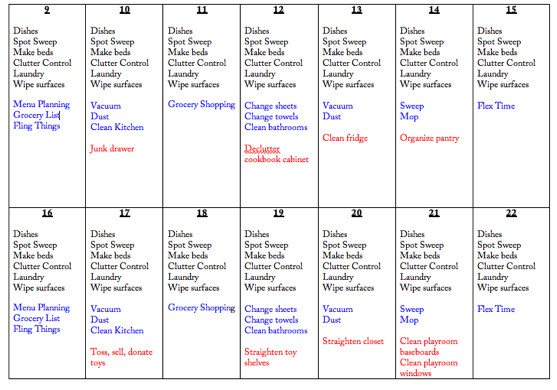
1.  Monthly Cleaning Calendar–  The first half of the year I was focused on keeping a clean house, and my custom monthly cleaning calendar really worked for me.  A sample calendar still remains in my sidebar, if you’re interested.  Things have gone downhill of late, but I’ve got a new, easier system lined up for the new year that takes in to account the new addition to the family.  We’ll see how it goes.

2.  How to Clean Your Bathroom in 11 Minutes– This year, I found a bathroom cleaning method (and products) that works for me.  This quick and easy routine makes a dreaded task much more bearable.

3.  Dress Up Storage Bin and Puppet Theater– Now HERE’s a real project for you!  My husband did all the building for this and I painted and sewed the curtains (and gathered the costumes and puppets).  This labor of love was auctioned off by The Littlest Apple’s preschool.  I wish we had one for our house too!

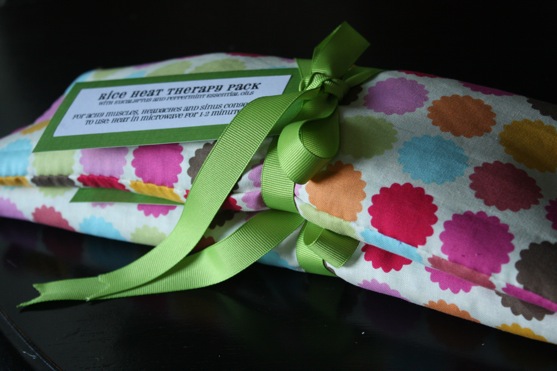
4. Rice Heat Therapy Packs–  I loved these so much, I made them for Mother’s Day AND for Christmas.  Such an easy little handmade gift!

5.  It’s a….– BOY!  This has been our biggest project of 2011.  Only a few more days to go before Baby Slingshot is here!

6.  Thankful Banner–  Late this fall, I finally got my crafting mojo back, and eeked out this Thanksgiving Banner just in time for Turkey Day.  This was my first project using burlap.  Love it!

7.  Slingshot’s Nursery– Okay, so I haven’t really shared any updates, but the nursery is mostly finished.  (I’ll share some photos in the next few days)  The walls are finished, the crib, rocker, changing table have all been set up.  A rug has been ordered.  We’re doing some DIY curtains and still need some wall accessories.  All in all, the nursery is turning out just how I’d hoped!  Here’s a pic from a few weeks ago when the board and batten was going up…

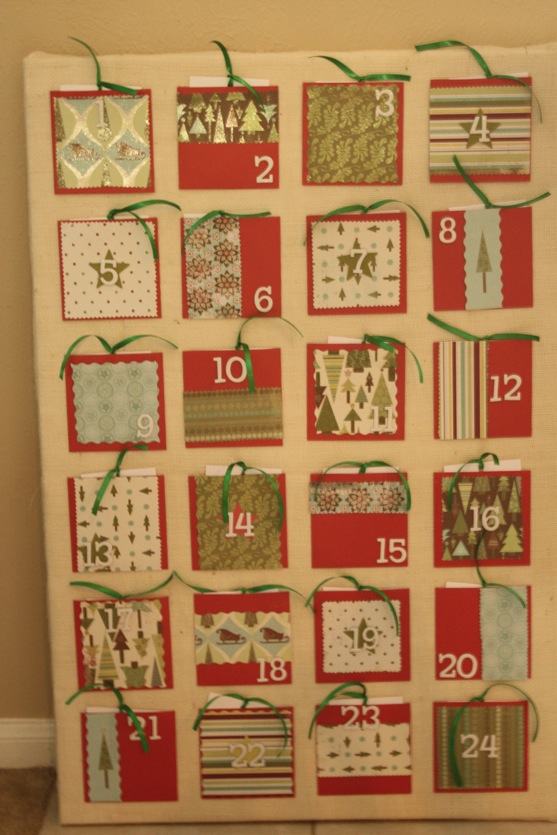
8.  Activity Advent Calendar– This was such a fun project, and an important part of our December.  The Littlest Apple LOVED checking the Advent Calendar each morning to see what our activity for the day was.  I think our favorite was the North Pole Breakfast.  Can’t wait to do this again next year!

9.  Going Primal/Paleo–  Going gluten, grain, and sugar free has been such a life-changer for me, and I definitely consider this a “project.”  A year ago, I NEVER would have considered doing something like this, but now I can’t imagine going back.  I feel great (as great as I can for being 36 weeks pregnant), I’ve got more energy than ever and I’m getting sick less often.  I’m looking forward to a Paleo/Primal 2012!

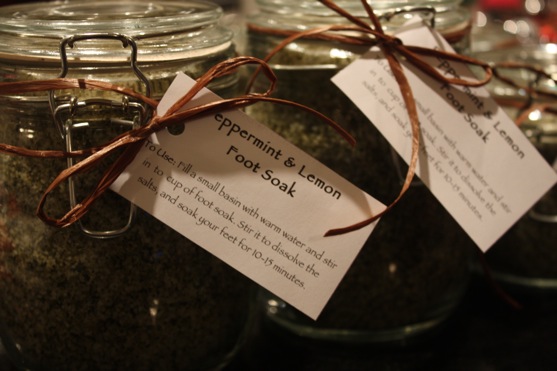
10.  Peppermint and Lemon Foot Soak– I made 10 of these this Christmas (including one for myself!).  It was so easy to throw together, and the smell is divine.  Such a great way to relax after being on your feet all day.

Dec 28 11
by cara
at 8:53 PM

Top 11 Recipes of 2011

With 2012 right around the corner, it’s time to reflect on 2011.  Today I’d like to share my favorite recipes from the last year (in chronological order)….

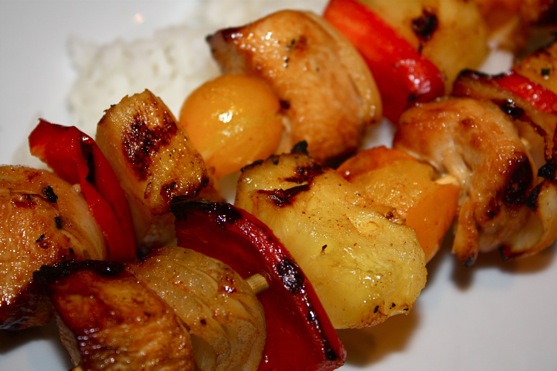
1.  Caribbean Chicken Kebabs with Lime-Cayenne Butter–  Hands down, the best thing we grilled all year long.  Great flavors, and also goes well with beef and shrimp.

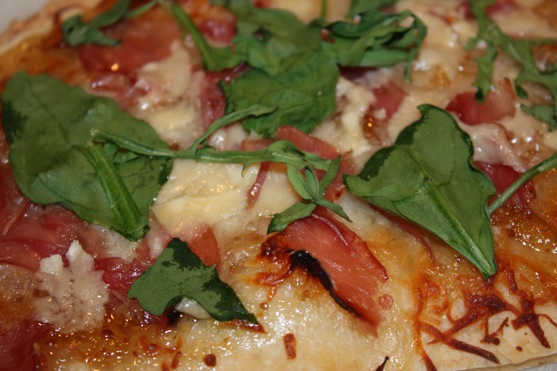
2.  Fig Prosciutto Pizza with Arugula– The recipe that started my fig obsession.  Sweet fig preserves paired with salty prosciutto and cheese….I don’t think I will ever get tired of this pizza.  Craving it right now!

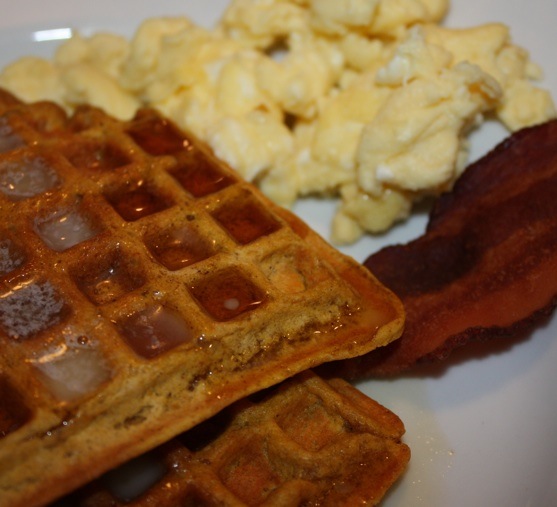
3.  Pumpkin Waffles– My first time using our waffle maker.  The beginning of the Waffle Revolution at our house, and the best waffle recipe I tried all year long (and I tried quite a few!).

4.  Cajun Chicken Pasta– (no photo).  One of my favorite dishes ever.  So easy to make, and easy to adapt for a large dinner party.

5.  Beef With Peppers– This has become my go-to stir fry dish when I’m craving Asian takeout.  I love the flavors and the slight spiciness of this dish!

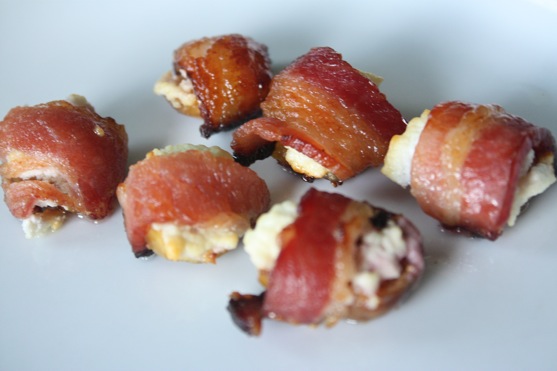
6.  Bacon Wrapped Figs– Heavenly little morsels!  A great appetizer or snack, but good luck sharing them with anyone else.  You’ll want to eat them all!

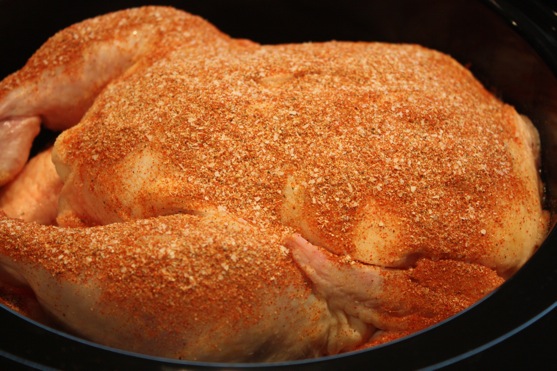
7.  Crockpot Whole Chicken-The easiest way to cook a whole chicken.  Produces a tender, juicy, flavorful chicken that can be used in soups, casseroles, or eaten straight out of the crockpot.

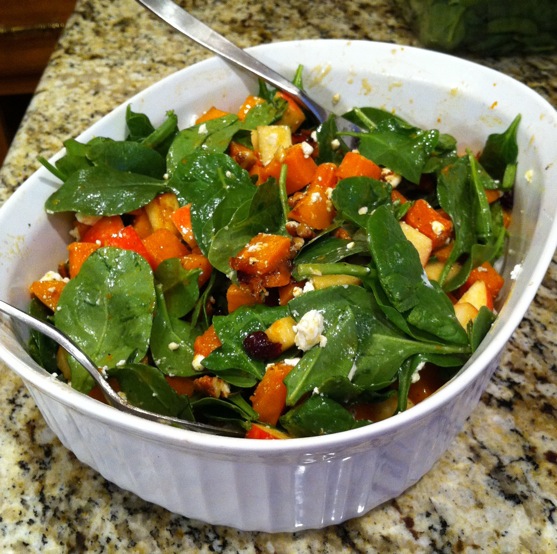
8.  Fall Salad with Butternut Squash and Apple Butter Vinaigrette– The beginning of my current salad obsession.  This one has several of my favorite things: butternut squash, goat cheese, pecans, and dried cranberries.  A great side dish for Fall.

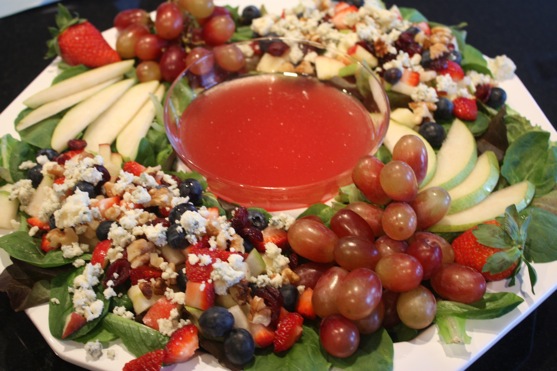
9.  Winter Berry Salad Wreath with Lemon Poppyseed Dressing– This salad not only looks gorgeous but tastes delicious too.  Not too difficult to make, and great for when you want to impress.  Perfect for brunch, potluck dinners, or holiday parties.

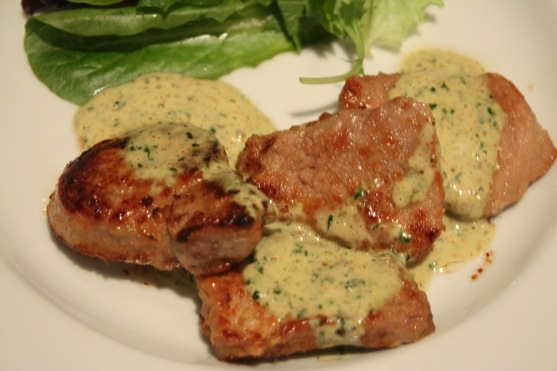
10.  Pork Tenderloin Medallions with Cilantro Pesto–  Primal cooking at it’s best.  The Cilantro Pesto is out of this world!

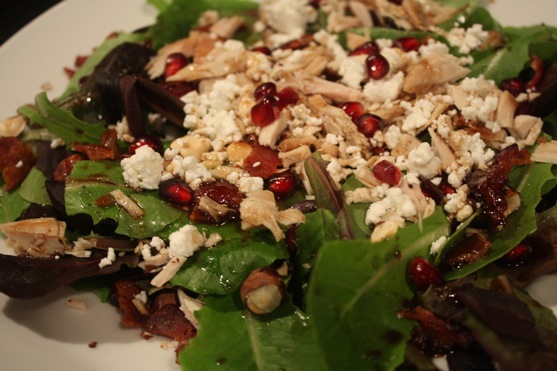
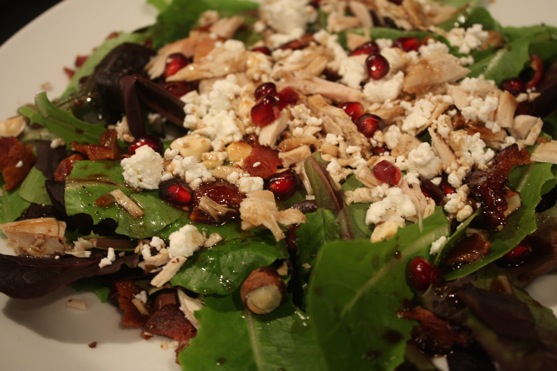
11.  Pomegranate Hazelnut Holiday Salad with Maple Bacon Dressing– yes, this was my most recent post, and yes, this is the third salad on my Top 11 List, but this one is just too delicious not to include.  I love pomegranate and bacon.  Especially together.

Dec 27 11
by cara
at 5:58 AM

Pomegranate Hazelnut Holiday Salad with Maple Bacon Dressing

Salad: it doesn’t have to be boring.  I’ve got a whole board of salad inspiration on Pinterest.  I eat salads frequently for lunch, and by changing them up with new and different flavor combinations, I don’t get tired of eating them.  Yes, they take a little prep work in advance, but do the work once, and you’ll have enough salad for a few days!

This Pomegranate Hazelnut Holiday Salad with Maple Bacon Dressing is one AMAZING salad!  I’ve thrown this salad together at least 3 times in the last month, and I just can’t get enough of it.  I suppose I’m a little slow jumping on the pomegranate band-wagon: until I made this salad, I don’t think I’d had pomegranate or pomegranate juice.  But now I love those messy little seeds with all my heart!

And then there’s the dressing…made of maple syrup, balsamic vinegar, and….wait for it….bacon grease.  It really doesn’t get any better than that.

In order to make this salad a little more filling for a lunch or dinner (and to get some extra protein), I add grilled chicken or turkey (as in the photo, taken shortly after Thanksgiving) and crumbled goat cheese.  I think the goat cheese pairs well with the bacon and pomegranate flavors, but other cheeses would probably work great too!

Pomegranate Hazelnut Holiday Salad with Maple Bacon Dressing

recipe adapted from Lauren’s Latest

Ingredients:

  • 8 cups Mixed Greens
  • 12 slices Bacon, cooked and crumbled (save your bacon grease, see below!)
  • ¾ cups Chopped, Toasted Hazelnuts
  • 1 whole Pomegranate, Peeled And Arils Removed
  • 1 cup chopped grilled chicken or leftover turkey
  • 3/4 cup crumbled goat cheese
  • 3 Tablespoons Warm Bacon Grease (reserved From Cooking The Bacon)
  • 2 Tablespoons Maple Syrup
  • 2 Tablespoons Balsamic Vinegar
  • Salt And Pepper, to taste

To make salad: Toss greens, bacon, hazelnuts, pomegranate, grilled chicken/turkey, and goat cheese together in a bowl.

To make dressing: Place bacon grease, maple syrup, balsamic vinegar and salt and pepper (if using) into a small jar and shake until combined. Pour dressing over salad, toss and serve immediately.

Dec 24 11
by cara
at 8:28 PM

Christmas 2011

Merry Christmas, from our family to yours!


Dec 24 11
by cara
at 6:35 AM

Salt Dough Ornaments

Making salt dough ornaments has been on my list of things to try for several years now, and this year, we finally made them.  They were super duper easy to make (only 3 ingredients!), and The Littlest Apple and I both had lots of fun painting them once they were dry.  We used washable tempera paints, but I’m sure acrylic would also work well.  You can play around with stamps and pressing patterns into the dough before baking (we did a few of those, like the red star that you can just barely see in the very top right of the photo below).  Next year we might break out the glitter too!

One special thing we did this year was the Family Thumbprint Christmas Tree Ornament (you can see 2 pictured above).  I wanted a way to document our last year as a family of 3, and I thought this would be a cute way to do it.  We pressed our thumbprints into the dough before baking, and then I colored them each a different color and added some details and our name with a black fine-tip Sharpie.  Next year, we’re going to need a bigger tree ornament to fit all 4 of our thumbprints!  This was actually the only salt dough ornament that went on the tree.

The rest were used for gift tags!  Part necessity because we ran out of gift tags, part “okay, what do we do with all of the ornaments now that we made them?”  Aside from their slightly delicate nature (I did accidentally break one when I stacked a few presents on top of each other), I LOVE the way the salt dough ornaments look as gift tags.  I wrote on them with a fine tip sharpie.

One batch of dough made plenty for us!

Salt Dough Ornaments

recipe from The Happy Housewife

Ingredients:

  • 2 cups flour
  • 1 cup salt
  • 1 cup warm water

Mix together flour and salt.  Then mix in the warm water.  Mix until you have a dough that is similar in consistency to pie crust.  Take the dough and place it on a floured surface.  Roll out the dough until it is about 1/4 inch thick.  Use cookie cutters to cut out shapes. If you don’t have cookie cutters you could use a glass to cut circles.  Put the shapes on a cookie sheet.  Then take a sharp object (I used a meat thermometer) to put a small hole in each shape where you will insert the ribbon. Make sure the hole goes all the way through the dough, because it will close up slightly while baking.  Bake the salt dough ornaments for 4 to 6 hours at 200 degrees or until hardened.  Paint and decorate as desired!

Dec 23 11
by cara
at 9:04 AM

Reindeer Bites Cookies

A few days ago, The Littlest Apple and I sat down to look through all the cookie recipes I’ve pinned to select some to make for Santa.  He was very interested in these cookies, but decided we should make them for Santa’s reindeer since they are called REINDEER Bites Cookies.  I thought the reindeer were getting carrots and reindeer food (of the oatmeal and glitter variety) at our house like they did last year, but The Littlest Apple had other plans.  And once he has an idea in his head, good luck convincing him otherwise (he gets that from me).  So, Reindeer Bites Cookies for Santa’s reindeer.  Oh, and he was also insistent that we needed to bake different cookies for Santa.  So I’ll have another cookie recipe coming soon…

As for the Reindeer Bites Cookies…what’s not to love?  These cookies are simple to make, and even though they look rather plain, there are so many wonderful add-ins: the coconut-shredded AND coconut extract, graham cracker crumbs AND pieces, caramel bits and chocolate chunks.  The batter of these cookies reminded me very much of the Samoas/Caramel deLite Girl Scout Cookies.  So yes, I indulged in cookie dough batter.  Again.  And suffered for it.  Again. You would think I would have learned my lesson by now….but I just couldn’t resist this delicious cookie dough!  I’m guessing Santa’s reindeer are going to enjoy these too.

Here’s the recipe, in case you want an extra special treat for the reindeer when they visit your house…

Reindeer Bites Cookies

recipe from Six Sisters Stuff

Ingredients:

  • 1/2 c. butter flavored shortening (Picky Apple Note: I substituted real butter for this!)
  • 1/2 c. butter, softened
  • 1/2 c. sugar
  • 1 c. brown sugar
  • 1/2 tsp. baking soda
  • 1 tsp. salt
  • 2 eggs
  • 1/2 tsp. coconut extract
  • 1/2 tsp. vanilla
  • 2 c. flour
  • 1 c. graham cracker crumbs
  • 1 c. caramel bites
  • 1 c. coconut
  • 1 c. chocolate chunks
  • 1/4 c. graham cracker chunks
Preheat oven to 375 degrees F.  Beat shortening, butter, and sugars until fluffy. Beat in baking soda, salt, coconut extract and vanilla. Add eggs one at a time, beating after each. Slowly add flour and graham cracker crumbs. Stir in caramel bites, coconut, choc chunks, and graham pieces. Drop by rounded teaspoon onto a cookie sheet. Bake 10-13 minutes. Let stand on the cookie sheet for a few minutes after removing from oven. The caramel on the bottom needs time to set up before you can remove them. Store in an airtight container.
Dec 22 11
by cara
at 9:00 PM

Peppermint and Lemon Foot Soak

Yesterday was a busy day of baking cookies, painting salt dough ornaments, working on the nursery, a trip to Target, and wrapping Christmas presents late into the night.  As a result, blogging got put on the back-burner yesterday (and I was on such a roll with posting!)  I think it’s going to be go, go, go around here for the next few weeks (and then some!).  On the agenda for today: get old car(s) (yes, plural) tuned up, washed and vacuumed in preparation for trading them in tomorrow (new car day!!!), write thank you notes for baby gifts received, do some deep cleaning around the house, work on the nursery, and finish (and deliver?) a few handmade gifts.  Whew!  It’s good thing The Littlest Apple is spending the day (and night) with my parents.

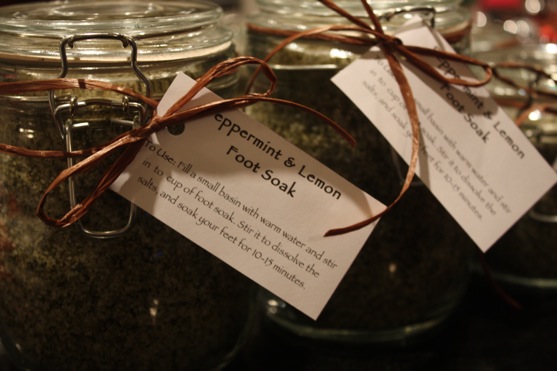
Now that The Littlest Apple is out of school for the Christmas break, I can share this great Foot Soak I made for his preschool teachers.  I’ve created homemade scrubs before (for Mother’s Day), but this gift idea caught my eye on Pinterest because it was a foot soak, not a scrub, and included peppermint tea.  Also, it wasn’t super oily like lots of other scrubs.  Teachers who are on their feet all day herding preschoolers deserve something luxurious and refreshing to soak their tired feet in at the end of the day, don’t you think?!  (Not a bad idea for pregnant women either, so I made myself a batch too!)  This soak was amazingly easy to make, and The Littlest Apple enjoyed helping me stir together the ingredients.  I packaged it in these jars that I just love (I bought some of mine at Garden Ridge Pottery and some at Hobby Lobby), and kept my labeling and ribboning to a minimum (mostly because I made about 10 of these and got burnt out by the ribboning stage).

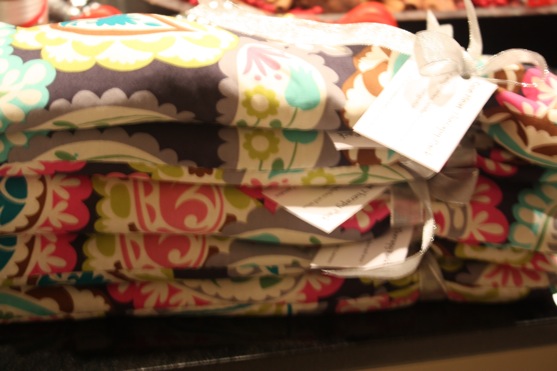
I paired the foot soak with a Rice Heat Therapy Pack containing eucalyptus essential oils, also hand sewn by me.  Yes, 10 of them.  I’m glad to have that marked off my To Do list!  I found a super cute fabric on sale at Hobby Lobby, and I’m already itching to use it for myself somehow.

I’m kicking myself for not getting any better pictures of this stuff for you.  The pictures I do have were taken at night and are pretty awful.

Peppermint and Lemon Foot Soak

recipe from Or So She Says…

Ingredients:

  • 1 cup sea salt (a great alternative would be Kosher salt)
  • 1 cup Epsom salt (usually found in the personal care/pharmacy aisle)
  • 2 Tbsp peppermint tea (Be careful not to confuse this with “peppermint flavored” tea: the tea should be 100% peppermint leaves. Tip: if you can’t find it in bulk, buy a box of tea-bags, cut them open and measure!)
  • 4 tsp pure peppermint extract
  • 3 tsp pure lemon extract
  • 1 tsp olive oil
  • 1 tsp cornstarch
  • 1 tsp baking soda

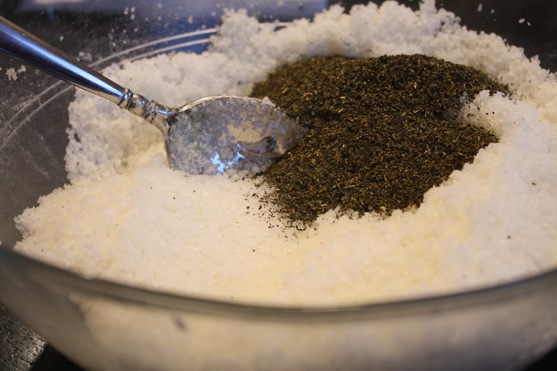
Combine the sea salt and Epsom salt in your mixing bowl. When the two salts are completely blended, add olive oil, peppermint extract and lemon extract. Stir each time you add an ingredient, making sure to break apart any large chunks of salt with your spoon. Once these liquid ingredients have been fully incorporated, your salt mixture will look like moist sand (and it will smell pretty good too!). Now it’s time to add the cornstarch and baking soda. Again, blend thoroughly, breaking apart any large clumps of baking soda or salt.  Almost done! Now add the final ingredient – the peppermint leaves. (I add this last, because I’ve found that adding them early in the process causes the leaves to bruise and give off their green color to the salt.) Stir the leaves in until they are fully blended with the salt mixture. Go ahead and take a deep breath while you’re at it – it should have a very refreshing scent!

At this point, if you’re planning on keeping the foot soak for yourself, store it in an air-tight container so it stays fresh. If the container is not air-tight, the beautiful aroma of the extracts and the peppermint leaves will fade. (The soak will still be useful, just not as charming!)

Instructions for Use: Fill a small basin with warm water and stir in ¼ to ½ cup of foot soak. Stir it to dissolve the salts, and soak your feet for 10-15 minutes. Ahhhh…

Dec 20 11
by cara
at 10:29 PM

Pork Tenderloin Medallions with Cilantro Pesto

Let’s take a little break from all the Christmas stuff because I’ve got a delicious new pork recipe to share with you!  Don’t worry, I’ve got quite a few more Christmas things I’m going to try to squeeze in over the next few days, but for today, it’s all about a yummy dinner, okay?

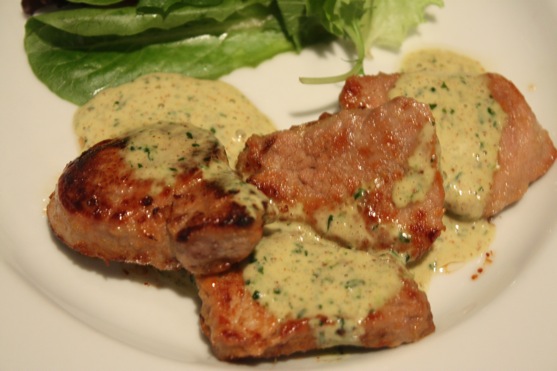
The real superstar of this dish is the Cilantro Pesto.  Don’t get me wrong, the pork medallions themselves are plenty tasty and simple enough to prepare (and I love cooking pork in medallion form!), but I could just eat this pesto by the spoonful.  It’s that good!  The Cilantro Pesto is creamy and spicy and sweet and and rich and bold all at once.  It’s a unique flavor combination that just works.  I found this recipe in The Primal Blueprint Reader-Created Cookbook (available for free at Mark’s Daily Apple), but don’t tune me out just because I started talking about all that Primal and Paleo stuff again!  My husband, who is decidedly NOT Primal (and isn’t called The Picky Apple for nothin’!), loved this meal just as much as I did.  I think you’ll enjoy it too!

Pork Tenderloin Medallions with Cilantro Pesto

recipe from The Primal Blueprint Reader-Created Cookbook

Ingredients:

  • 2 pounds of pork tenderloin
  • 4 tablespoons olive oil
  • 2 teaspoons sesame oil
  • 2 tablespoons rice wine vinegar
  • 2 cloves of garlic, chopped
  • 1 inch fresh ginger, peeled and chopped
  • Cilantro Pesto (recipe below)

Slice the tenderloin into rounds of 1-inch thickness. Mix oils and vinegar, add garlic and ginger. Marinate the pork slices in a non-reactive glass container for at least 2 hours or overnight, turning at intervals to marinate both sides of the slices.  To cook the pork, heat some coconut oil, lard, or olive oil in a large skillet over medium-high heat. Quickly sear the slices, turning once, until just cooked through. Do not crowd the pan, cook in batches as needed so they sear and don’t steam. Keep each batch warm in a warm oven or covered in foil wrap.  Make pesto (see recipe below).

To serve: Put a few slices of pork on a plate with a little bit of pesto on each slice, or serve pesto on the side.  (A little pesto goes a long way, flavor-wise.) Serve with cooked greens with sesame seeds and sliced red peppers for a nice color combo.

Cilantro Pesto

Ingredients:

  • 1 bunch of cilantro, leaves only
  • 2 large garlic cloves
  • 1-inch piece of ginger, peeled and sliced thin
  • 1 tablespoon fish sauce
  • 1/4 cup olive oil (or less, to taste)
  • 1 teaspoon sesame oil (or more, to taste)
  • 1/4 cup almond butter (Picky Apple Note: You can also use peanut butter!)
  • 1 teaspoon honey (optional)
  • 1/2 – 1 cup coconut milk
  • sea salt to taste

To make pesto:  Blend sauce ingredients in blender or food processor until smooth, adding coconut milk until preferred consistency is reached.

Dec 19 11
by cara
at 10:28 PM

Favorite Things 2011

I’ve participated in the Favorite Things Party at 320 Sycamore for the last 3 years, and this year I have lots of new favorites to share with you!

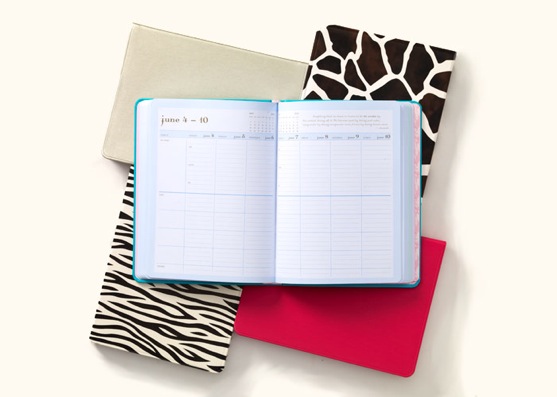
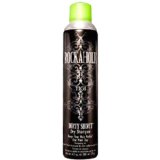
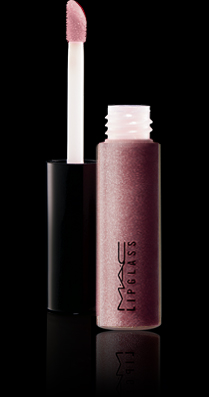
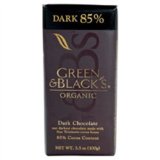
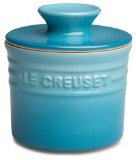
Hair powder: I’ve mentioned before that I’ve got LOTS of hair.  Super thick, super straight.  It doesn’t lend itself well to air-drying, so washing and drying it on a regular basis is a huge ordeal.  My hair is also on the dry side, so I tend to go 3-4 days without washing it (sometimes longer, if I’m being honest).  To keep it looking fresh, I use hair powder (AKA dry shampoo!).  Couldn’t live without it!  Two of my favorites are TIGI Rockaholic Dirty Secret Dry Shampoo and Tresemme Fresh Start Dry Hair Shampoo, but just about any of them will do! MAC Lipglass: Must have!  I wear this every day.  It has great shine, stays on longer that most lipglosses, doesn’t feel sticky, and comes in tons of great colors.  My current favorite is Viva Glam V. Green and Black’s Organic  85% Dark Chocolate: This is the chocolate I go to when I’m craving chocolate.  It’s dark.  It’s smooth and creamy.  It’s not full of sugar.  One tiny little square should satisfy your chocolate cravings.  (Runner up=Lindt) Le Creuset Stoneware Butter Crock: We eat real butter here, primarily Kerrrygold Butter which is made in Ireland from grass-fed cows.  But keeping real butter in the fridge means that your butter isn’t spreadable.  Enter the butter crock!  You keep this handy device on your counter, and it keeps your butter nice and fresh and soft for spreading.  Don’t know how we managed without it.     I got a white one, but I love the Caribbean color, pictured below. MomAgenda: I’ve been using the MomAgenda Desktop Planner for three years to keep myself organized.  These planners come in several different sizes, great colors (including zebra print!), and include lots of space for planning your day, your children’s activities, dinner, and your daily and weekly to do’s.  There’s also an App for iPad now. Slugs and Bugs Music: We discovered the music of Randall Goodgame and Andrew Peterson in September of 2010 after they performed at my son’s preschool.  We own Slugs & Bugs & Lullabies as well as A Slugs & Bugs Christmas.  Both CDs are full of silliness, clever lyrics, as well as truths about God.  Some of our favorite songs are “Tractor Tractor,” “God Made Me,” “The Camel Song” (the silliest Christmas song ever, which includes a Star Wars reference) and “Christmas Around The World.”  Our whole family enjoys listening to these CDS (over and over and over) and my son, husband, and I are frequently singing their music throughout the day.
Amazon Kindle: As an avid book reader, I wasn’t sure how I would feel about using an e-reader.  But after receiving a Kindle from my husband last year for Christmas, I have been 100% happy with it.  I’ve read more books this year than ever before!  I love how light it is (especially since I tend to like the novels that are 500-1000 pages).  The e-ink makes the screen super easy to read, and I’ve been taking full advantage of the free books available for download.  I have the Kindle Keyboard pictured below.  In the last year, they’ve switched to touch screen and full color technology in the Kindle Fire.  If you love to read, you won’t regret owning a Kindle!

Parks and Recreation: Every year, I share my favorite TV show, and this year, I’m loving Parks and Recreation on NBC.  It’s funny and clever and heartwarming all at once.  I love Amy Poehler and her character Leslie Knope, Aziz Ansari as Tom Haverford and all the rest.  Last season, Rob Lowe and Adam Scott joined the cast, and they are both just perfect!  If you haven’t watched this show yet, I encourage you to tune in!

Gap Maternity Jeans: I have 2 pairs of maternity jeans.  They’re both from Gap, and I love, love, LOVE them!  Maternity jeans have come a long way since I was pregnant 4 years ago.  These are amazingly well made, fit great, and are super comfortable with a full belly panel.  I have a pair of Long and Leans hemmed to wear with flats and a pair of Sexy Boot Jeans to wear with heels and boots.  Both styles are available in sizes 00-18 and in Ankle, Regular, and Long lengths.  If I had to pick just one, I’d probably choose the Long and Leans.

Merona Women’s Ruffle Neck Dress:  This is NOT a maternity dress, but I took the risk in ordering it from Target.com, and it is my favorite maternity dress (and favorite dresses I own, period!).  I hope to be able to wear it post-pregnancy too.  The teal color is gorgeous, the ruffles and the fit are flattering and forgiving.  It’s versatile for summer and winter, work and play.  I’ve gotten so many compliments every time I wear it.  I also have it in red (my Christmas Eve dress!), which I love as well.  The best part?  It costs $25!  In addition to teal and red, this dress also comes in Army Green, Brown, and Violet.

Disclaimer: This post contains several Amazon Affiliate links.  That means if you click through and purchase something from Amazon, I earn a few pennies.
Blog Widget by LinkWithin