Jul 6 10
by cara
at 5:47 PM

Finding Our Summer Rhythm

We’ve been simplifying our scheduling and to-do lists around here and enjoying  a summer of simple activities.  I don’t want to be on the go all day in an attempt to keep The Littlest Apple entertained, and I’m trying to cut back the amount of TV he’s watching.  I’m no longer referring to or creating rigid daily lesson plans for Tot School, just a loose framework of daily activities.  A routine.  A rhythm for our days that The Littlest Apple can look forward to.  We’re not (nor have we ever been) doing lapbooks, worksheets, and all of those super neat printables I keep seeing everywhere.  Although that suits my personality just fine, and I dream of The Littlest Apple and I sitting side by side at the kitchen table each doing our “work” for 30 minutes each day, it does NOT suit The Littlest Apple’s personality and learning style.   He needs to be MOVING and DOING.  So here’s a little glimpse into our daily rhythm

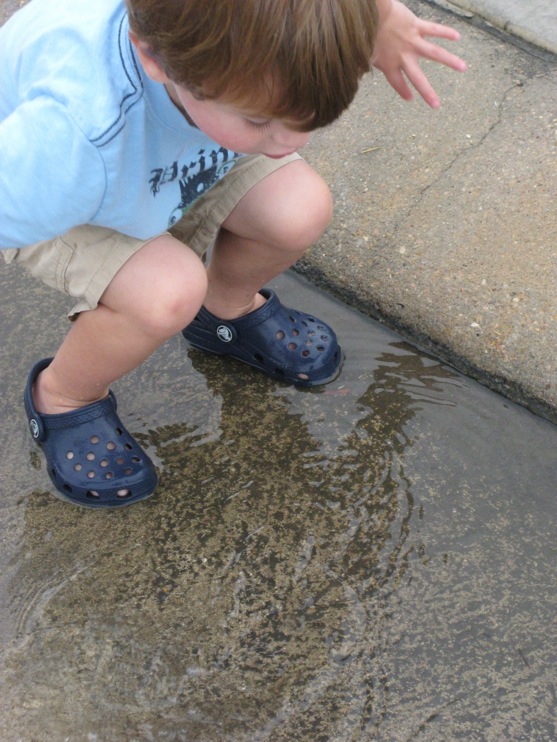
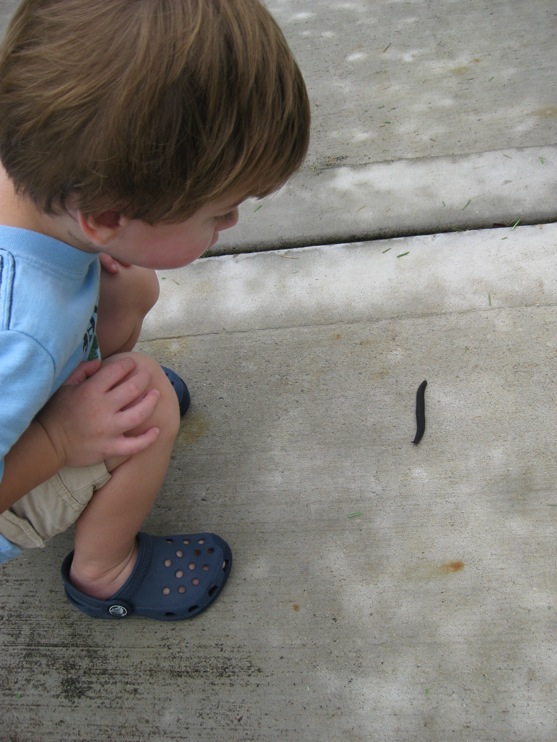
We’re spending at least an hour outside every morning before it gets too hot.  (Temperatures are in the 90s here.)  We walk around our neighborhood or go to one of the many nearby parks.  I’ve been encouraging The Littlest Apple to walk more and more on his own, instead of being carried or pushed in the stroller.  Because he is relatively light for his age, he gets carried (and expects to be carried) way more than most kids his age.   Since his energy level is still on the high side, our morning outings have helped him to focus better on other activities the rest of the morning.  There is a park within walking distance that has 37 baby ducklings!  We’ve even gone out in the rain, which makes for great puddle jumping and slug-hunting.  In the late afternoons, we often go outside again, spend time tending the garden, playing with the sand and water table, or splashing in the kiddie pool.

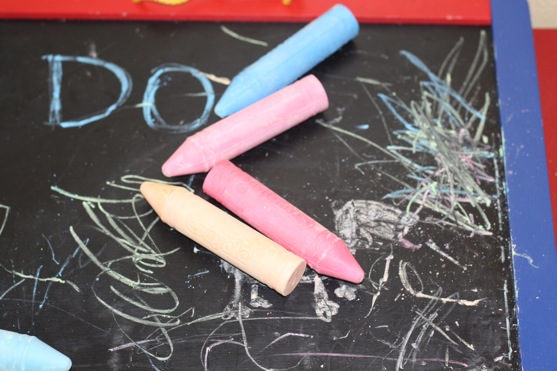
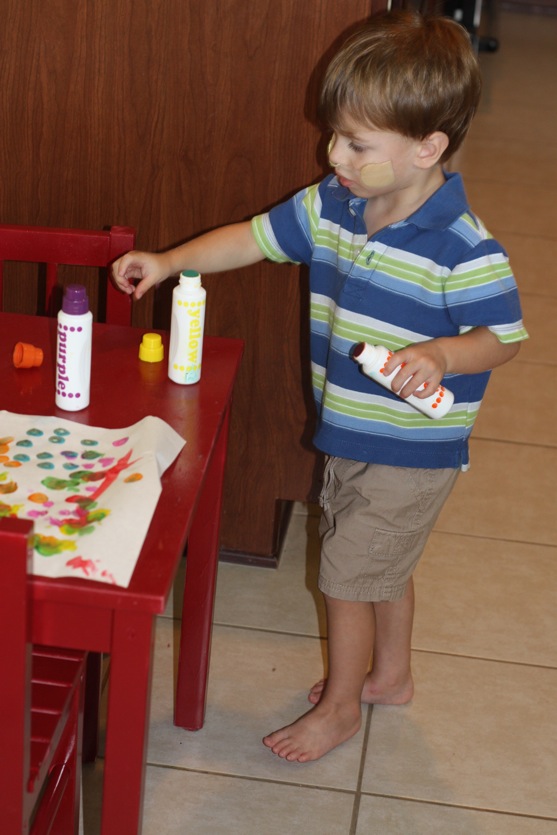
We spend time every day on art.  I rotate out the supplies available to him(markers, crayons, dot paints, tempera, watercolor, chalk, glue and collage supplies, etc).  Sometimes I have a definite project in mind (and incorporate additional supplies), sometimes I just let him create whatever he wants.  Last week we used markers to draw still life portraits of a vase full of sunflowers we had on our kitchen table, and painted an American flag.  The Littlest Apple also created some great art using his dot markers, and practiced with his safety scissors.

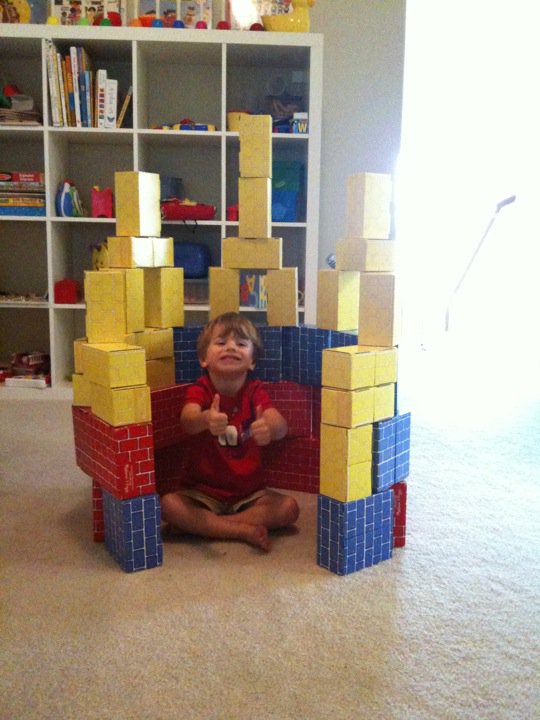
Building. We’ve got giant blocks, small blocks, and stacking towers, and we’ve been using them LOTS lately.  Making skyscrapers, castles, houses, towns, and bird nests.  Sometimes we count the blocks or sort by color, sometimes we use toy dump trucks and loaders to move the blocks around, sometimes we just build.  I let The Littlest Apple lead the way on these projects, using his imagination (which never fails to amaze me!).  Last week we also built roads with ramps and lined the blocks up like dominoes and knocked them down, over and over and over again.

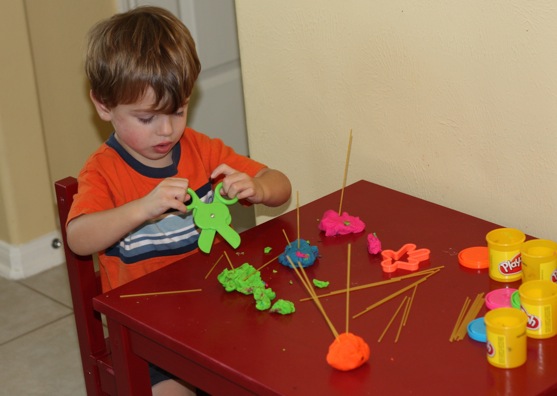
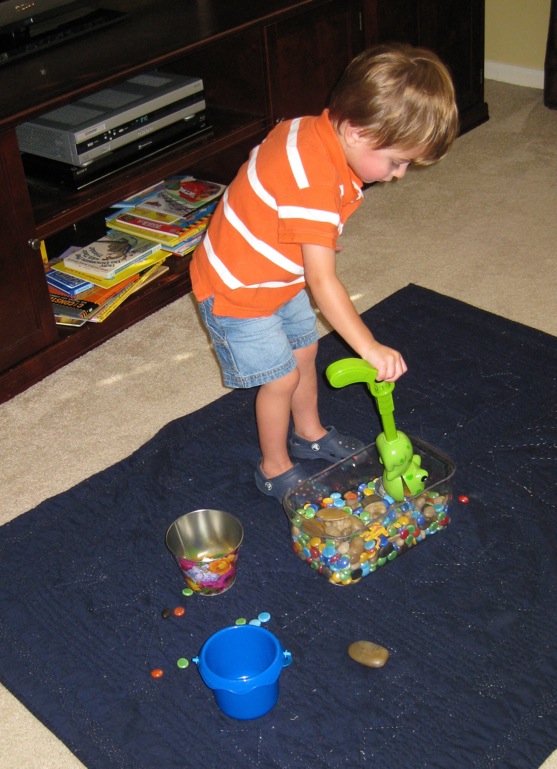
Sensory activities like rock tubs, seasonal sensory bins (time for a new one!), playdough (sometimes store bought, sometimes homemade), pasta, lima beans, pom poms.  We use shovels, scoops, buckets, tongs to move, pour, and transfer stuff from place to place.

We read.  LOTS.  We read downstairs on the couch, we read upstairs in the playroom.  We read in tents made of blankets.  We read in mommy’s bed.  We read in The Littlest Apple’s rocking chair.  Sometimes we even read outside in the late afternoon.  Even though he never really sits STILL for stories (sitting still for anything is still a really big struggle), The Littlest Apple is staying interested in longer stories, and more stories at a time.  Our current favorite books include Mike Mulligan and More, Make Way for Ducklings and the Harper Collins Treasury of Picture Book Classics, but we also make weekly trips to the library in search of new favorites.

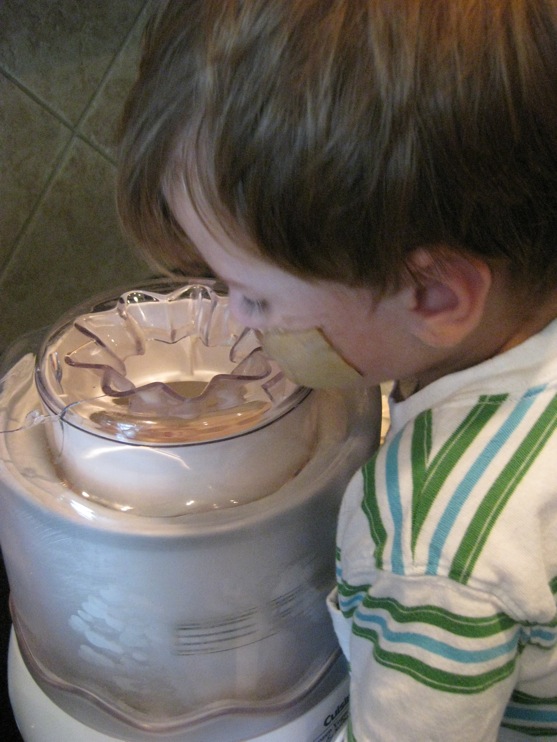
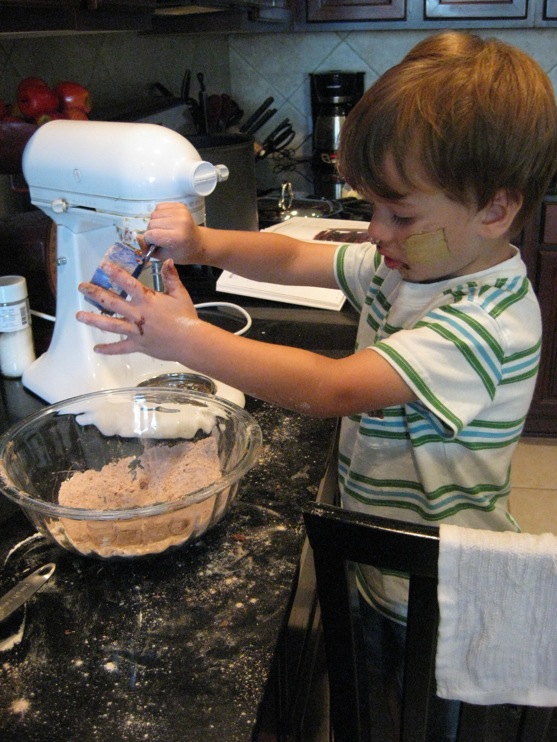
Working in the kitchen.  Making ice cream.  Making popsicles.  Learning knife skills.  Washing and drying fruit.  Washing and drying dishes.  Making tortillas.  Baking bread and muffins.  Making butter.  And quite a few messes, too.

Real life activities. Both of us need to work on cleaning up our messes!  I’m trying to teach The Littlest Apple that when he makes a mess in the kitchen (like the one pictured above), then he is responsible for wiping down the counters and putting the dirty dishes in the sink.  He’s also been vacuuming, dusting, sweeping, mopping, sorting and putting away laundry, making beds.

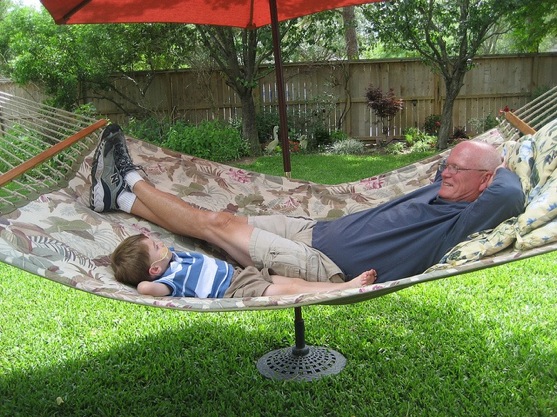
Quality time with grandparents. We see both sets of grandparents at least once a week.  The Littlest Apple really looks forward to their time together.

And last but not least, CUDDLE TIME!  My favorite part of the day.  We spend at least 30 minutes a day just laying in bed cuddling and talking, tickling and kissing and hugging.  It can’t get any better than that!

I’m sharing this post with Tot School at 1+1+1=1

Jul 3 10
by cara
at 9:29 PM

Corn and Goat Cheese Salad with Cilantro Honey Lime Dressing

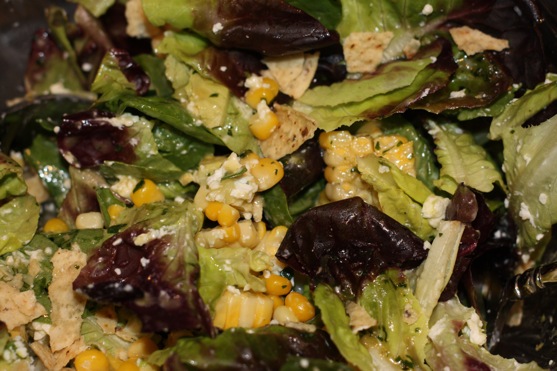
I have lots of recipes piling up that I want to blog about, but tonight I made the most AMAZING salad that I just had to share first.  Courtney at Cooking Up a Family recently mentioned a Cilantro Honey Lime Dressing she made, and I thought this would pair perfectly with the Shredded Chicken Taquitos I had on the menu for dinner.  This was one of those salads that just came together with ingredients I had on hand already.  What?  You don’t keep goat cheese and Cotija cheese on hand?  Well you should.  They’re very versatile cheeses!  But don’t worry if you don’t have the cheese–the dressing is the star of the show here!  You could add some grilled chicken or shrimp to make this salad a stand-alone (and stand-out) meal.

Corn and Goat Cheese Salad with Cilantro Honey Lime Dressing

Ingredients:

  • Lettuce (use something extra crispy, like romaine)
  • Corn
  • Goat Cheese, crumbled
  • Avocado, sliced or cut into small chunks
  • Cotija cheese
  • Tortilla chips, crumbled
  • Cilantro Honey Lime Dressing (recipe below)

Prepare dressing (recipe below).  In a large bowl, toss the lettuce with corn, goat cheese, and avocado.  Toss with dressing.  Top salads with tortilla chips and Cotija cheese.

Cilantro Honey Lime Dressing

recipe from The Mother Huddle via Cooking Up a Family

Ingredients:

  • 1 jalapeno, chopped and seeded if you don’t want it spicy
  • 2 cloves garlic, chopped or crushed
  • 1/4 cup fresh lime juice,1 or 2 large limes depending on how juicy they are
  • 2 tsp balsamic vinegar
  • 1/3 cup honey
  • 1/4 tsp cumin
  • 1 handful cilantro leaves, about a 1/4 cup…try not to use the stems it will make it taste soapy
  • Salt to taste, about, probably 1/2 tsp
  • 1/2 cup canola or olive oil

Place all ingredients except cilantro and oil in blender. Pulse until well blended. Add cilantro and pulse a few more times. With blender on, slowly pour in oil until mixture maintains a dressing like consistency. (If using a food processor, start by pulsing the jalapeno and garlic before adding liquid.) Serve over salad.

Jul 2 10
by cara
at 2:59 PM

My Flag Wreath Was Featured On…

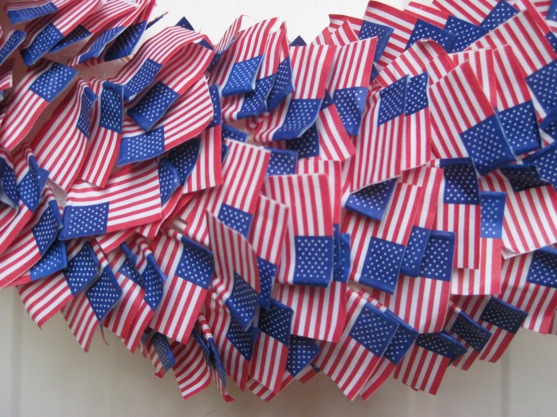
Earlier this week I posted my wreath made with flag toothpicks.

This was one of the first craft projects shared on the blog, and on a whim, I decided to include it in a couple linky parties/contests featuring a red, white, and blue theme.  I have been absolutely AMAZED and flattered by how popular this little project has become!  As a result, my blog page views have more than doubled this week, and my normally quiet little blog of mine is getting lots of comments.  I’ve also heard from many of you via comments, email, and Facebook that have been inspired to make your own wreath, too.  And it’s all thanks to the following blogs for featuring my flag wreath:

First, my project was featured on the Sunday Showcase at Under the Table and Dreaming.  There were 192 entries this week!

Then, out of 147 entries in the CSI Project: Red White and Blue Challenge, my flag wreath made the Top 10!!

Tidy Mom included my flag wreath in her I’m Loving It-Patriotic Style post

mod blog also dedicated a post entirely to my flag wreath.

Focal Point included the flag wreath on a roundup of patriotic DIY projects

I feel like I’m forgetting someone, so if you featured my flag wreath, just send me an email or comment here, and I’ll add a link back to your blog!  Thanks again everyone, you made my week!  Who knew a little flag wreath made with toothpicks would be so popular?!

Jun 30 10
by cara
at 9:31 PM

Minute To Win It Party

Have you ever seen the game show on NBC called Minute to Win It?  Hosted by Guy Fieri, contestants on this show complete increasingly difficult challenges using household items in one minute or less.  The Picky Apple and I have watched it a few times, and we always say “I could do that!”  We decided to put ourselves (and others) to the test.  Inspired by a post on The Dating Divas about a couples Minute To Win It Party, we decided to host our own Minute To Win It Party.  We had 12 people, including us, and it was SO MUCH FUN!

The Food

I loved this menu!  Most of the items could be prepared ahead of time.  I much prefer serving this type of meal to a big group rather than hamburgers that have to be cooked as the party is happening.  By preparing food ahead of time, you can relax and enjoy the party too!

The Drinks

Speaking of relaxing….

  • Absolut Raspberry Lemonade
  • White Sangria
  • Margarita Popsicles (recipe coming soon)
  • Strawberry Margaritas (recipe coming soon)
  • Beer

Did I mention this was an adults-only party?!  We don’t do parties like this much, and we I got a little carried away with the drinks.  I couldn’t make up my mind, so I just decided to make it ALL!  As a result, I still have freezerful of delicious margarita popsicles.  That’s not a bad thing, I don’t think.

The Games

We selected 5 games (and 2 bonus games) from the Minute To Win It website (and described in detail below).  We have some rather competitive friends, and I figured the drinks would loosen everyone up, but I wanted to encourage everyone to play without forcing them to do each game if they didn’t want to participate.  Therefore, we created the following rules:

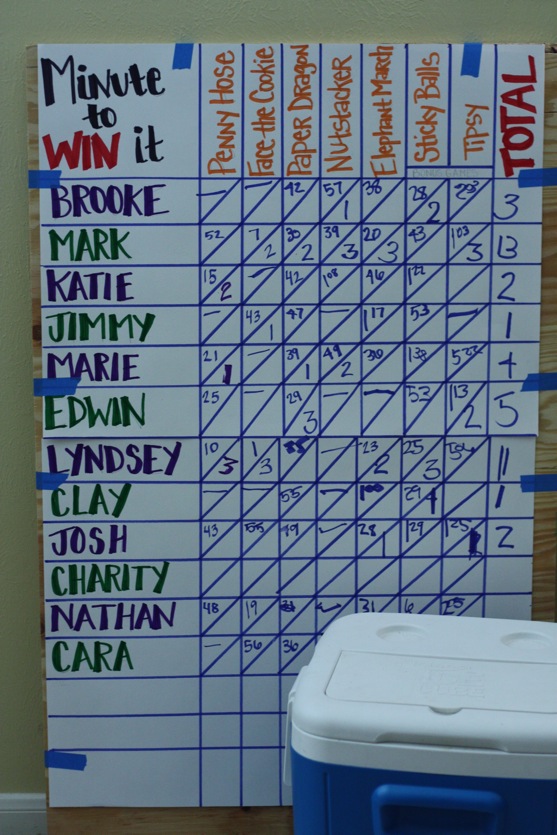
  • Times will be recorded for each player.  3 points will be awarded for 1st place, 2 for 2nd place, and 1 for 3rd place.
  • The winner of each of the 5 games will receive a prize.  (The prizes were all from dollar bins at Target at Michael’s: sling shots, velcro catcher things, little guns, etc)
  • After the games are completed, the scores will be added up, and the winner will receive the Grand Prize.  (We really hyped this up, but kept it a secret.  It was a giant WWE belt, which was fabulously gaudy.)
  • The Picky Apple and I were disqualified from winning since we practiced the games to test them out and kept the games top secret from everyone else.
  • 2 or 3 people will go at the same time for games if possible, to speed things up.  Even though people weren’t competing against each other in pairs, it helped fuel the competitive spirit.  Also, no one felt too silly going by themselves.
  • Names will be drawn from a hat to determine the order for each game.
  • We let some of the games go for a little longer than a minute…some of these games seem impossible to complete in just one minute!
  • Scores were recorded on the official scoreboard…created lovingly by me, channeling my inner high school self…

As I mentioned, we had 5 games planned that would count toward the final score, and 2 bonus games in case of a tie or if everyone just wanted to play a few more silly games.  Well, not only did everyone want to play MORE silly games, they wanted them to count toward the final score!  Love our competitive friends!

I tried to pick games that would not only be fun to play, but fun to watch too.  And boy, were they ever!

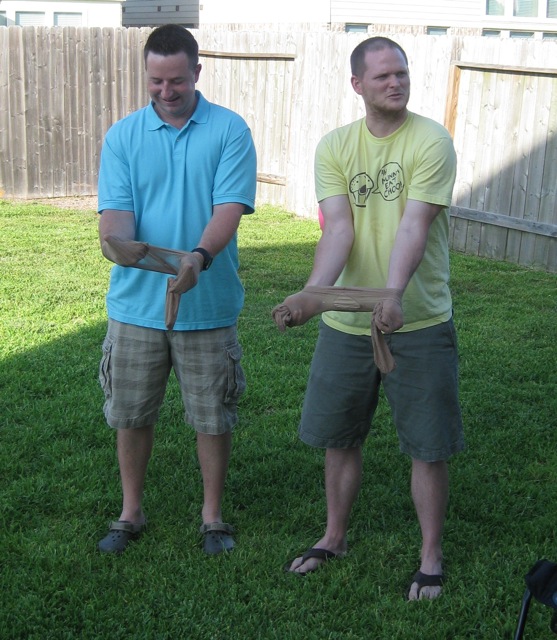
Penny Hose: Two pennies are placed in the ends of the legs of a pair of pantyhose. Using only their hands, the contestants must inch their way down the legs to retrieve the pennies and pull them out. Each arm must work independently and the player cannot use one hand to stretch or hold the hose for the other.  (We used quarters instead of pennies, and this is MUCH harder than it looks!)


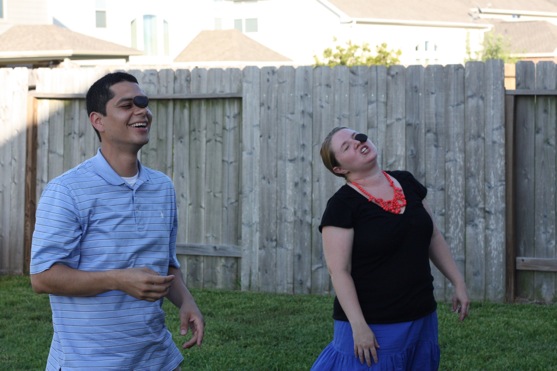
Face the Cookie: Contestants, using only their faces, must move three Oreo cookies individually from their forehead to their mouth. (We only did one cookie.)


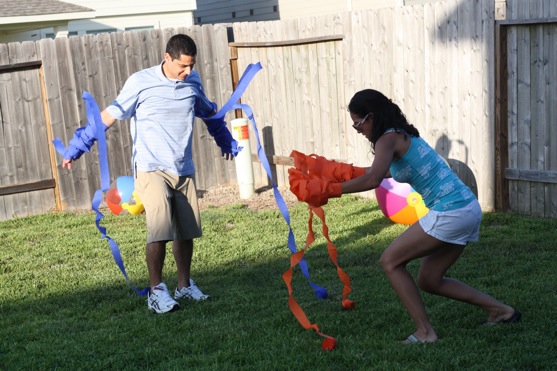
Paper Dragon: Contestant must unspool two rolls of party streamers using only their hands and arms. (I bought 32! rolls of crepe paper at Party City)


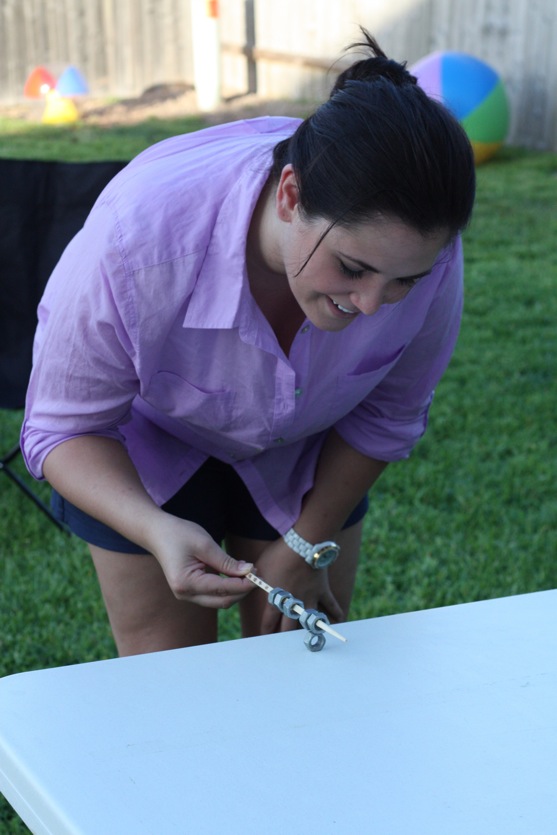
The Nutstacker: Contestant must create one stack of large metal nuts by sliding them off a chopstick without touching them with their hands. (We used 6 nuts)


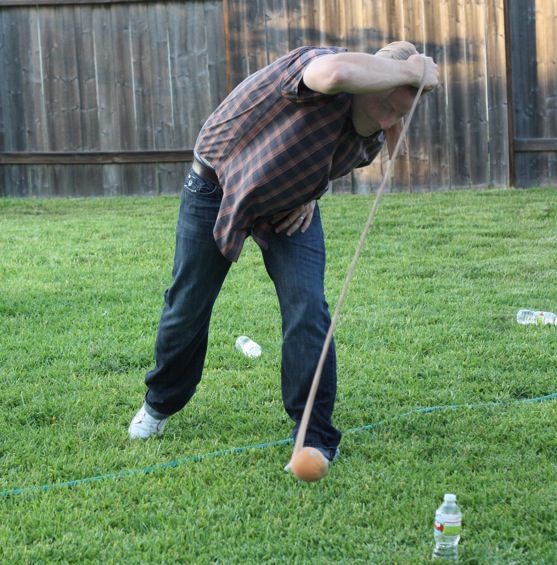
Elephant March: Eight unopened water bottles are placed in two parallel rows on the ground, precisely eight feet apart. The contestant must wear a standard pair of pantyhose over the head, with a baseball placed inside the end of one leg. Keeping one foot on each side of the centerline, the contestant must swing back and forth using the momentum of the baseball to knock down all eight bottles. (We only used 6 water bottles, and used an orange instead of a baseball)

(After this, the photo taking fell by the wayside…)

Ping Bounce: Bounce ping pong balls to land in 3 different cups full of water.  (We simplified the Tic Tac Toe game from the show)

Tipsy: Contestant must balance three 12-ounce cans on their beveled lower edges. It is impossible to balance a full can like this, therefore the contestant must first drink from the can. The contestant must balance a total of three cans to successfully complete the challenge. (I let our contestants use their drink of choice.  All the guys used beer (mistake?) and the ladies either used Fresca or diet soft drinks)

I think everyone had a really great time.  After days of worrying whether people would participate and get in to the spirit of the game, it was SO reassuring at the end of the night to hear everyone say how much FUN they had!  We’re already talking about making this a semi-annual (or more frequent?) event where we pass on the Grand Prize Belt to the next winner.   Looking forward to the next time!
Jun 29 10
by cara
at 8:16 PM

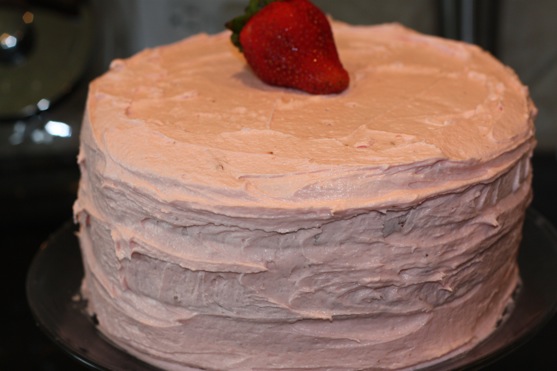
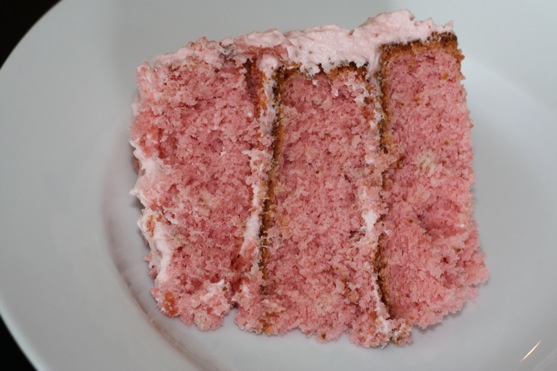
Strawberry Layer Cake

Pink Princess.  Barbie.  Pretty in Pink.  Pinkalicious.  These are all names I’ve seen describing strawberry cakes or cupcakes.  Which is fine and dandy if you’re using the cake for a five year old little girl who loves all things pink and princess-y.  But that wasn’t exactly my target audience here.  This was a birthday cake for my husband, who LOVES strawberry cake, and is not afraid to embrace the pink.  I think I’ve at long last found a from-scratch recipe for strawberry cake and strawberry buttercream that I like!

A quick note about cake baking: I don’t make layer cakes very frequently (see photos below), and this was my first time lining my cake pans with parchment paper.  Not sure why I didn’t try this sooner!  It made getting the cakes out of the pans a breeze!  No more cakes falling apart as you flip them over to release them from the pan.  Definitely try this next time you bake a cake, if you haven’t already!

Strawberry Layer Cake

recipe from Smitten Kitchen

Ingredients:

  • 4 1/2 cups cake flour
  • 3 cups sugar
  • 5 1/4 teaspoons baking powder
  • 3/4 teaspoon salt
  • 3 sticks (12 ounces) unsalted butter, at room temperature
  • 1 1/2 cups pureed frozen strawberries
  • 8 egg whites
  • 2/3 cup milk
  • 1 to 2 drops red food dye, if using

Preheat the oven to 350 degrees F. Butter three 9-inch round or 8-inch square cake pans. Line with parchment or waxed paper and butter the paper.

Put the flour, sugar, baking powder, and salt in a large mixer bowl. With the electric mixer on low speed, blend for 30 seconds. Add the butter and strawberry puree and mix to blend the ingredients. Raise the speed to medium and beat until light and fluffy, 2 to 3 minutes; the batter will resemble strawberry ice cream at this point.

In another large bowl, whisk together the egg whites, milk and red food dye, if using, to blend. Add the whites to the batter in two or three additions, scraping down the sides of the bowl well and mixing only to incorporate after each addition. Divide the batter among the three prepared pans.

Bake the cakes for 30 to 34 minutes, or until a cake tester or wooden toothpick inserted into the center comes out clean. Allow the layers to cool in the pans for 10 to 15 minutes. Invert and turn out onto wire racks and peel off the paper liners. Let stand until completely cooled before assembling the cake, at least an hour.

Strawberry Buttercream

recipe by me!

  • 8 ounces unsalted softened butter
  • 5 cups powdered sugar
  • 3/4 teaspoon kosher salt
  • 2 tablespoons plus 2 teaspoons whole milk
  • 1 teaspoon pure vanilla extract
  • 1 teaspoon fresh lemon juice
  • 2 1/2 tablespoons strawberry preserves

In a stand mixer, fitted with a paddle attachment, cream the butter & salt for about 30 seconds and then add half of the powdered sugar and the milk to the butter and beat again until combined. Scrape down the bowl.  Add the rest of the powdered sugar, the vanilla, the lemon juice, and the strawberry preserves and beat until combined.  Scrape down the bowl again.  Beat on high speed for 5-6 minutes or until the frosting is fluffy.

Jun 27 10
by cara
at 9:01 AM

Flag Wreath

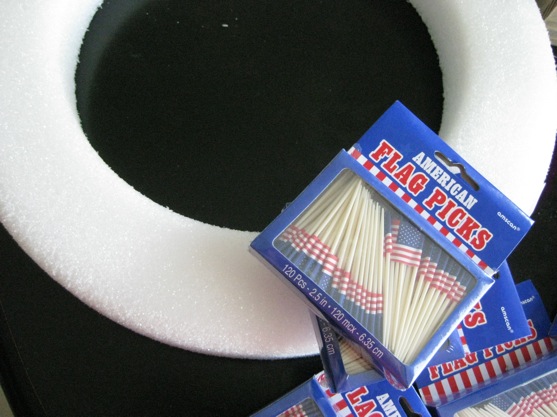
I’ll devote an entire post to last night’s party sometime soon, but I wanted to share this project since July 4th is quickly approaching.  Lately I’ve been wanting to create and make, feeling motivated and wanting to dip my toes into a few crafty projects.  I was inspired by the July issue of Good Housekeeping to make a festive wreath for the 4th of July.  This craft requires only two relatively inexpensive supplies: a foam craft wreath and tiny flag toothpicks…lots and lots of flag toothpicks:

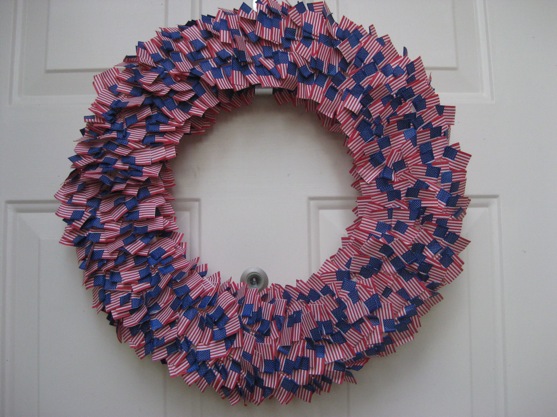
The directions are simple: Stick the flag toothpicks in the foam wreath until the wreath looks full and fluffy.  That’s all there is to it!

(In need of a better wreath hanger for the front door….)

The wreath took me about 2 hours to complete and I found the repetitive nature of the task to be a nice little stress-reliever.  I used around 600 toothpicks on mine (they came in boxes of 120), and there are some places on the sides of the wreath that could still use more.  I would advise starting with the inside of the wreath, instead of the front as I did.  I think this would be fun for older kids to do on their own (maybe on a smaller wreath), and I let The Littlest Apple poke a few toothpicks into my wreath.

Isn’t this fun and easy?  A cute and festive flag wreath to use for July 4th, Memorial Day, Flag day, and any other time you feel like breaking out some patriotic red, white, and blue!

I’m sharing this post with….

Jun 25 10
by cara
at 7:04 AM

Party Preparation

I’ve been busy this week getting ready for an adults-only party we’re hosting tomorrow night.  Menu planning, purchasing supplies for super-top-secret party games, testing recipes for Watermelon Margaritas (flop) and Margarita Popsicles (hopeful), and doing important things like making a crafty new wreath for my front door and thinking about how much more awesome the party would be if I could redecorate my mantle.  This is EXACTLY why I don’t host big parties very often.  I get a little crazy, and feel the need to be Martha Stewart sans a staff of hundreds to do my bidding.  Also, energetic almost-3-year-olds aren’t really interested in party planning, as it turns out.  They are much more interested in splashing in rain puddles, hunting for slugs, and pretending to be Buzz Lightyear.  So we’ve been doing a lot of that, too.  It’s crunch time now for my party prep, so I’ll be back with a new post on Sunday!

Jun 22 10
by admin
at 11:15 AM

My Little Planner in the Making

Here’s a conversation I had with The Littlest Apple at the grocery store this morning….

TLA: Where am I going after HEB?

Me: Home to unload groceries and eat lunch.

TLA: Where am I going after lunch?

Me: To take a nap.

TLA: Where am I going after naps?

Me: To the library to return our library books.

TLA: Where am I going after the library?

Me: We’re going play in our backyard pool.

TLA: Where am I going after the pool?

Me: (seeing where this is headed….) We’re going to cook dinner, then eat dinner, take a bath, and go to bed.

TLA: Where am I going after night?

Me: I haven’t planned that far yet.

TLA: Why?

Jun 21 10
by cara
at 12:53 PM

GI Update: Clogged Tube and Tape Removal

First of all, I want you all to go check out this post on gastroparesis at LittleStomaks today that mentions us.  I was SO excited to read this!  This post is the result of a comment I left on a post last week about when to worry about your underweight child.  It totally made my day to help spread some information about gastroparesis!  LittleStomaks is a fantastic blog about toddler nutrition, and I hope you’ll check it out!

Now, on to the update…

When we’re actually using The Littlest Apple’s NG tube with a formula that doesn’t make him hyperactive, we feel encouraged and hopeful that he’s gaining weight and getting the calories he needs.  But it seems that more often than not, we’re facing obstacle after obstacle.  Does it seem that way to you, too, my readers?

We waited on the shipment of new formula (the one containing pureed chicken, peas, green beans, peaches and cranberries) for 5 days. During those 5 days, we opted NOT to use the old formula since it was making him so crazy.  So finally, FINALLY the new formula came last Thursday!  That evening, we set everything up, primed the pump, then checked the NG tube only to find it CLOGGED!  The NG tube should be flushed out with water after each night feed, but during those 5 days of nothing, we didn’t flush it because we didn’t put any formula in it.  Lesson learned.  Flush your NG tube at least once a day, whether you’re using it or not.

When an NG tube gets clogged, you have to remove it and place a new one which is traumatic for everyone involved (to say the least).  But just to add another obstacle, we didn’t really have the supplies we needed on hand.  (Another lesson learned-always have a spare tube!).  We removed the tube and tape on Saturday morning.

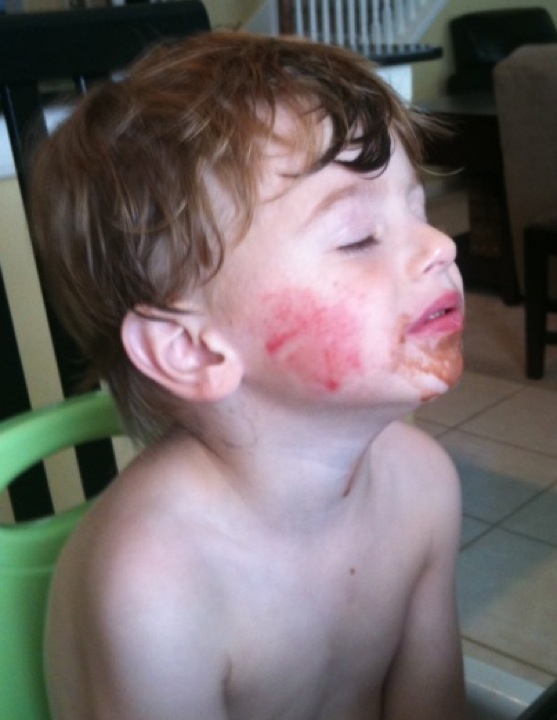
Here’s what his cheek looked like under the tape:

It was even bleeding a little. (Oh, and he’s got fudgsicle on his face too, in case you were wondering.)  Poor kid.  Looks like he was allergic to the most recent tape we used.  The tape (Duoderm) was supposed to be gentler on the skin than the harsher Tegederm (which we use on top of that).  I guess I should have been prepared for that since I had a blistery reaction to the tape used after my emergency c-section when The Littlest Apple was born and after my ruptured ectopic pregnancy surgery in December.  The Littlest Apple certainly seems to have inherited all of my skin sensitivities.

So now we’re keeping the NG tube out and tape off his face until his cheeks heal.  This is really slowing his weight gain down, but I’m thoroughly enjoying kissing his sweet little (slightly chubbier?) cheeks in the meantime.  And dreading the NG tube re-placement.  The Picky Apple and I have decided we’re going to try it on our own next time.

Jun 20 10
by cara
at 6:55 PM

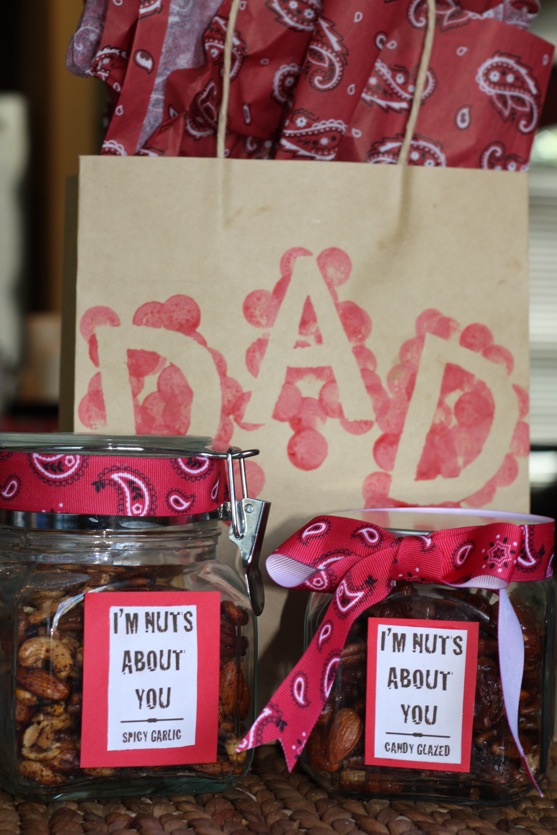
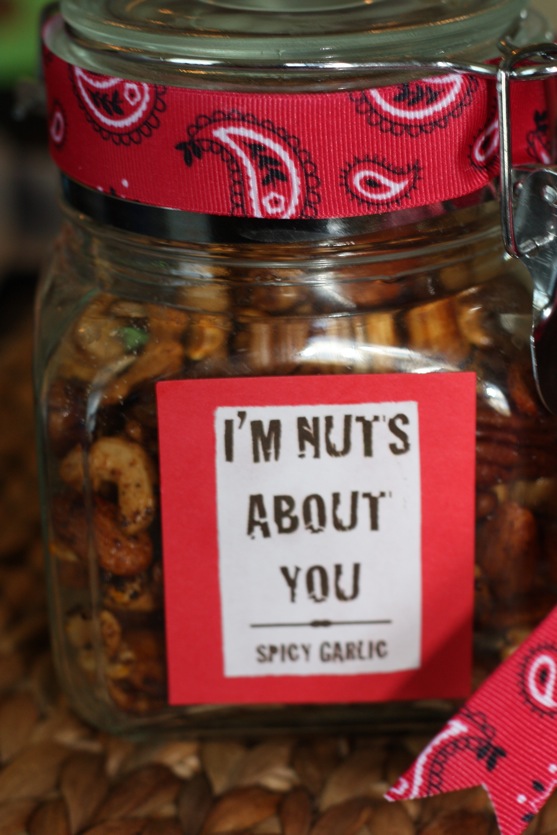
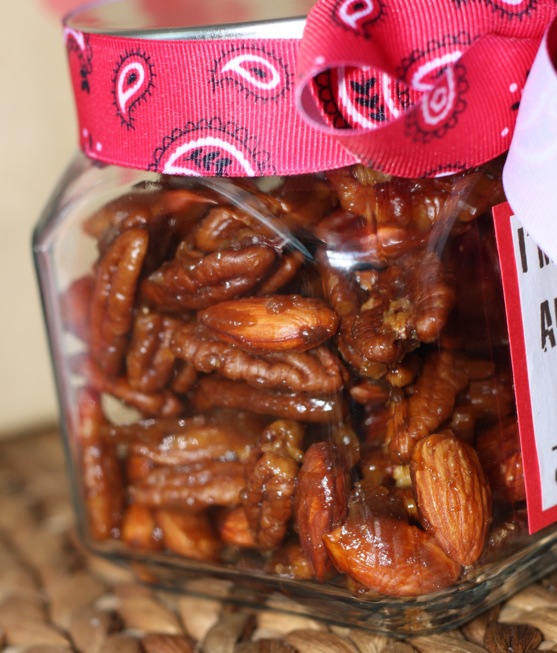
I’m Nuts For You: Spicy Garlic Nuts and Candy Glazed Nuts

Happy Father’s Day!  Since I went the homemade route with bath scrubs for Mother’s Day, I wanted to do something homemade for my dad and father-in-law as well.  I always think the dads are hard to shop for, and obviously, I needed something a little more manly than bath scrubs.  Homemade for dads is tricky!  I had seen a cute idea somewhere about using some store bought nuts, but making a new “I’m Nuts for You” label, perhaps as a teacher gift or something similar.  I decided to run with that idea, but make my own seasonings for mixed nuts and package them in mason jars with cute little labels.  Every time I visit my parents’ house, my dad has flavored almonds or mixed nuts in some strange new flavor (wasabi, salt & pepper, salt & vinegar, etc), so I figured this would go over well with him for sure.  I selected two different flavors: Spicy Garlic and Candy Glazed.  I thought both flavors were delicious (couldn’t stop eating them!), and the dads loved them, too!  The jars, gift bags, bandana ribbon, and bandana paper were all purchased at Hobby Lobby.  The Picky Apple helped with the labels, and The Littlest Apple helped decorate the gift bags (dot markers over contact paper letters).  These nuts are so easy to make.  Perfect for Father’s Day, teacher appreciation, holiday giving, or just to have on hand for your next party!

Spicy Garlic Nuts

adapted from King Arthur Flour

Ingredients:

  • 4 cups unsalted nuts (I used equal parts peanuts, almonds, cashews, and pecans)
  • 2 tablespoons garlic oil (I found roasted garlic oil near the olive oil on the baking aisle)
  • 2 tablespoon Worcestershire sauce
  • 1/2 teaspoon garlic salt
  • 1/2 teaspoon paprika
  • 1/2 teaspoon ground black pepper
  • 1/2 teaspoon chili powder

Pre-heat oven to 250°F. Line a half sheet pan with parchment paper for easy cleanup. Place all nuts in a large bowl and toss well to combine.

Pour the garlic oil and Worcestershire sauce over the nuts and toss to coat. Mix the dry spices in a separate small bowl and sprinkle evenly over the oiled nuts. Again toss well to coat. Use a silcone spatula to scrape the bottom of the bowl so that there are no pockets of oil.

Spread the coated nuts on the parchment lined pan. Bake the nuts for 10 minutes. Remove from the oven and stir well with a silicone spatula or wooden spoon. Bake for an additional 10 minutes or until the nuts are mostly dry to the touch. They will continue to dry as they cool, so be careful to not overbake.  (Picky Apple Note: I baked mine 10 minutes longer than the recipe calls for because they still seemed a bit wet.  Next time I might reduce the oil to 1 1/2 teaspoons, bake them an another 5 minutes, or both)

Remove nuts from oven and let cool on baking sheet. Sprinkle with additional salt if desired and serve. Store any leftovers airtight at room temperature.

Candy Glazed Nuts

from Gooseberry Patch Christmas All Through The House

Ingredients:

  • 16 oz. nuts (the original recipe calls for pecans only, but I used a mix of pecans and almonds…not everyone loves pecans as much as I do!)
  • 1/2 cup butter
  • 3/4 cup brown sugar, packed
  • 2 teaspoons vanilla extract
  • 1/4 teaspoon salt

Arrange nuts in an aluminum foil-lined 13×9″ baking pan; set aside.  Melt butter in a saucepan over medium heat; add brown sugar, vanilla, salt.  Stir one minute; remove from heat.  Continue stirring until sugar dissolves; pour over nuts, stirring to coat.  Bake at 325 degrees F for 25 to 35 minutes; stir every 10 to 15 minutes.  Remove from oven; spread on wax paper to cool.  Store in an airtight container.

PS. If you’re wondering what I got for The Picky Apple for Father’s Day, we simply exchanged cards/thoughtful notes this year.  He got a homemade card from The Littlest Apple (made by me) with a list of 25 Things I Love About Dad.  Many of them are inside jokes that would take an entire blog post to explain.

What did you give the dads in your life this Father’s Day?

Blog Widget by LinkWithin