Jun 3 10
by cara
at 8:46 PM

Good Reads: Roots, Shoots, Buckets and Boots, by Sharon Lovejoy

As I’ve become more and more interested in gardening, I’ve been looking for ways to share my interest with The Littlest Apple.  He loves digging in the dirt, admiring flowers and leaves, watching our vegetables grow, and helping with yard work.  I let him help with our Spring Garden this year (progress post coming up soon), and I created a Gardening Sensory Bin for him.

I read about this book on The Artful Parent.  Roots, Shoots, Buckets and Boots: Gardening Together With Children by Sharon Lovejoy is such an amazing resource!  Not only is this book filled with gorgeous drawings, but there is also a plethora of information about activities, projects and crafts to do with kid-friendly plants you can grow.  There are plans for 9 different theme gardens, including a Pizza Patch, a Sunflower House, Flowery Maze, and a Moon Garden to visit at night.  There is a wonderful chapter at the beginning of the book about the top twenty plants for kids.

There are so many great ideas from this book that I can’t wait to try!  My wishlist of plants to try (already a longish list) now includes: hollyhocks, woolly lamb’s ear, four o’ clocks, evening primrose, and moon plant.  I’m also going to plant the same mammoth sunflowers I had so much success with last year.  This book contains several sunflower projects that I think The Littlest Apple would enjoy.  I’m already growing some beans, but I’d like to make a teepee covered with beans or some other quickly spreading vine.  Wouldn’t that be so much fun for little ones to play in?

If you’re even the slightest bit interested in gardening and looking for inspiration (whether you have kids or not!) you should definitely check out this book!  I’m looking forward to reading some of Sharon Lovejoy’s other books.

Disclosure: I have not been asked to review this book.  This was just a Good Read I wanted to share! Some of the links above are Amazon affiliate links.

Jun 2 10
by cara
at 1:17 PM

Scratch and Sniff Paint

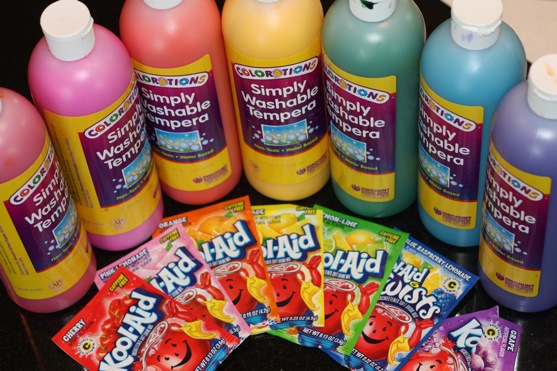
I had SO much fun with this activity for our art playgroup!  Inspired by this blog post at paint cut paste, I set out to create scratch and sniff paint using Kool-Aid.  The original instructions called for simply mixing the Kool-Aid with small amounts of water, but I also read that several colors (yellow and purple in particular) aren’t very bright that way.  I really just wanted the scent from the Kool-Aid.  So instead of water, I mixed my Kool-Aid with tempera paint (okay, and a teeny bit of water too)!  I think you could also mix Kool-Aid with liquid watercolors, since that’s the kind of paint you’re going for anyway.  When shopping for the Kool-Aid, I got a little carried away and excited about all of the possibilities (as tends to happen with me and crafty stuff), so I bought the whole rainbow!

In case you’re wondering here’s the breakdown of colors and scents I mixed:

  • Red: Cherry
  • Pink: Pink Lemonade
  • Orange: Orange (duh)
  • Yellow: Lemonade
  • Green: Lime
  • Blue: Blue Raspberry
  • Purple: Grape

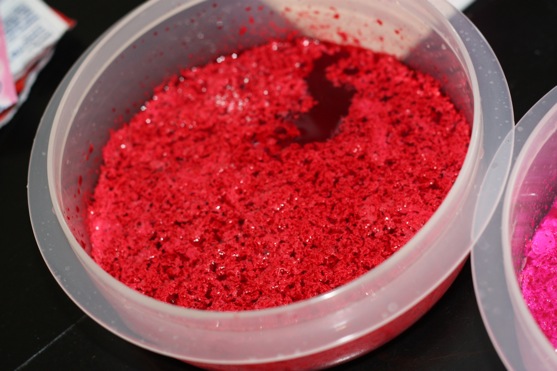
Mixing Kool-Aid with tempera paint did have an interesting effect.  It created a foamy layer on top that was kind of yucky:

But I simply skimmed that layer off shortly before we started painting, and the vivid colors of the tempera paint and strong scent of the Kool-Aid remained in a water-color-like paint!

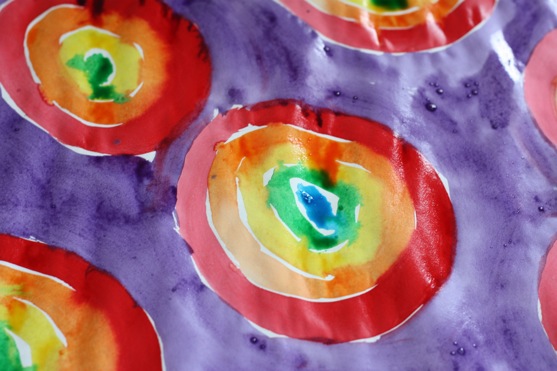
This was such a neat sensory experience for the kids.  They tried to guess the different scents as they painted.  The brightest colors (and boldest scents) were the red, orange, and purple, so make sure to include those if you’re going to try this at home.  Some of the little artists wanted to use every color, some focused on one or two colors.  They all seemed to enjoy painting with the scratch and sniff paint and stuck with this project for longer than any of our other projects.  Here are some of The Littlest Apple’s masterpieces (he’s big on paint-mixing…I wish I had taken photos of some of our other artists’ masterpieces, too):

And I had fun painting too, after our artist-friends went home.  How could you NOT want to play around with these bright and sweet-smelling colors?!

It’s also fun to go back after the paint has dried to smell your picture (no scratching necessary with some of the colors, like purple!).  You could also have your kids use the paints on pictures of fruit (ie, paint the grapes with the grape-scented purple paint).

May 31 10
by cara
at 12:21 PM

5 Minute Hummus

Hummus is one of our favorite savory snacks.  Even The Littlest Apple will eat it on occasion.  (Amazing, right?!)  Hummus is great with pita chips, homemade pita bread, or veggies like cucumbers, red peppers, and carrots.

Up until now, I’ve been relying on store bought hummus.  I’ve tried several different recipes, but this is the first one that I’ve had any luck with.  In addition to the perfect recipe, I think that using a food processor or a really good blender is key to getting the hummus nice and creamy.  I have a cheap-o blender, but the food processor I got for Christmas works great for this!

Hummus

5 Minute Hummus

adapted from a recipe in Real Simple, May 2010

Ingredients:

  • 1 15-ounce can chickpeas, rinsed
  • 2 teaspoons minced garlic
  • 1/4 cup olive oil, plus more for serving
  • 2 tablespoons fresh lemon juice
  • 2 tablespoons tahini
  • 1 teaspoon ground cumin
  • 3/4 teaspoon Kosher salt
  • 1/4 teaspoon paprika

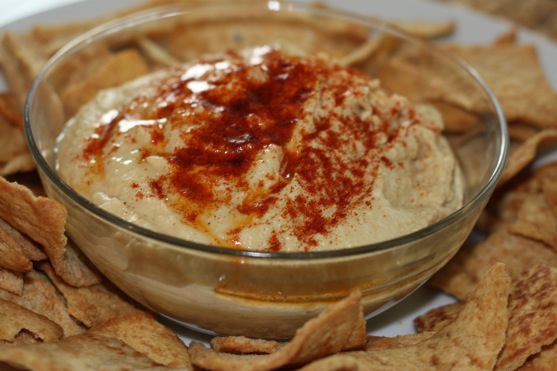
In a food processor, puree the chickpeas and garlic with the olive oil, lemon juice, tahini, cumin, and 3/4 teaspoon salt until smooth and creamy.  Add 1 to 2 tablespoons water as necessary to achieve the desired consistency.  Transfer to a bowl.  Drizzle with olive oil and sprinkle with the paprika before serving.

May 30 10
by cara
at 6:52 AM

Crayon Monograms

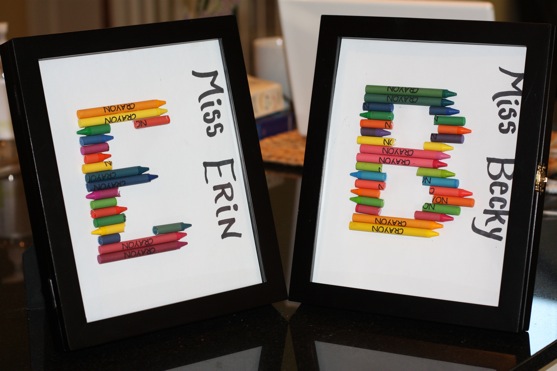
I know this post is a little late since most kids are already done with school, but perhaps this will be useful to some of you for next year’s teacher gifts!  I thought these Crayon Monograms from Testosterone Times Three would make a perfect end of the year gift for The Littlest Apple’s Mother’s Day Out teachers.  A simple, handmade thank you to his teachers for all of their hard work.  (Homemade Bath Scrubs would also be a great gift for teachers.)

The teachers also received gift cards from the entire class.  (I’ll share some notes on that particular debacle  when I do my “Notes to New Room Moms” post).  I honestly don’t know how these teachers do it with a class of 10 2 and 3 year olds, all in various stages of potty training.  I think they spend most of their day changing diapers, taking kids to the potty, and washing hands!  The Littlest Apple will be moving on to a different school, closer to home, but we’ll always remember his very first teachers!

Crayon Monograms

For this project, I used a serrated knife to cut the crayons to size, then used Tacky Glue to attach the crayons to a piece of cardstock.  The cardstock will need to be custom-cut to fit your shadow box frame (Mine was an 8 x 10 frame, but the cardstock needed to be cut slightly smaller than that.)  I used a cheap box of crayons, but I think next time I’ll use Crayola brand, since the crayons are the main focus!  I’d also be tempted to print out the teacher names next time along the side, instead of writing it by hand.  It takes a little finesse to get the letters looking good, but all in all, this is a fun and inexpensive project.

May 27 10
by cara
at 8:55 PM

Developing an Attitude of Gratitude

I’m a pessimist.  A worrier.  A whiner.  I tend to see the glass as half empty.  And lately, it seems like a big black cloud has been hovering over my head.   Sometimes I feel like life’s just not FAIR. (That’s me pouting and stomping my foot like a 2 year old, having a little pity party, in case you couldn’t tell).

But things could be much worse, and I need to work on my attitude.  “Life is 10% what happens to you and 90% how you respond to it.”  Attitude is (almost) everything, apparently.  And my attitude needs some serious improving.  It’s so easy to get caught up in every little daily irritation, every loss, every complication, every event that doesn’t turn out as expected or planned.  I don’t want to dwell on the negative anymore.  I don’t want to become  that person (or have I already?) that always has a list of complaints to share with you whenever you ask how they are doing.

photo taken by my MIL in her backyard

photo taken by my MIL in her backyard

When you get caught up in all that is wrong, you fail to see all of the things that are right and good about life.  I’m making an effort now to have an attitude of gratitude.  But how exactly do you develop an attitude of gratitude? (This is just a little guide and some reminders for myself as much as everyone else.)

Count your blessings. I don’t necessarily mean counting them literally, although I suppose keeping a numbered running list of things to be grateful for could be helpful.  I mean that you need to somehow document all of your blessings.  I choose to do this via a Gratitude Journal where I record 3-5 things to be thankful for each day.  For a peek at mine, check out this Gratitude Journal post.  You could also draw them or create a collage.  On the good days, this will be an amazingly easy task.  On the bad days, coming up with 3-5 things to be grateful for might be a little trickier.  Perhaps your list will include things like: “I didn’t yell today.  I got dinner on the table for my family.  So thankful to have a car to run errands!”  Sometimes we take some of the basics (food, shelter, clothing) for granted.  If you’re looking for inspiration for your gratitude journal, check out 14,000 Things to be Happy About, by Barbara Ann Kipfer.  I’ve had this book for about 15 years (now there’s even an updated version with 14,000 new things), and I can always find something here to be thankful for!

Give thanks. When was the last time you let your family and friends know just how much they mean to you?  It is so easy to take them for granted.  I’m definitely guilty of this.  Maybe it’s time to send them a note, an email, or give them a phone call.  Or let them know in person.  Isn’t it odd how we are more likely to say thank you to a stranger at the grocery store than we are to our own family members?  It’s time to make sure those closest to you know just how much you appreciate all that they do.

Help others. It’s been a couple of years since I’ve volunteered my time (unless you count being a room mom), but I used to volunteer several times a month at both Dress for Success and the Houston SPCA.  Those afternoons of helping women pick out a suit that would make them feel confident for that much-needed job interview and  those mornings spent caring for and loving on those dogs and cats waiting for their forever homes were some of the most fulfilling moments before I became a mother.  I know I don’t have that kind of time to commit in this season of my life, but I need to do something to help others.  I’ve really enjoyed sharing my passion for art with the kids and mommies in our Art Playgroup, perhaps I could run with that somehow.  I’ve also been thinking about volunteering as a patient advocate after our less-than-pleasant experience.  Think about what you can do to help others and take the first step to make it happen.

Keep things in perspective. It’s so easy to forget the big picture and to get wrapped up in the little irritations of day-to-day living.  Cranky because you had to wait for an hour at the dentist’s office?  Be thankful that we have such wonderful dental and health care available, the advances in medical technology, and that you have health insurance.  Frustrated because the summer camp you really wanted to send your child to is already full?  Be thankful for your wonderful neighborhood parks and pools, local libraries and other free and inexpensive forms of entertainment nearby.  I read somewhere that if your family income is $10,000 a year, you are wealthier than 84% of the world.  If your family income is $50,000 or more a year, you make more than 99% of the world. Wow!  That makes me feel so fortunate for the opportunities available to me and mine.  Time to stop complaining about what I don’t have.

photo taken by my MIL on a recent trip to Galveston

photo taken by my MIL on a recent trip to Galveston

Be aware when you compare. I’m tempted to say “Don’t make comparisons at all“, but I think remembering the statistic above and realizing how much better off you have it than many people (a roof over your head?  clean water?) can be helpful in developing your attitude of gratitude.  It can also be useful to seek inspiration in the lives of others, particularly those who have similar values to your own.  But there will always be someone who has a bigger house, more money, a nicer car, a better body, or a “perfect” marriage that you long for.  Those types of comparisons can lead to stress, envy, and feelings of inferiority and insecurity (For more on insecurity, check out Beth Moore’s new book, So Long Insecurity).

Create a Pessimism Prevention Plan to refer to in case of “emotional emergency.” When something goes wrong, whether it is big or little, you need to have an emotional plan of action in place.  This is your Pessimism Prevention Plan.  For the bigger things, like the loss of a loved one or divorce, it’s natural to be upset.  It’s okay to grieve.  But when little things go wrong (even if those little things don’t seem little), this is when those of us who are natural pessimists or worriers need to have a strategy in place to prevent a downward spiral of negative thinking.  A Pessimism Prevention Plan, if you will.  This might include referring back to previous entries in your gratitude journal (or maybe carrying around some of your favorite blessings in your wallet),  re-reading this blog post, signing up for some additional hours at the animal shelter, or a phone call or coffee with a particularly optimistic  and uplifting family member or friend.

Live in the present. It’s hard to enjoy all of the blessings of today if you’re reliving the past or worrying about the future.  Try to focus on right now.

Do you have any additional tips for developing an attitude of gratitude?  How do you stay positive?

Today’s gratitude journal…I’m thankful for:

  • pleasant summer evenings in the backyard
  • lavender cut fresh from the garden
  • good friends who live right down the street
  • a brand new box of 64 crayons
  • the funny questions of a 2 year old
sunset at Gulf Shores
sunset at Gulf Shores
May 24 10
by cara
at 9:41 PM

Good Reads: Food Rules: An Eater’s Manual, by Michael Pollan

Food Rules

There are quite a few good books about Real/Whole/Traditional Foods out there:

I’ve read all of those (okay, I’m still working my way through Nourishing Traditions), and as enjoyable and informative as all those were, Food Rules appealed to me because of its brevity.

If you’re interested in the Real Foods movement, but are feeling overwhelmed and don’t know where to begin, or if you’d just like a quick overview, then Food Rules is the perfect starting place for you.

The book consists of a short introduction and 64 Food Rules, each less than a page long.  These 64 rules are divided into 3 sections, which easily sum up the main philosophy of the book: (1) Eat Food, (2) Mostly Plants, (3) Not too much.  All of the rules, many of them repetitive in nature, expound on those 3 main rules.

Some of my favorite rules from the book:

#2: Don’t eat anything your great-grandmother wouldn’t recognize as food.

#6: Avoid food products that contain more than five ingredients.

#7: Avoid food products containing ingredients that a third-grader cannot pronounce.

#25: Eat your colors

#27: Eat animals that have themselves eaten well.

#47: Eat when you are hungry, not when you are bored.

#56: Limit your snacks to unprocessed plant foods.

#60: Treat treats as treats.

These concise rules make eating sound so simple.  When did it all get so complicated?  Getting back to eating simply should be, well, simple, don’t you think?  Easier said than done, but this book will certainly give you some guidelines on how to get started and stay on track.

Disclosure: I have not been asked to review this book.  This was just a Good Read I wanted to share! Some of the links above are Amazon affiliate links.

May 22 10
by cara
at 2:11 PM

Baked Chicken Bacon Alfredo

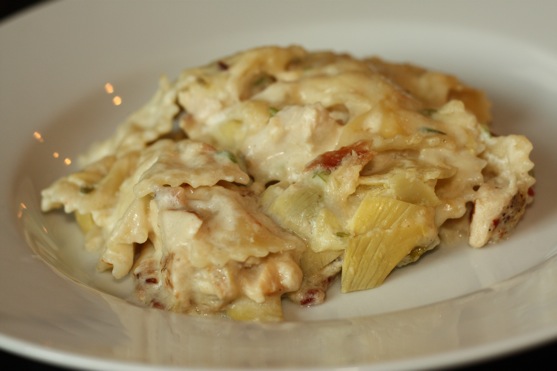
I thought this dish would be a perfect fit for my chicken alfredo and bacon loving Picky Apple, and I was drawn to it because of the homemade alfredo recipe and artichokes.  It’s freezer friendly, so make a big batch and freeze some for later!  I’ll admit that this recipe is deceptively simple.  I made it more complicated than it needed to be since I didn’t have my chicken cooked ahead of time.  I pan sauteed some chicken with olive oil, lemon juice, garlic and oregano to use in this recipe.  The homemade alfredo sauce does add some extra steps, but it is SO worth it.  This sauce is delicious even by itself.  Add to that some chicken, bacon, and artichokes, and you’ve got one yummy pasta dish!

Baked Chicken Bacon Alfredo

Baked Chicken Bacon Alfredo

from Our Best Bites

Ingredients:

  • 8 oz. penne or bowtie pasta
  • 1 recipe Guiltless Alfredo Sauce (see recipe below, or use 1 16-oz. jar)
  • 2 chicken breasts, grilled and chopped (about 2 c. chopped chicken)
  • 6 oz. (1/2 package) cooked bacon, chopped
  • 1 14-oz. jar marinated artichoke hearts, drained and chopped
  • 1/2 c. chopped green onions (about 1 decent-sized bunch)
  • 1 c. shredded mozzarella cheese, divided
  • Salt and pepper, to taste
Preheat oven to 350.  Prepare pasta according to package directions.  While pasta is cooking, prepare Guiltless Alfredo Sauce. When pasta is done, drain and add to the sauce. Toss with chopped chicken, bacon, artichoke hearts, green onions, and 1/2 c. mozzarella. Season to taste.  Transfer mixture to an 8×8″ baking dish and sprinkle with remaining 1/2 c. mozzarella cheese. Cover with aluminum foil and bake at 350 for 20 minutes or until heated through and cheese is bubbly.

Guiltless Alfredo Sauce

from Our Best Bites

Ingredients:

  • 2 C low-fat milk (not skim)
  • 1/3 C (3 oz) 1/3-less-fat cream cheese
  • 2 T flour
  • 1 t salt
  • 1 T butter
  • 3 garlic cloves
  • 1 C grated Parmesan cheese

Toss the milk, cream cheese, flour, and salt in a blender.  Process until smooth and set aside.

In a non-stick sauce pan, melt butter on med-high heat and add garlic.  Let the garlic saute for about 30 seconds, you don’t want to burn it. It should be nice and bubbly. Then add milk mixture to the pan. Stir constantly for about 3 or 4 minutes or until it just comes to a simmer. Keep stirring and let it cook for a few minutes more. It should be much thicker now.

When it’s nice and thick (it should look as thick as a normal alfredo sauce) remove the pan from the heat. Add the cheese, stir it up and then cover immediately. Let stand for at least 10 minutes before using. It will continue to thicken upon standing. Also, if you have leftovers in the fridge, the sauce will thicken almost into a solid. Just re-heat and add a little milk and it will be back to normal again.

May 20 10
by cara
at 12:16 PM

UNCLE!!

That’s me shouting “UNCLE!” and shaking my fists at the sky.  In the last 24 hours The Littlest Apple has:

  • vomited
  • had NG tube removed (it was coming out of his mouth as a result of the aforementioned vomiting, so we had to pull it)
  • diarrhea (and associated accidents)
  • 3 or 4 chipped front teeth (the top two look particularly bad)

And we’re on vacation at the beach, heading home tomorrow.  A shorter than expected trip to the beach after our flight on Saturday morning was CANCELLED with little (no?) notice (we had already cleared security by the time we learned of the cancellation).  The next available flight wasn’t until Monday, shaving a good 2 days off of our week at the beach.  I stewed about that for a good while (and I’m still a little bitter that we weren’t compensated in any way), but now we’re here!  At the beach, on our “relaxing” vacation.  But apparently I needed a little reminder that nothing about life with The Littlest Apple is relaxing.  In case I had forgotten.  Which I hadn’t.

UNCLE!!

I think we’re going to need a vacation from this vacation.

May 16 10
by cara
at 8:12 PM

Mango Salsa

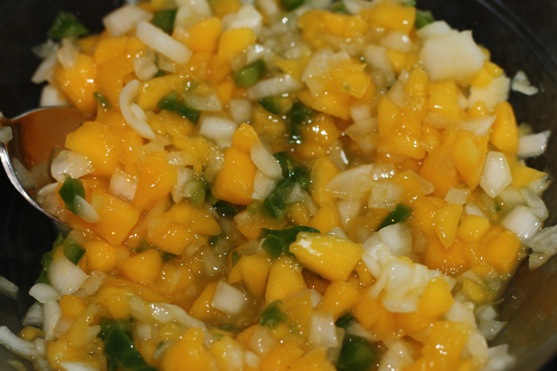
I mentioned the other day that I don’t really like eggs, but I like quiche.   Similarly, I don’t really care for mangoes, but I sure do love mango salsa.  I got this recipe (if you can even call it that) from my mom.  I love the sweetness of the mangoes, combined with the spicy kick of the jalapenos and the tartness of the lime juice.  Cilantro would probably taste pretty great in this too!

Mango Salsa

Mango Salsa

Ingredients:

  • 1 mango, diced
  • 1/2 to 1 small white onion, diced (the batch pictured above contained 1 onion, and it was a little too much, for me at least)
  • 1 jalapeno, seeds and ribs removed, chopped fine
  • lime juice, to taste
  • kosher salt, to taste

Combine all ingredients, and refrigerate for at least 30 minutes prior to serving.

May 14 10
by cara
at 2:55 PM

Gardening Sensory Bin

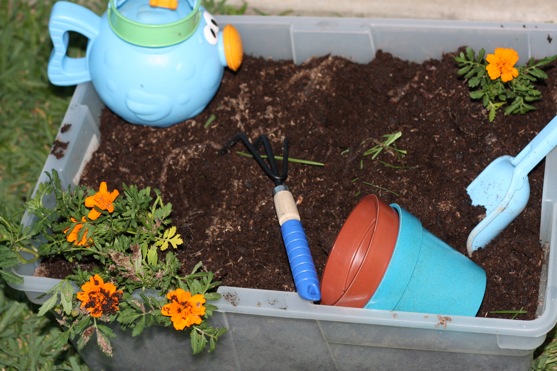
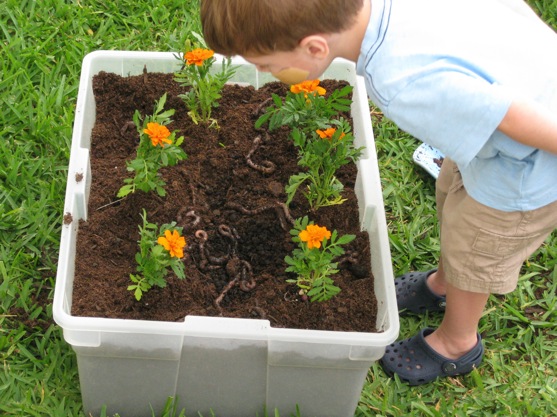
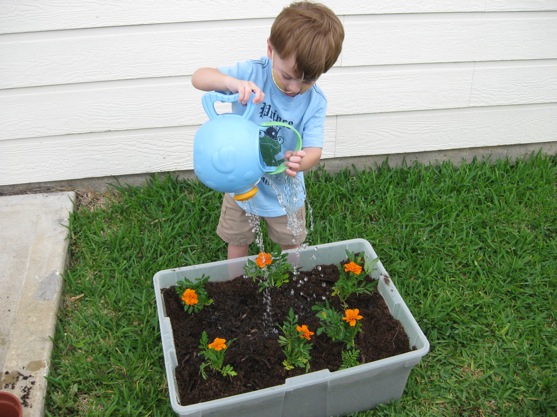
This sensory tub may be my favorite one yet, and it is perfect for spring and summertime.  The Littlest Apple loves to dig in the dirt and “help” in the garden and with the yardwork.  So I put together a sensory tub based on those interests.  The sensory tub is filled with organic soil (you have to watch out for the fertilizers in all of the potting soil since little hands are going to be in it!), a couple of pots, a small rake, shovel, a 6 pack of marigolds (hardy and inexpensive), a watering can, and best of all, WORMS!!  A big thanks to Grandma and Grandpa for picking up some of the supplies for this bin, including the worms.  They purchased our worms at Walmart (located near the fishing supplies), but they are also available at some garden centers.

Prepare yourselves for hours of fun watching the worms, examining the flowers, planting the flowers in the bin or the pot, digging in the dirt, raking, watering the flowers and worms, and using a magnifying glass (not pictured) to examine the flowers and dirt.

Worms Sensory Tub 1

Worms Sensory Tub 2

Worms Sensory Bin 3

Blog Widget by LinkWithin