Dec 20 10
by cara
at 2:26 PM

Mexican Chocolate Thumbprint Cookies

The annual holiday baking has begun!!  I’ve got a laughably ambitious baking list this year…

For my Cookie Boxes (given to family and friends), I’m planning:

  • Mexican Chocolate Thumbprint Cookies
  • Cranberry Bliss Bars
  • Peppermint Bark
  • Snowballs
  • Peppermint Double Chocolate Cookies
  • Momofuku Compost Cookies
  • Spiced Snowcaps

I probably won’t get them all done, but if I get at least 5 different things in the Cookie Boxes this year, I’ll be happy.  The Snowballs (also called Mexican Wedding Cookies) are the only ones I’ve made before, but this time I’m using a slightly different recipe.

I’m also baking Fresh Gingerbread Cake with Whipped Caramel Frosting for Christmas Eve.  If I’ve got time, I’d really like to make Chocolate Bread Pudding Cake with Eggnog Sauce, too.

And let’s not forget the Cinnamon Rolls that have become a Christmas Day tradition!

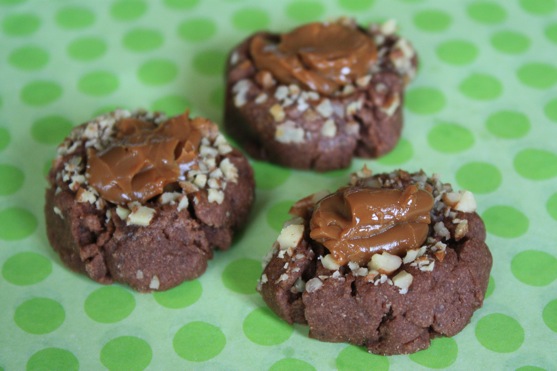
So, I’ll be spending LOTS of time in the kitchen this week.  Before I dive back in to all the baking, here’s today’s recipe.  I’ve only just begun, and I’m already in love with my first recipe! (A sure sign I know how to pick them, right?)  This is a Bobby Flay recipe, and he’s one of my favorite chefs.  These cookies are similar to the Chocolate Turtle Cookies from a few years ago.  BUT, I like these even better because they’ve got cinnamon AND chocolate, and the filling is dulce de leche.  YUM!  And they just LOOK good, don’t they?

Mexican Chocolate Thumbprints

from Good Housekeeping, December 2010

Ingredients:

  • 2 cup(s) all-purpose flour
  • 1 teaspoon(s) ground cinnamon
  • 1/2 teaspoon(s) salt
  • 6 tablespoon(s) Dutch-processed cocoa powder
  • 1 teaspoon(s) espresso powder
  • 2 tablespoon(s) vegetable oil
  • 1 teaspoon(s) vegetable oil, combined with above
  • 1 cup(s) (2 sticks) unsalted butter, softened
  • 3/4 cup(s) granulated sugar
  • 1/4 cup(s) packed light brown sugar
  • 2 large egg yolks
  • 2 teaspoon(s) vanilla extract
  • 2 large egg whites, lightly beaten
  • 1/2 cup(s) ground pecans
  • 1 cup(s) dulce de leche

In large bowl, with wire whisk, stir flour, cinnamon, and salt until blended. In small bowl, with rubber spatula, combine cocoa powder, espresso powder, and oil until mixture becomes smooth paste.

In another large bowl, with mixer on medium-high speed, beat butter and sugars until light and fluffy. Beat in egg yolks, one at a time, on medium speed until combined. Beat in vanilla, then cocoa mixture, until combined. Add flour mixture and beat on low speed just until dough comes together. Cover bowl with plastic wrap and refrigerate at least 20 minutes or up to 8 hours.

Preheat oven to 350 degrees F. Line 3 cookie sheets with parchment paper.

Roll 2 teaspoons dough into a ball. Dip top of ball into egg whites, then pecans. Place on prepared cookie sheet. Repeat with remaining dough, spacing balls 1 1/2 inches apart. With thumb or back of wooden spoon, make a deep indentation into center of each ball.

Bake, 1 sheet of cookies at a time, 9 minutes or until edges are set but centers are still soft. If necessary, make indentations again. Cool on pan on wire rack 2 minutes. With metal spatula, carefully transfer cookies to rack and cool completely. Store in airtight container at room temperature up to 3 days.

To serve, fill center of each cookie with about 1/2 teaspoon dulce de leche.

Dec 19 10
by cara
at 10:54 PM

Apple Picks

One week until Christmas and I still have shopping, wrapping, and baking to do.  I started my annual holiday cookie baking tonight, so stay tuned for some sweet treats.  In the meantime, I wanted to get in one last Apple Picks before Christmas.  Great gift, decoration and baking ideas abound!  If you’re still looking for some last minute ideas, check out these links:

Christmas 2010 Tour of Homes @ Nesting Place  (773 participants this year!!)

Top 10: Holiday Appetizer Recipes @ Tip Junkie

Gingersnap Cucpcakes with Vanilla Bean Cinnamon Buttercream @ Picky Palate

Homemade Peppermint Bath Salts and Oatmeal Cookie Bath Soak @ The Motherload

Christmas Playdough Gift Sets @ Chasing Cheerios

Cinnamon Honey Butter-Gifts in a Jar @ Tidy Mom

The Gift of Peppermint Hot Chocolate @ It’s The Little Things That Make a House a Home

Pasta Angel Ornaments @ Craftily Ever After

Dec 18 10
by cara
at 8:37 AM

Count Your Blessings Chalkboards

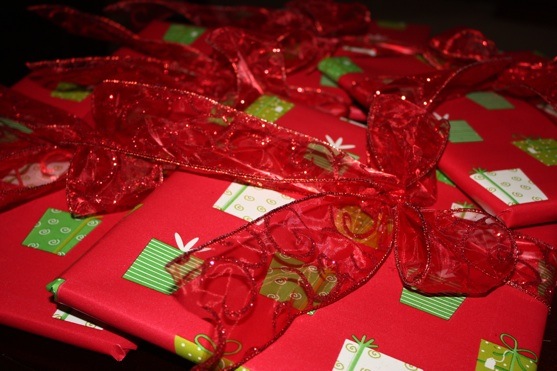
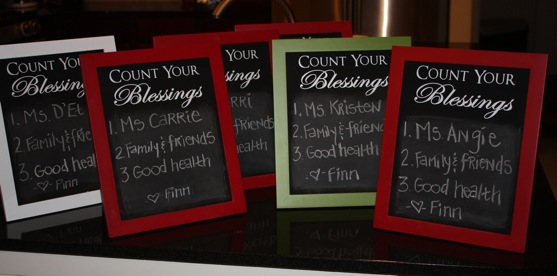
At last I can share the gifts I made for The Littlest Apple’s preschool teachers!  I handed out the gifts today (and note to myself in the future: do this a few days earlier, if at all possible!!)

My regular blog readers already know about my Gratitude Journal (I keep a paper version and the digital one you see in my right sidebar).  It’s a great way to end the day, reflecting each evening on the little (and big) parts of my day that I’m thankful for.  So I decided to come up with a way to share this idea with The Littlest Apple’s teachers.

I was itchin’ to use my chalkboard spray paint again and I’ve been wanting to try out some of the vinyl letters I keep seeing everywhere, so an idea was born!!  Count Your Blessings Chalkboards!!

This project wouldn’t have happened without the help of Shelley from Wonderfully Wordy and House of Smiths.  I custom ordered the vinyl “Count Your Blessings” from her shop, and she managed to get them to me just in the nick of time even though she was already swamped with Christmas orders!  Thanks again Shelley!

I fully intended to go thrifting for cool frames to use, then spray paint them red or turquoise, but I ran across some frames at Target for a price I couldn’t pass up.  (The total cost for this whole project was less than $10 per board.  Not bad!)

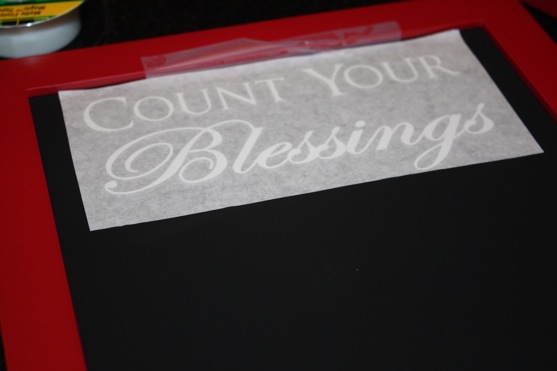
I removed the glass from the picture frames and sprayed the glass with 2 coats of chalkboard spray paint.  Once that dried, I put the frames back together, and applied the vinyl decals.  This was my first time using vinyl and Shelley’s instructions were super easy to follow.  I had visions of this part going horribly wrong, but I got all 6 of them on straight with no problems!

At this point, I seasoned the chalkboard by rubbing a piece of chalk over the board, then erasing it.  (If I could do it again, I’d season the ENTIRE chalkboard before putting the vinyl on….lessons for next time!) I’m guessing you could probably rub chalk over the vinyl very carefully, but I didn’t want to risk it.

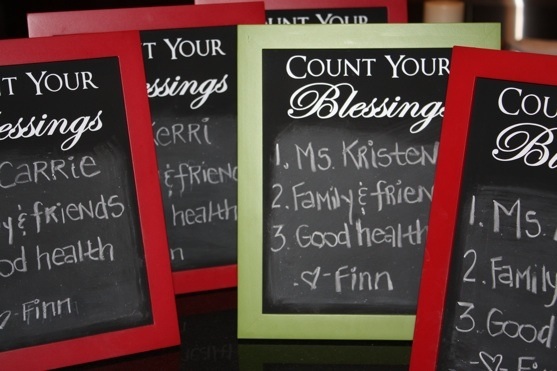
Then I added a few things to be thankful for on each board, including each teacher’s name.  I wasn’t feeling particularly creative at this point, so I just wrote the same things on each board.  I used chalk for easy erasing, but chalk ink would work well too.  My hope is that the teachers will use these at home as a Gratitude Journal of sorts.

What did you give your child’s teachers this year for the holidays?  Teachers, what kinds of gifts do you like receiving?

I’m sharing this post with…..


Dec 15 10
by cara
at 9:48 PM

Preschool Christmas Program

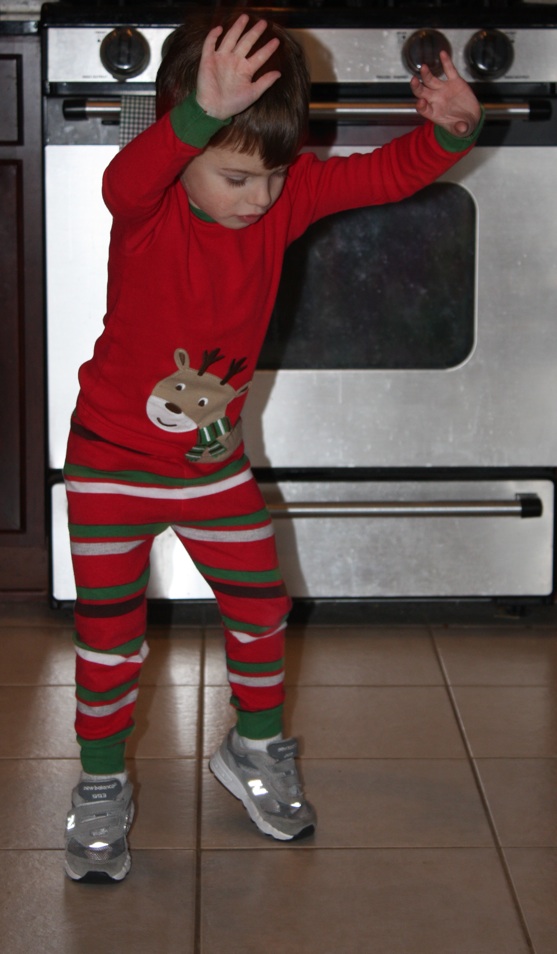
“What’s that?  Did you say my Christmas Program is tonight?!”

“Oh no!!  I need to practice!”

“Alright.  I’m warmed up.  Mommy, I know the other kids are dressing up, but our class is SUPPOSED to wear pajamas!”

“Wow.  This is a BIG DEAL!  Good thing I look cute in my jammies, because now that I’m up here, I really don’t feel like singing and dancing….”  (The Littlest Apple is on the far left, in case you couldn’t tell….)

Dec 13 10
by cara
at 10:41 PM

Christmas Tour of My Home

I’m participating again this year in The Nester’s Christmas Tour of Homes.  I LOVE to check out everyone’s houses all spruced up for Christmas, especially when I can do so in my jammies!

Let’s start outside our front door.

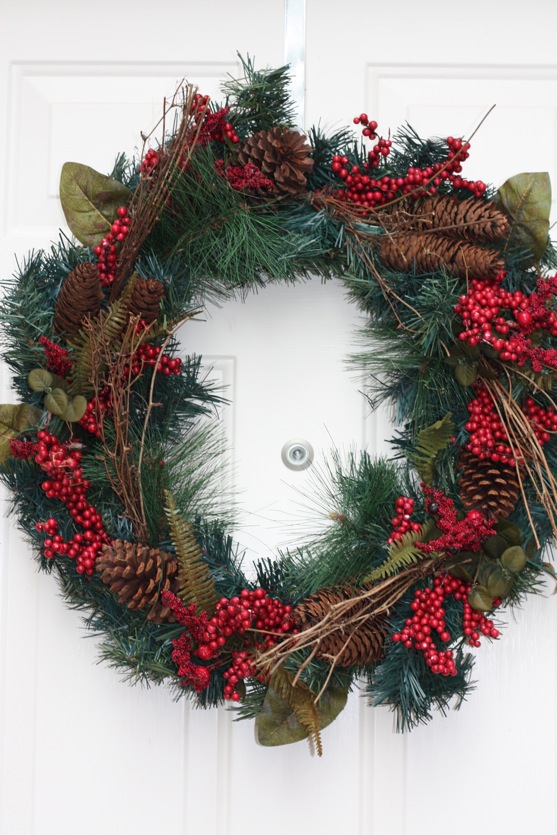
There’s a big natural wreath on the front door with two little lighted trees near the door to greet you.

Pointsettias line the foyer…

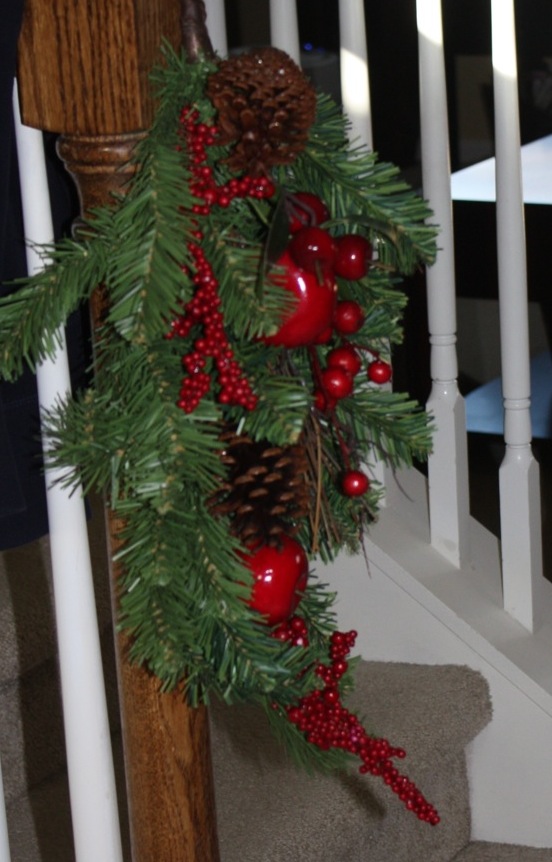
New this year are some apple and pine cone filled swags for the stairs.

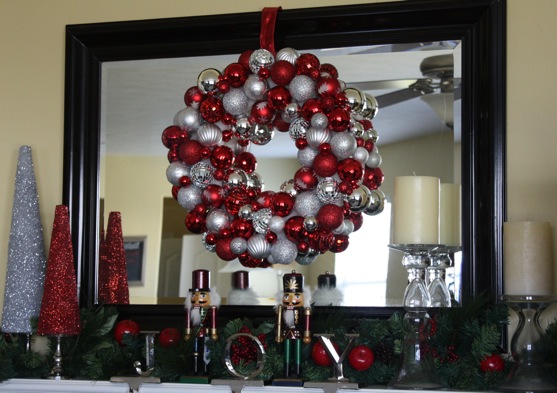
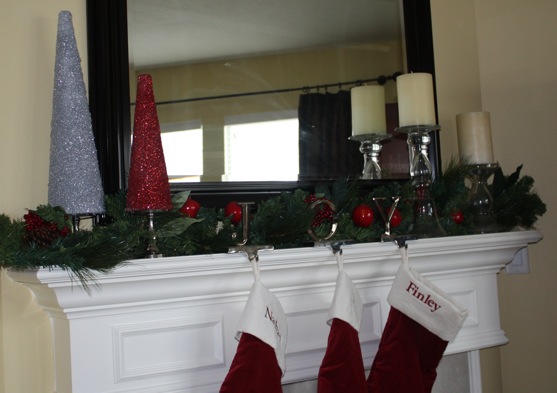
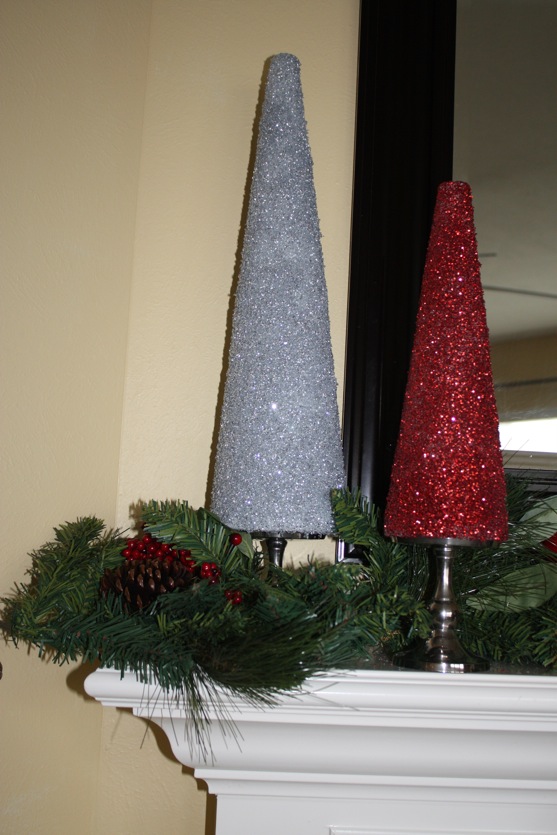
If you’re a regular reader here, you’ve already seen my mantle, which this year, outshines the tree now that I’ve got my Glitter Trees and Ornament Ball Wreath.

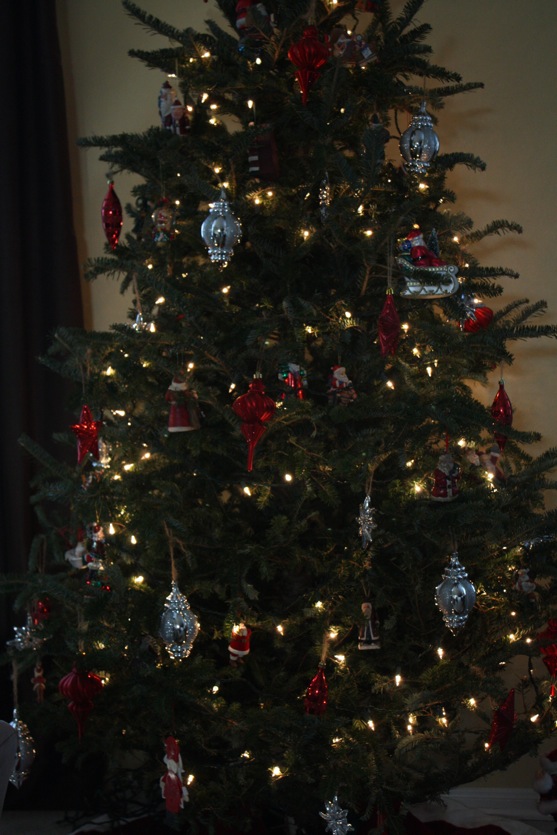
Our tree is a work in progress featuring Santa, red, and silver ornaments.  Next year’s goal will be to create a tree topper and to add some garlands and ribbons.  Oh, and we’ll be switching to artificial because my pine allergy MOST DEFINITELY includes Fraser fir.  (“It’s the itch, itchiest season of alllllllll.”)  Our tree is coming down the day after Christmas, folks.

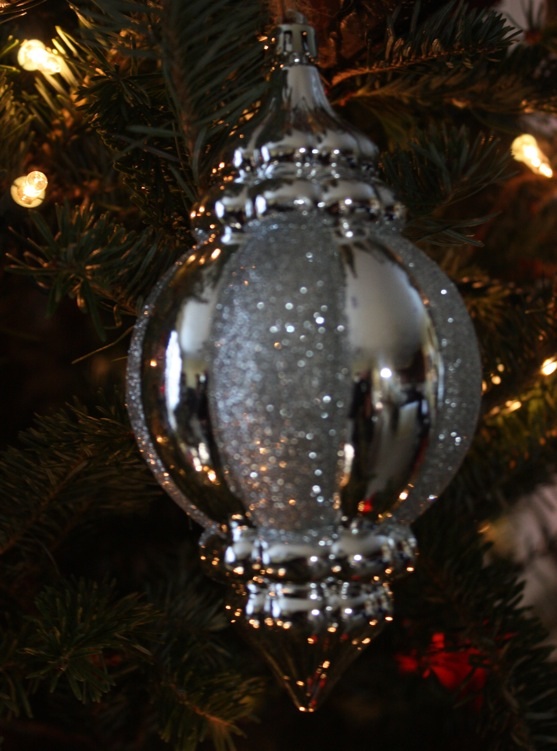
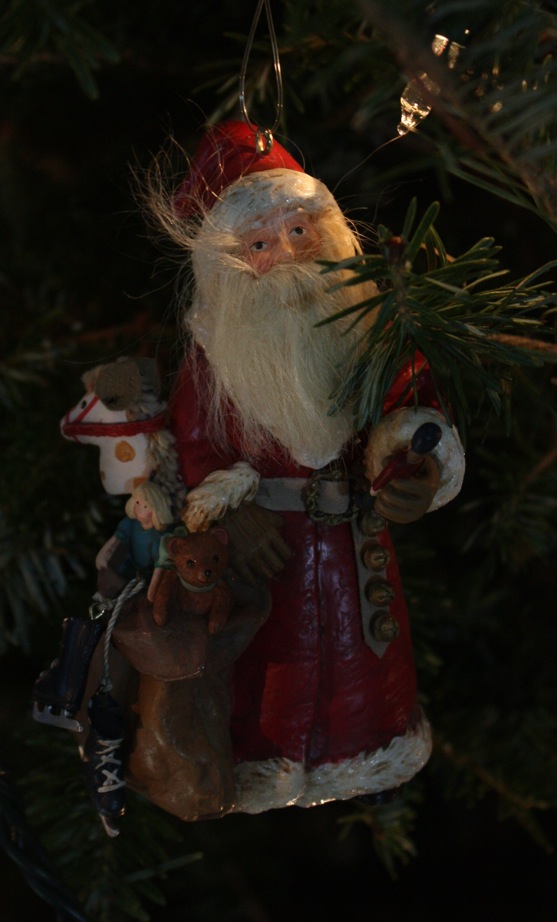
Here’s a closeup of some of my favorite ornaments:

I also added a few Christmas decorations this year JUST for The Littlest Apple.

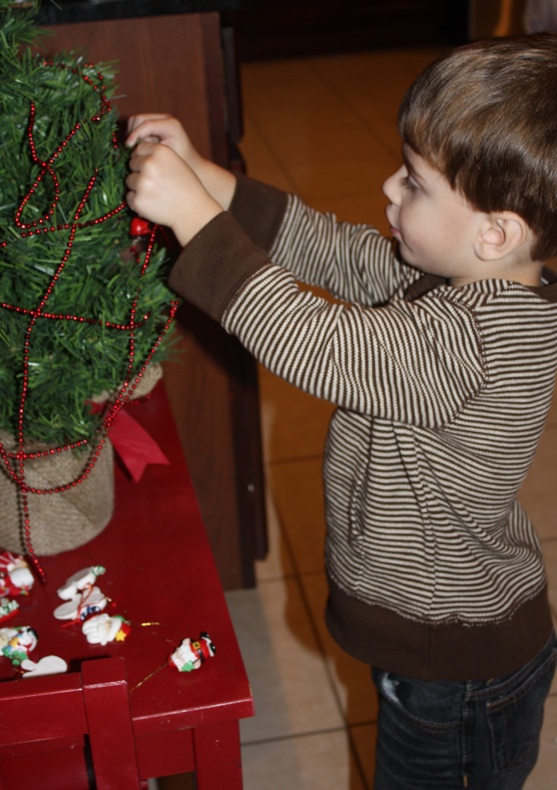
First, there’s the tiny tree that’s all his, complete with decorations and a string of shiny red beads to adorn the tree.  His favorite part of his tree is pulling all of the decorations off (actually, pretending that they are jumping off the tree), so we decorate it once or twice a day.  As long as it’s not the big tree, I’m okay with this.

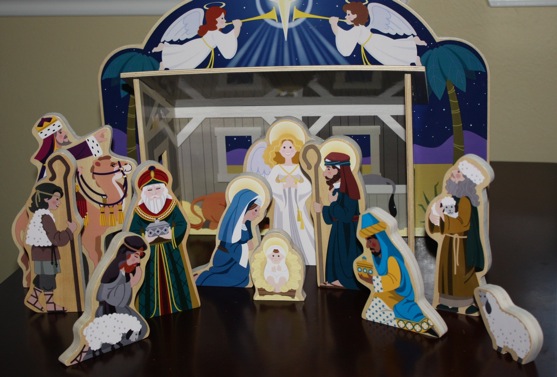
I was also excited to find this wooden Nativity scene by Melissa and Doug.  I LOVE Melissa and Doug stuff!  The Littlest Apple enjoys playing with this.  I hear “Excuse me, Mary!” as he marches the wise men and shepards around.  He also enjoys having the shepards tackle the others (including baby Jesus), so the figures are usually in one big, messy pile.  Joseph has become The Littlest Apple’s favorite figure.  He carts Joseph around the house for bedtime stories, dinner, etc.  Last night he educated Joseph all about Roombas.

I’m also hoping to add a nicer display Nativity scene to my Christmas collection sometime in the future.

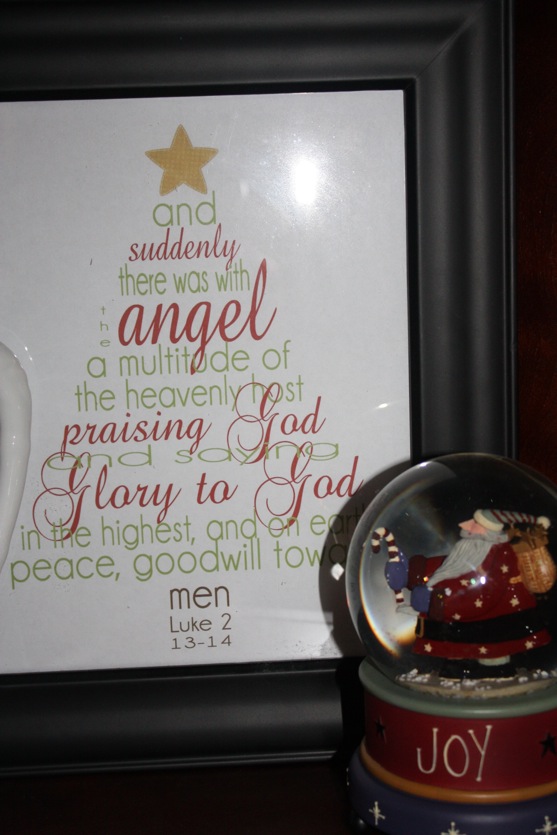
There is a Christmas print framed and tucked into our entertainment center alongside my snowglobe.

There are lots more little touches of Christmas around the house, but those are the highlights.  Thanks for stopping by our home, and I’m looking forward to checking out your homes too!

Dec 12 10
by cara
at 7:52 PM

First Santa Visit

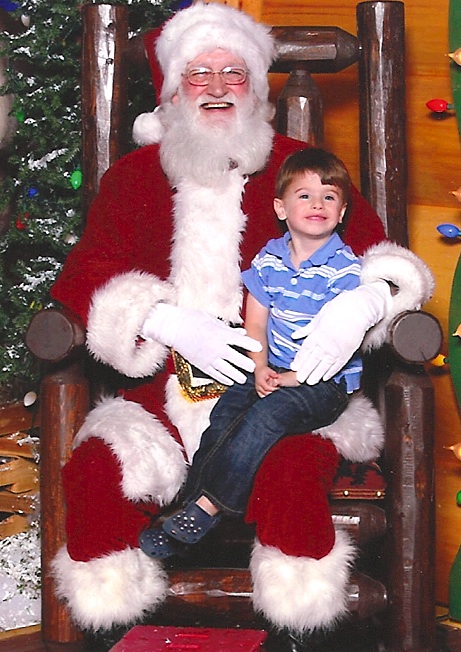
This weekend, The Littlest Apple got to sit in Santa’s lap for the first time ever.  I’m glad we waited until he was 3 (going on 3 1/2) because I feel like he really understood it this year.  He knows who Santa is and was very excited to see him.  The Littlest Apple had a GREAT first visit with Santa.  He didn’t get scared, he remembered what we said about asking for just a  FEW things, and he spoke clearly when he asked for “an excavator, a chainsaw, and a jackhammer.”  He smiled for the camera right on cue.  It was a wonderful visit!

Side note: Doesn’t The Littlest Apple’s wish list remind you of the the Viking boy from the Capital One commercial who asks for a mace?!

Our first visit to see Santa was at Santa’s Wonderland at Bass Pro Shops.  This was pure heaven for The Littlest Apple.  Not only did they have Santa himself, but also trains, slot cars, remote control monster trucks, fishing games, Red Ryder arcades, and free Christmas crafts.  And that’s in addition to all of the normal Bass Pro Shops stuff The Littlest Apple loves to look at: live fish, boats, fishing poles, guns, knives, and lots of big stuffed animals.  Seriously, why haven’t we taken him here sooner?

Have you taken your kids to see Santa yet this year?  What are your kids asking for?

Dec 7 10
by cara
at 11:10 PM

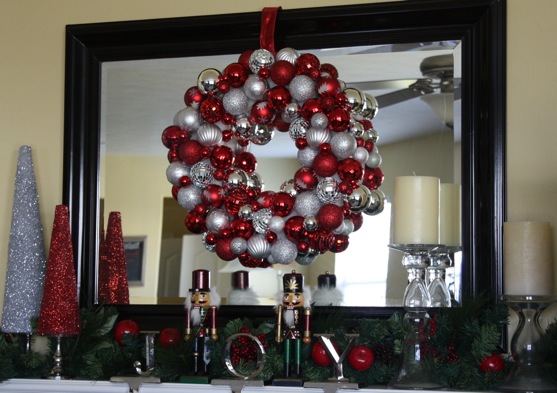
Ornament Ball Wreath

I’ve had an Ornament Ball Wreath on my list of craft projects since last year when I saw them in several magazines.  Martha Stewart, Better Homes and Gardens, Southern Living, and Good Housekeeping have all had versions of this wreath, and many bloggers have made them too.  There are many different Etsy sellers making these for $50 or more, so I thought I’d give it a go.

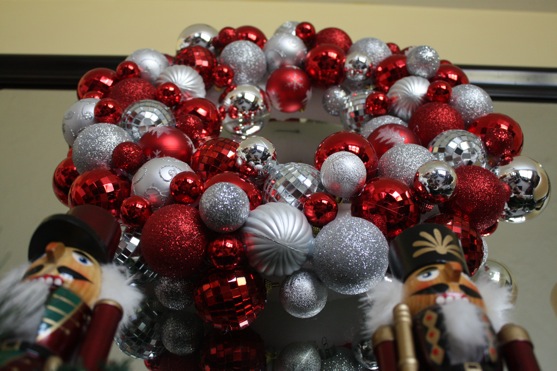
There appear to be several different techniques for making these: you can either hang the ornament balls all on a wire coat hanger, bent into a circle OR you can hot glue the ornaments onto a wreath form.  I opted to hot glue my ornaments to a wreath form.

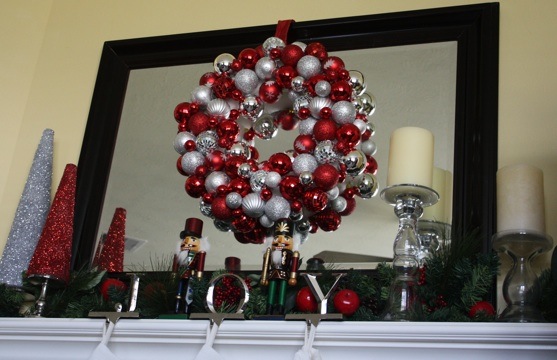
I am SO in love with my new Ornament Ball Wreath!  It looks just gorgeous hanging over my mantle next to my Glitter Trees, don’t you think?!

Several tips for those of you that want to try this:

  • Wrap the wreath form in ribbon first, like I demonstrated with my Halloween Ribbon Wreath.  I completely forgot to do this, and there is some styrofoam showing in places.
  • Put some thought into how you plan to display your wreath BEFORE you make it.  If you plan to hang your wreath, I’d suggest putting a length of wire and/or ribbon around the wreath form before you start gluing the ornament balls on.  I also forgot to think this through (can you tell I was eager to get started?!), but my husband saved the day.  He used a skewer to poke holes through the foam for some wire.  That’s what is holding it up, and the red ribbon is decorative and concealing the wire!
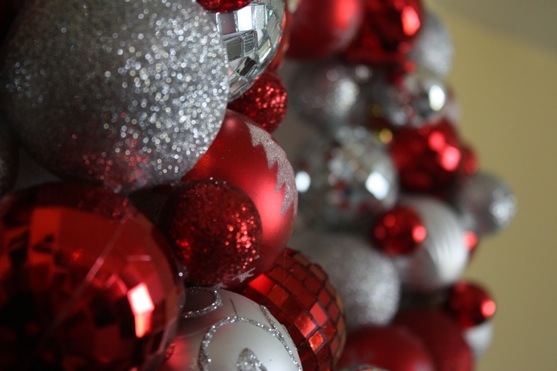
  • Use several different sizes of ornaments, and keep your color palette simple.  Try to find ornaments with different finishes (I’ve got disco ball, glitter, striped, swirly pattern, mirror, etc).  Most of my ornaments are patterned but not TOO elaborate.  I would have preferred NOT to use the red ornaments with Christmas trees (shown below), but I was running low on red ornaments.
  • Buy early and purchase lots!  I tried to shop last weekend for additional ornaments for my wreath and came up short.  I’ll be purchasing more as soon as they hit the stores next fall summer February.  I’ve still got a few blank spots on the sides, though they are strategically placed so you can’t really tell from most angles.

I’m sharing this post with the following parties:

Dec 6 10
by cara
at 9:43 PM

Homemade Gifts for Neighbors, Teachers and Friends

Looking for gift ideas for your child’s teachers?  Neighbors?  Friends?

I love to bake and craft, so homemade gifts are right up my alley.  Here are a few things I’ve done in the past….

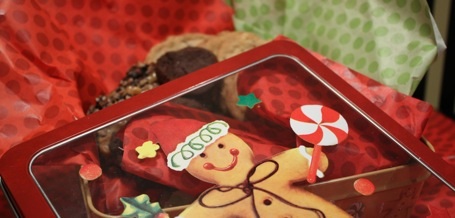
Cookie Boxes: I love putting together Cookie Boxes or trays for our neighbors and friends.  It’s always a major undertaking, baking hundreds and hundreds of cookies.  I usually aim for 5 or 6 different kinds of cookies in each box, but you could just as easily stick with one really good cookie and call it a day!  Lots of work, but it just isn’t Christmas to me without baking lots of cookies!

PS.  I did an informal poll about cookies on Facebook a while back.  With increasing dietary concerns-food allergies, diabetes, gluten intolerance, and almost everyone trying to lose weight-I questioned whether cookies are still a welcome gift.  People overwhelmingly responded YES….but obviously food allergies and special diets should be taken into consideration!

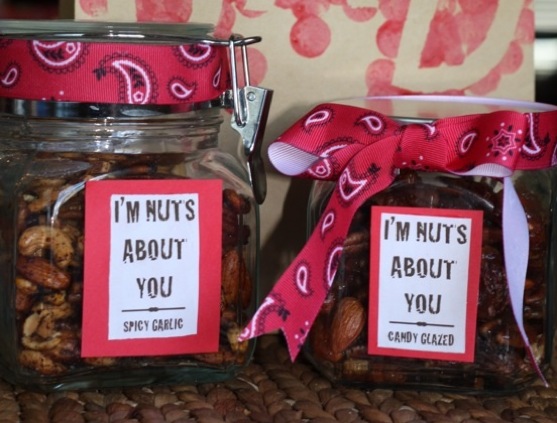
Spicy Garlic or Candy Glazed Nuts: These are SO yummy!  Both the Spicy Garlic and the Candy Glazed varieties are fantastic, and I love to have them on hand for a quick appetizer when we have company over.

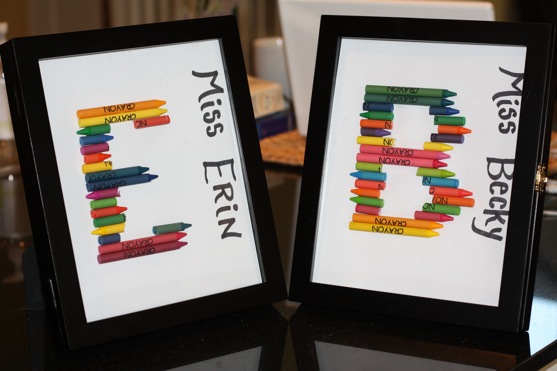
Crayon Monograms: These Crayon Monograms are just perfect for teachers and really fun to make. (And you can use all the leftover bits for melted crayons.)

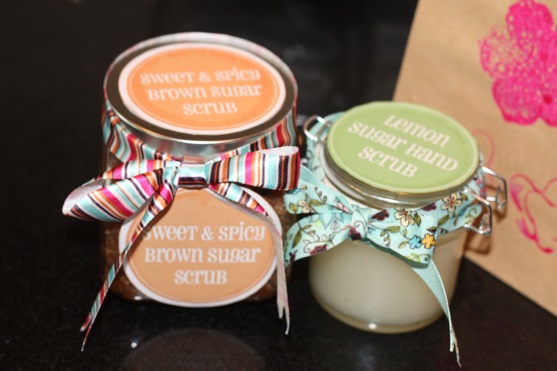
Homemade Bath Scrubs: Probably the easiest of all the gifts I’ve mentioned so far.  Bath scrubs take less than 5 minutes to mix together, and most of you should have all of the ingredients on hand.  There are lots of variations, including this Sweet and Spicy Brown Sugar Body Scrub and Lemon Sugar Hand Scrub.

I’m doing something different this year for The Littlest Apple’s teachers, but I won’t be sharing my new project for another week or two few weeks!

What are you giving to teachers, neighbors, and friends this holiday season? What kinds of things do you like to receive?

Dec 5 10
by cara
at 10:40 PM

Glitter Trees

Like most of you, my Christmas decorations are always evolving, a perpetual work in progress.  Unless you have an interior decorator and/or put aside a hefty chunk of change for Christmas decorations, you don’t just move to a house and instantly Deck the Halls throughout your home with catalog-worthy Christmas sparkle in every nook and cranny.

This will be our fourth Christmas in our home, and we’re still slowly building our collection of Christmas decor.  Two years ago I got the monogrammed stockings and tree skirt that I’ve always wanted.  Last year, I doubled our ornament collection for the tree.  So far, all of my Christmas decor has been store bought, but this year I wanted to try some crafty projects of my own.

First up is our mantle/mantel.  When we had the house built, The Picky Apple and I argued over whether or not to get a fireplace.  I won that battle.  We rarely use our fireplace, but I just couldn’t imagine Christmas without stockings hung on the mantle!  (I’m sure The Picky Apple would insert a comment here about the fireplace being a VERY expensive Christmas decoration….)

Given how important the mantle is to Christmas decor (second only to our Christmas tree), our mantle still needs a bit more Christmas magic.  We’ve got the basic garland and our stockings, and that’s about it.  I used to have a Nutcracker collection up there, but I’ve moved on to other things.  Sparklier things.  Something red and silver and sparkly would be just perfect!

Glitter Trees to the rescue!

Phase 1 of Mantle Makeover: Glitter Trees

I saw this idea on eighteen25, and these were super easy to make.  I had the glitter and spray adhesive on hand (quite literally, as you’ll see in a minute), so my total cost for this project was less than $15 (for the cones and candlesticks).  I’ve seen similar Glitter Trees in home decor stores for MUCH more than that!

Here’s what you’ll need:

  • foam cones in differing sizes
  • glitter
  • spray adhesive
  • candle sticks
  • hot glue or other strong glue to glue cones to candlesticks

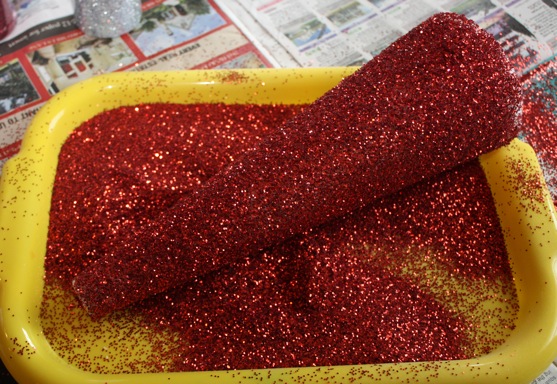
First, you’ll need to cover your work area with newspaper.  Spray the entire cone (all but the bottom) with your spray adhesive.

Working quickly, pour glitter over the cone, turning to coat the entire cone.  Just like last time I played with glitter and spray adhesive, I once again managed to coat my hands in spray adhesive and glitter.  Multiple times.  What a mess.  But so worth it.

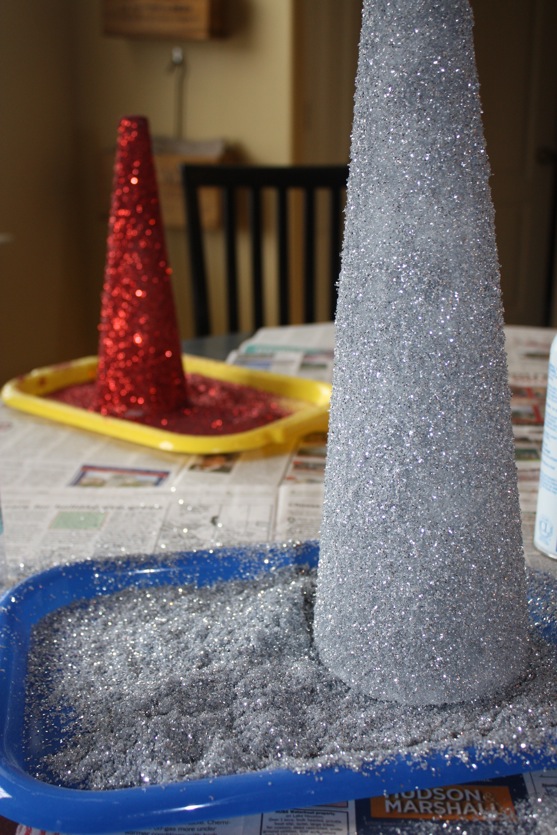
Let the entire cone dry before tapping off excess glitter.  Doesn’t that silver glitter below look fluffy?

Add more spray and glitter as desired, but I only needed one coat.

Once spray adhesive on cones has dried completely, use hot glue or other strong glue to attach glitter tree to the candlestick.  That’s all there is to it!

I love the sparkle that my new glitter trees bring to the mantle!!  In fact, I’d love to create a whole forest of glitter trees to go all the way across the mantle.  Stay tuned for several more Christmas mantle crafts I’m working on!

I’m sharing this project with…

Dec 3 10
by cara
at 9:58 PM

Tips for New Bloggers: Blogging Q & A

I’ve been getting lots of emails lately with questions about blogging, so I thought it might be a good idea to answer some of those questions here!

Why did you start blogging?

During The Littlest Apple’s first few months of life we spent most of our time at home  Born a low birth-weight (4 pounds 9 oz) at 36 weeks, he wasn’t really supposed to go out much, especially during flu season.  So we stayed home.  And I was nursing every two hours for months and months on end to help him gain weight, and I often used that time to surf the net.  I started reading blogs.  Two of the first blogs I discovered were The Pioneer Woman and Dooce.  As the months passed, I found more and more blogs, and got particularly interested in the world of food blogs.  I love to cook and bake and love to write, so I thought I might just have something to share too.  The Picky Apple was born!

How did you get started?

Honestly?  I told my husband that I wanted to start a blog, and he set it up for me and showed me how to edit and publish posts and to upload and share pictures, how to add links, etc.  He’s a programmer.  Not very helpful to you, right?

I’ve heard that Blogger is the easiest blogging platform (aka content management system) for new bloggers to use, especially when they don’t have a programming background.  My blog is WordPress platform, hosted separately.  But other bloggers also use Typepad, WordPress.com(the free version of what I’m using), Gawker, Blogsmith, etc.   I know there are LOTS of great tutorials out there on how to get started and which platform is best for you.

Here are some links that might be of use:

The blog platforms of choice among the top 100 blogs @ pingdom

Choosing a Blogging Platform @ Blogging Basics 101

I thought this was a food blog.  Why did you change your content?

Those of you that have been following me since the beginning (January 2008) know that this used to be food blog.  I changed my content because I felt like there was so much more I wanted to share.  And honestly, I was getting bored just talking about food all the time.

Here’s my first post explaining The NEW Picky Apple.

How much does it cost to start a blog?

You can start for free using Blogger, WordPress, or some of the other blogging platforms mentioned above, but if you have any desire to be a long-term blogger, you should purchase a domain name (mine is www.thepickyapple.com) and a hosting package.  We use Dreamhost (my husband already had it) and the cost is $8.95 per month.

Who designed your blog?

Again, my husband gets all the credit.  He took a WordPress theme (and there are so many themes to choose from, some free, some cost money) and customized it.  He also designed my header and blog button.   He’s pretty amazing.  But again, if you don’t have people in your life to help you, you can either use a ready-made theme or hire a blog designer.

How much time does blogging take?

That’s a tricky question.  It can take as much time as you want it to take.

Don’t you hate those kinds of answers?!

It is one of those experiences where the more you put into it, the more you get out of it.  As you’ll see below, there’s so much more to blogging than just publishing posts with words and photos.  There’s participation in the “community” of the blogging world, responding to comments, linky parties, visiting other blogs, etc.

The more honest answer is that I spend at least an hour on my blog day.  Three years in, it still takes me forever to edit my posts, add photos, and get my content ready for publishing.  And those LONG spirited child posts?  Those take at least several hours, which is why I’m only doing them every other week.

Then there is the time spent responding to comments, participating in linky parties, updating sidebars, and Facebook Fan Page.

When do you find the time in your day to blog?

I usually blog in the evening after The Littlest Apple goes to bed or during the day on Wednesdays and Fridays when he is in preschool.  I respond to comments and do other blog related things throughout the day as time and The Littlest Apple permit.

How do I get people to read my blog?

How to get more readers for your blog…that’s the million dollar question indeed.  Here are my thoughts….

First of all, step away from Google Analytics and stop checking to see how many Google Followers you have!  It’s so easy to get obsessed and frustrated with statistics!

One main way to get people to read your blog is to comment on other blogs that you like (with more than just “great post!”)  Leave thoughtful comments, and other bloggers will be likely to reciprocate (assuming that they aren’t the big huge blogs that get thousands of comments daily).  Make sure that your Blogger/Wordpress/Google ID is set up with your blog address, so they can find you. I think that’s how my first non-family non-friend IRL comment originated and it was the coolest thing ever.

Another great way is to participate in linky parties and memes.  For my blog this means participating regularly in parties/carnivals to share recipes, crafts, preschool activities and mommy stories, usually following whatever the “theme” of the linky party is (Halloween, pumpkin, funny things your kids says, etc).  There are MANY linky parties out there, including some that are weekly writing prompts, things about you, etc.  There are tons of Christmas linky parties right now about recipes, traditions, crafts, mantle decor, show off your tree, etc.  If that’s your blogging niche, now is a GREAT time to get started!! A Google search for blog carnivals or linky parties or blog memes should yield some that you might be interested in.  When and if you DO participate in these types of things, be sure to visit the other participants and comment on their posts.  And be sure to thank the host for starting the party.  (It all comes back to comments!)  These have been KEY in getting my blog out there, increasing my readership, and also getting some major spotlights on big blogs that saw my stuff and featured me.

Create a blogroll in your blog’s sidebar.  You can let other bloggers know that you think their blog is great and that you’ve included them on your blogroll, but don’t expect them to reciprocate.  A blogroll should be about what YOU like, not just a list of reciprocal links.  Update your blog roll every few months, as your favorite blogs will change over time.  I need to do this!!

Once your blog makes its way to someone ELSE’s blogroll (also a cool feeling, the first time it happens!), their readers will click through and it will just multiply from there.

If one of your posts generates more comments than usual, then do a follow up post, or a post on a similar topic.  That being said, I think it is more important to stay true to yourself, true to your voice than to cater to your audience too much.  I’ve seen advice all over the place recommending that you pick a “niche” and stick to it.  My blog is much more widely read now, even though I jump from food to spirited children to crafts to DIY.  I think your authentic voice is the most important thing.

No one is commenting!  How do I encourage comments?

This is still something I really struggle with.  I’ve got lots of readers, but not very many comments.

Leave comments on other blogs, as I mentioned above!

In addition to leaving comments, I frequently use email to correspond with bloggers, and that helps you stand out from the crowd.  I try to respond with a nice little “thank you” email whenever someone comments on my blog for the first time (though this is getting harder and harder for me as my readership grows).  I also send notes to bloggers when I read something or know of something that they might be interested in, or when I just have something more to say.  (for instance…”Hey! I just found your blog and saw on Your about page that you went to UT.  I did too!  Graduated in 2001, and I miss Austin.  When were you there?”)  That can start a great dialogue and encourage them to follow your blog.  I was on the receiving end of a few of these emails from people who saw the gastroparesis feature on The Today Show and emailed me to see if I saw it.  That meant a lot to me, coming from complete strangers, and you can bet I immediately went and checked out their blogs and commented.

Edited to add: Do as I say, not as I do!  Right now I’m at least a few weeks behind in responding to blog comments and emails that don’t require immediate attention.  I’d also advise you respond to comments and blog related emails every day or every other day so they don’t pile up on you!  Some days it’s all I can do to get a blog post up, but I try to make time to respond to comments and visit other blogs.

End your blog posts with a question to engage your readers.  This is something I’ve been working on lately too, to encourage all of those lurkers to comment!  Sometimes it works better than others.

Are you making any money from your blog?

It’s really not about the money.  When I started blogging, I never intended to generate income from my blog.

But to answer your question, YES, I’m starting to make money from my blog.  My hubs won’t be quitting his day job anytime soon though.

I’ve earned a little money from the Amazon Affiliates program, but I don’t go out of my way to push Amazon products.  I’ll link to them if I’m discussing books or toys, but I never do it just to earn referral fees.

As you’ve noticed, I’ve recently started accepting sponsorships for my blog.  My readership has grown to a point where this is completely feasible, so I’m seeking out mom owned small business and other companies that I like.  Advertising of my own choosing, not some annoying flashing add at the bottom or side of the screen for who knows what.

I don’t want to be the kind of blog that is always peddling something.  My eyes just glaze over when I see blogs like that that just seem to be one big ad or one giveaway after another.  But you will see an occasional sponsor post here and there from sponsors that I think might be a good fit for me or my readers.  My blog is NOT about selling products, reviewing products, and giveaways, and I plan to keep it that way!  (Though I do like the occasional, straightforward giveaway as a thanks for reading…another one coming soon!!)

Do you have any other tips or advice for new bloggers?

  • Include photos or illustrations.  (Again, do as I say, not as I do with this photoless post!)
  • Don’t let blogging take over your real life.
  • Don’t feel pressured to post every single day, unless you really want to.
  • Take occasional breaks.
  • Don’t put music on your blog.
  • Don’t push flashing things on your blog.
  • Don’t share info about family and friends without getting their permission first.
  • Get feedback from family and friends (and other bloggers).
  • Keep going!  It takes a while to find your voice, and the longer you stick with it, the easier it will get.
  • Plan ahead.  Create a blogging schedule for yourself with a topic for each day.

I could go on and on and on!  If you want additional information about starting a blog, here are some resources for you:

Bloggertunity: A Mom’s Guide to Blogging (an ebook) @ Metropolitan Mama

Blogging in Pink: A Woman’s Guide (free ebook) @ Scribbit

Blogging Basics 101

Simple Blogging (an ebook)

Problogger

Blogging has become such a passion of mine!  I’ve made lots of new friends, found amazing sources of information and inspiration, and rediscovered interests and dreams long forgotten.  If you are considering starting a new blog, go for it!  And if you’ve just started, you may feel like you are just talking to yourself (and maybe your mom).  Stick with it, and you’ll be amazed at all that blogging has to offer.

Do you have a blog?  How long have you been blogging?
Blog Widget by LinkWithin