Apr 29 10
by cara
at 9:00 PM

GI Update: Feeding Tube Placement

After a MONTH of trying to get The Littlest Apple’s NG tube placement scheduled, I got a call yesterday asking if we could come in today to get the tube placed. Relief at long last, right?  Well, not so much.  It’s been nothing but drama, drama, drama.

The Good:

  • The Littlest Apple has gained 1 pound in only 3 weeks!  (After not gaining any weight for about 6 months)
  • We got the tube placed today after a month of waiting.
  • The Picky Apple took the day off today, and was amazing.  Couldn’t have made it through the day without him.
  • Grandparents to visit and distract.

The Bad:

  • SO much screaming.  The Littlest Apple understandably didn’t tolerate the tube placement very well.
  • I got a “trial by fire” lesson in NG tube placement.  As in, the nurses made ME do it and instructed me as we went.  SO nerve wracking.  It didn’t work the first time, so we had to do it TWICE.  It took 4 of us to get it done the second time.
  • The waiting.  Our appointment was at 10:30.  We got home at 2:45 this afternoon.

The Ugly:

  • We were sent home with no feeding pump, only minimal supplies, and no follow up care plan.  As in WE HAVE A TUBE IN PLACE, BUT WE CAN’T EVEN USE IT!!!!  And because the nurse claims that she couldn’t find any home health care agency that was covered by our insurance, it has been left entirely up to ME to call home health care company after company on our insurance list to find someone to get out here ASAP and teach us what the heck we’re doing.  This is apparently somewhat unheard of.  And I sure don’t have any idea what I ‘m doing…I’m not a medical professional.  I don’t know what to ask or what I need in much detail: “What kind of pump do you need?” “Um, the kind for night feeds for a 2 year old?  That’s all the info I’ve got!!”  The doctor, who we didn’t see until after the tube was placed, was baffled by this…it is usually all set up and ready to go, but didn’t really do anything about it.  He’s not the one making calls and setting stuff up.  Why were we even THERE?!  All of the home health agencies I spoke with this afternoon were baffled and shocked that we were sent home w/o out a care plan in place.  RIDICULOUS.  Still trying to sort this all out.  I am beyond frustrated, bitter, and down right angry about it.  This has been a truly awful experience, in terms of getting what we need when we need it.
  • In the meantime, we’re on constant alert to keep a stubborn and very angry 2 year old from ripping out his tube.  Not that it really matters, I suppose, sine we’re not exactly using it yet.  My husband’s betting it will get ripped out tonight after bedtime.
  • The Littlest Apple has stopped talking, smiling, and laughing, at least for today.  He HATES the way the tape on his face feels when he moves his facial muscles, so he is trying hard not to move them at all.  Our normally animated little guy was a complete zombie today, and it breaks my heart.  He’s miserable and mad.

NG Tube

Hoping for a better day and a more coherent post tomorrow!
Apr 28 10
by cara
at 8:40 PM

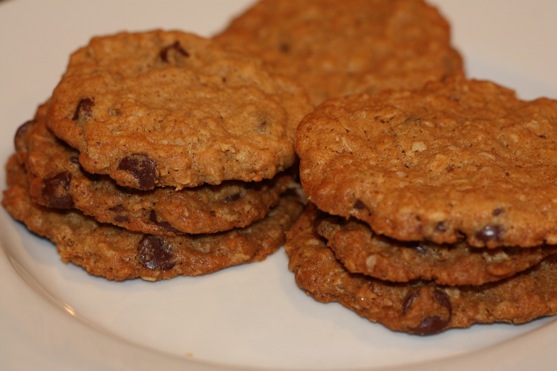
Chunky Peanut Butter and Oatmeal Chocolate Chipsters

I have baked these cookies several times in the last year, and they have quickly become one of my all-time favorite cookies.  They’ve got a little bit of everything: peanut butter, chocolate chip, oatmeal, and cinnamon.  They are like 3 cookies rolled into one super-duper delicious cookie!

Chunky Peanut Butter and Oatmeal Chocolate Chipsters

Chunky Peanut Butter and Oatmeal Chocolate Chipsters

from Baking: From My Home to Yours by Dorie Greenspan

Makes about 60 cookies

Ingredients:

  • 3 cups old fashioned oats
  • 1 cup all purpose flour
  • 1 teaspoon baking soda
  • 2 teaspoons ground cinnamon
  • 1/4 teaspoon freshly grated nutmeg
  • 1/4 teaspoon salt
  • 2 sticks (8 ounces) unsalted butter, at room temperature
  • 1 cup peanut butter-chunky is preferred, but smooth will also work
  • 1 cup sugar
  • 1 cup (packed) light brown sugar
  • 2 large eggs
  • 1 teaspoon pure vanilla extract
  • 9 ounces bittersweet chocolate, chopped into chunks, or 1 1/2 cups store-bought chocolate chips or chunks

Position the racks to divide the oven into thirds and preheat the oven to 350 degrees F.  Line two baking sheets with parchment or silicone mats.

Whisk together the oats, flour, baking soda, spices and salt.

Working with a stand mixer, preferably fitted with a paddle attachment, or with a hand mixer in a large bowl, beat the butter, peanut butter, sugar and brown sugar on medium speed until smooth and creamy.  Add the eggs one at a time, beating for 1 minute after each addition, then beat in the vanilla.  Reduce the mixer speed to low and slowly add the dry ingredients, beating only until blended.  Mix in the chips.  If you have the time, cover and chill the dough for about 2 hours, or for up to 1 day.  (Chilling the dough will give you more evenly shaped cookies.)

If the dough is not chilled, drop rounded tablespoonfuls 2 inches apart onto the baking sheets.  If the dough is chilled, scoop up rounded tablespoons, roll the balls between your palms and place them 2 inches apart on the sheets.  Press the chilled balls gently with the heel of your hand until they are about 1/2 inch thick.

Bake for 13 to 15 minutes, rotating the sheets from top to bottom and front to back after 7 minutes.  The cookies should be golden and just firm around the edges.  Lift the cookies onto cooling racks with wide metal spatula-they’ll firm as they cool.

Repeat with the remaining dough, cooling the baking sheets between batches.

Apr 27 10
by cara
at 10:25 AM

Handprint Lilies

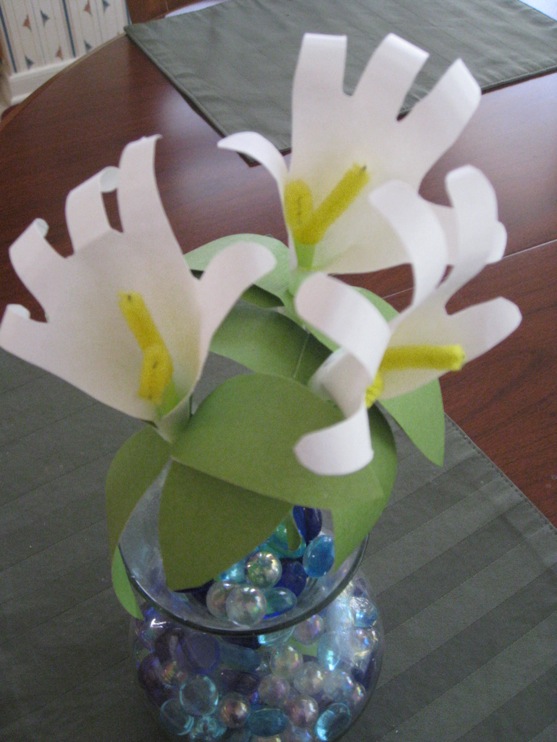
The Littlest Apple and I created these handprint lilies last year to give to both of his grandmas for Mother’s Day.  Okay, so The Littlest Apple just provided his handprints (and not very willingly, I might add).  The Picky Apple and I did all of the grunt work.  This project is best for kids who are old enough to help with the cutting and taping, but I think it makes a great memento for smaller handprints, too!  I took this photo at my parents’ house yesterday, and as you can see, my mom is still displaying her handprint lilies proudly, nearly 1 year later!

Handprint Lily

Since we made the Handprint Lilies before I started sharing crafts on my blog, I’ll try to walk you through the instructions.  Sorry I don’t have a photo tutorial!

What you’ll need:

  • White cardstock
  • Green cardstock
  • Yellow pipe cleaners
  • Green straws
  • Tape

Trace handprints on white paper (pink or lavender would also be lovely!), adding a little “wrist” to the bottom of each handprint, and cut them out.

Cut out 2 green leaves for each lily you are making.

Cut a yellow pipe cleaner into 2 inch strips.

Wrap the “wrist” of the handprint around the end of the straw, leaving about 1/2″of the straw sticking out, and tape in place.

To add leaves, you can punch holes in the end to slide them over the straw, and tape in place, or simply tape in place.

Fold the 2 inch yellow pipe cleaner in half, and put the doubled up end into the end of the straw.

Curl the fingers of the handprint back over a pencil, and style as desired.  My mom put her handprint lilies in some of those vase filler rocks.

Apr 26 10
by cara
at 8:04 PM

Apple Picks

Has it really been over a month since I’ve shared some Apple Picks?!  These are some of the posts that really caught my eye recently, perhaps because they reflect what’s going on in my life right now: parenting struggles, yummy recipes, dreaming of a vacation, keeping a 2 year old occupied, and orange juice on my white slipcovers.

How to Cook with Kids…Without Frustration from Steady Mom

The Entertaining Aftermath: 8 Steps to a Quick Cleanup from Simple Bites

Oven Baked Buffalo Blue Cheese Chicken Nuggets from Taste and Tell

I Want To Go To There: Blackberry Farm from Elements of Style

Chinese Beef Broccoli from goodLife {eats}

5 Things to Consider Before you Choose White Slipcovers from The Inspired Room

Raising Responsible Kids: Actions Speak Louder Than Words from Musings of a Housewife

Parenting Exhaustion from Parenting Passageway

5 Strategies to Help a Moody Mama from Steady Mom

Nature Crafts and Activities from No Time For Flashcards

Moist Apple Spice Bread from Baking Bites

Veggie Might: Vegetarian Meal Planning for Meat Eaters, by Cheap Healthy Good

Apr 25 10
by cara
at 6:53 AM

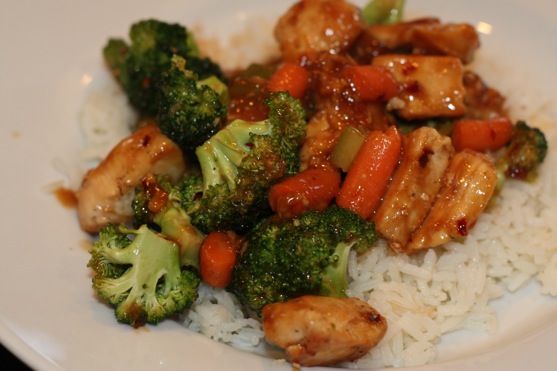
Sweet Peanut Chicken Stir Fry

I created this dish one night a few weeks ago when I was craving stir fry, but wanted a sweet and peanut flavored sauce.  I just kept mixing ingredients together for the sauce until it tasted like what I was imagining.  I LOVE this sauce!  This was also a great way to use up some carrots, broccoli, and celery from the vegetable bin.  I normally wouldn’t have thrown celery into a stir fry, but it added a great crunch.  You could also throw some peanuts in for even more crunch, but I didn’t have any on hand.  This is definitely a dish I’ll be making again!

Sweet Peanut Chicken Stir Fry

Chicken Peanut Stir Fry

recipe by me!

Ingredients:

  • 2 boneless skinless chicken breasts, cut into 1 inch chunks
  • 1 teaspoon toasted sesame oil
  • 3 teaspoons soy sauce
  • 1 teaspoon minced garlic
  • 1/2 teaspoon red-pepper flakes
  • coarse salt and ground pepper
  • 1 tablespoon creamy peanut butter
  • 1/2 tablespoon rice vinegar
  • 1 teaspoon grated ginger
  • 2 tablespoon honey
  • 2-3 cups of vegetables (I used a mix of carrots, celery, and broccoli)
  • peanuts (optional)

Heat sesame oil in a large skillet over medium-high heat.  Season chicken with salt and pepper.  Add to skillet and cook until done.

Meanwhile, in a medium bowl, combine soy sauce, garlic, red-pepper flakes, peanut butter, rice vinegar, ginger, and honey.  Whisk until smooth.  Add to skillet, and cook with chicken for 3 minutes.

Add vegetables to skillet, and cook for an additional 5 minutes.  Serve over rice.

Apr 22 10
by cara
at 12:15 PM

Painting with Golf Balls

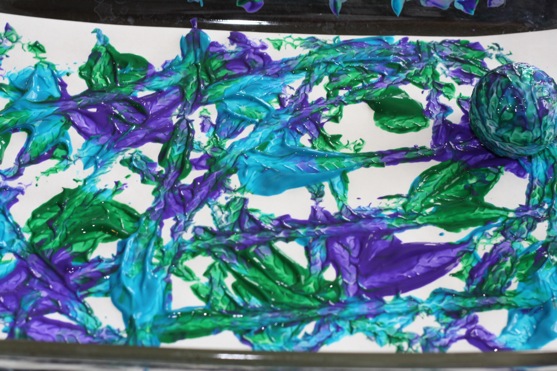
For our Art Playgroup yesterday, we had lots of fun painting using golf balls.  This is so simple, and assuming you can keep the golf ball in the pan (more on that in a minute), it is super easy to cleanup!

Here’s what you do:

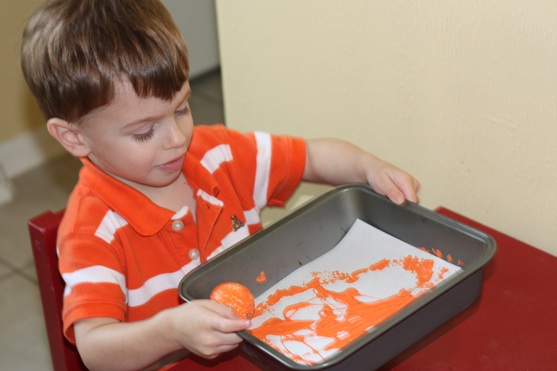
Find a baking dish with tall sides (I used a roasting pan, a Pyrex 9×13, and several 8×8 pans).  When I did the initial test run yesterday, I used a tray with low sides.  It worked just fine when I did it, but The Littlest Apple had a little less finesse and sent the golf ball-covered in orange paint-rolling across the kitchen and carpeted living room floor!  Luckily it was washable paint, but just a warning, be sure you use a dish with high sides!

Cut the paper to fit your pan.

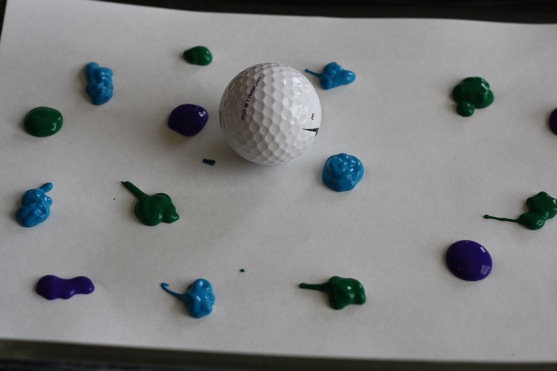
Add drops of paint all over the paper.  I found that using 3 or fewer colors works best.

Golf Ball Painting 2

Drop a golf ball in the pan, and hold on to the sides of the pan to roll the golf ball around.  The idea is for the kids to get the golf ball to roll through all of the drops of paint, which certainly requires a little hand eye coordination.

A photo from our second test run:

Golf Ball Painting 1

It will create a very cool “track” from the pattern of the golf ball.  Love this color combination!

Golf Ball Painting 3

Apr 21 10
by cara
at 8:17 PM

Spring 2010 Garden

Last year I started a small square foot garden, after reading All New Square Foot Gardening, by Mel Bartholomew.

Square Foot Gardening

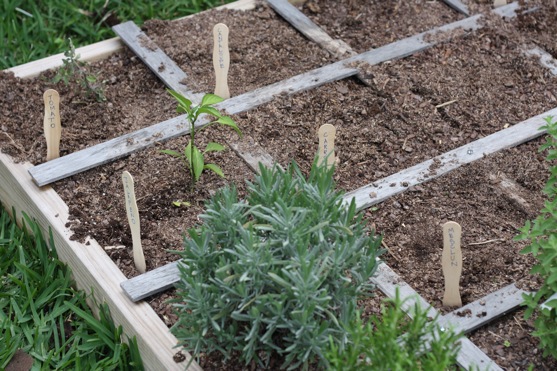
Our garden is a 4 x 4 raised bed, built by The Picky Apple.

Last year I grew (or attempted to grow) mammoth sunflowers, various herbs, tomatoes, beans, jalapenos and green bell pepper.  The mammoth sunflowers were impressive (7 or 8 feet tall!), and a few of the herbs did well, but I had minimal production from the other plants.  Perhaps because of all of the shade from the sunflowers.

Seeds

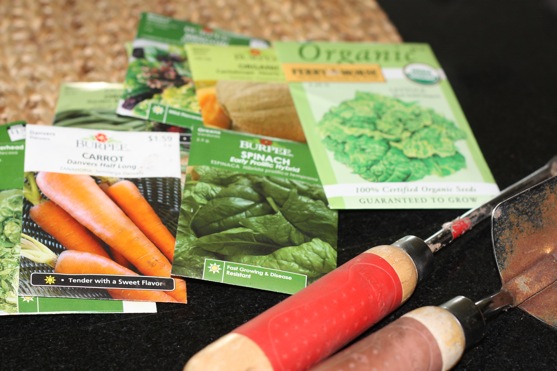
I recently planted my spring garden.  I had lavender, rosemary, and oregano left from last year.  This year we added basil (grew great last year but didn’t survive the hard freeze), tomatoes, beans, mesclun, lettuce, spinach, cantaloupe, carrots, and strawberries.  I’m really hopeful that we’ll be able to eat at least SOME of it this year!

Spring 2010 Garden

I thought it would be such a great experience to plant with The Littlest Apple this year.  He LOVES digging, and seems very interested in seeds.  But he still doesn’t quite “get” it.  Or if he does, he’s just not that big on following directions. He DID enjoy digging lots and lots of holes.  But not the small holes I needed for the seeds.  Nor would he listen to my instructions regarding the planting of the seeds.  He just wanted to throw them here, there and everywhere!  He just wanted to keep on digging even after the seeds were in the dirt and I’m not sure if any of the seeds actually STAYED were I planted them.  We’ll see if anything actually grows….

Apr 19 10
by cara
at 7:58 PM

Buttermilk Pancakes

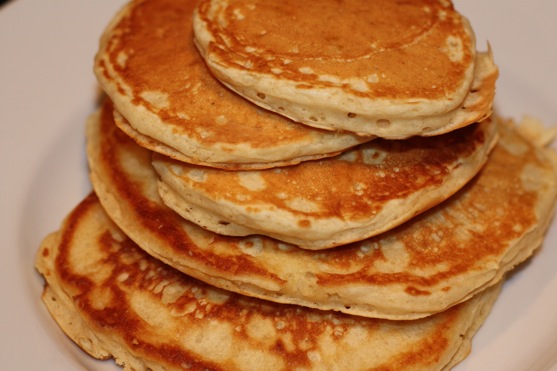
Until recently, the only kind of pancakes I’ve ever cooked at home involved store-bought pancake mix.  I realized that making them from scratch isn’t that much work, and I’ve typically got all the ingredients on hand.  My plan was to start with the original recipe and work on adding in whole-wheat flour.  I love the technique this recipe uses for keeping the pancakes warm as you cook them.  It works like a charm!  These pancakes are delicious, light and fluffy!

Buttermilk Pancakes

Buttermilk Pancakes

from The America’s Test Kitchen Family Cookbook

Ingredients:

  • 2 cups all-purpose flour
  • 2 tablespoons sugar
  • 2 teaspoons baking powder
  • 1/2 teaspoon baking soda
  • 1/2 teaspoon salt
  • 1 large egg
  • 3 tablespoons unsalted butter, melted
  • 2 cups buttermilk  (or add 1 tablespoon vinegar to 2 cups milk and let sit for a few minutes to thicken)
  • 1 to 2 teaspoons vegetable oil

Adjust an oven rack to the middle position and heat the oven to 200 degrees F.  Set a wire cooling rack over a baking sheet and set aside.

Whisk together the flour, sugar, baking powder, baking soda, and salt in a large bowl.  In a separate bowl, whisk together the egg, melted butter, and then the buttermilk.  Make a well in the center of the dry ingredients, pour the buttermilk mixture, and whisk very gently until the buttermilk mixture is just incorporated (a few lumps should remain).  Be careful not to overmix the batter.

Heat a 12-inch nonstick skillet over medium heat for 3 to 5 minutes.  Brush the pan bottom with 1 teaspoon oil.  Using 1/4 cup of batter per pancake, add the batter to the skillet (only 2 to 3 pancakes will fit at a time) and cook until large bubbles begin to appear, about 2 minutes.  Flip the pancakes and cook until golden brown on the second side, about 1 1/2 minutes longer.  Spread the pancakes out over the wire rack on the baking sheet (they shouldn’t overlap) and hold in the warm oven.  Repeat with the remaining batter, brushing the skillet with oil needed between batches.

To Make Ahead: If you have any leftover pancakes, let them cool to room temperature, then wrap them in plastic wrap and freeze.  They will keep for up to a week while still maintaining the majority of their original flavor and texture.  Defrost in the refrigerator for 24 hours, then heat up a 350 degree oven until warm, about 5 minutes.

Whole Wheat Variation: Replace 1 cup of the all-purpose flour with 1 cup whole-wheat flour.

Apr 18 10
by cara
at 12:52 PM

What The Littlest Apple is Reading

What My Child Is Reading Button

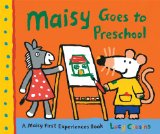
Maisy Goes to Preschool, by Lucy Cousins: We love the simple and colorful illustrations by Lucy Cousins in our other Maisy books, and The Littlest Apple enjoys seeing Maisy do some of the same things he does at school (paint, play outside, snacks, potty, naptime).

Maisy Goes to Preschool

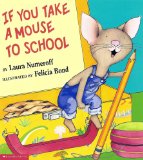
If You Take a Mouse to School, by Laura Numeroff: A cute follow-up to If You Give a Mouse a Cookie, with the same mouse and boy from the first one.  The circular “gimmick” of this series seems a little stretched in this one, but it is still a cute book about school.

If You Take a Mouse to School

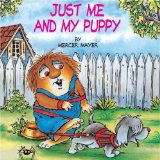
Just Me and My Puppy, by Mercer Mayer: We’ve recently discovered a couple of the Little Critter books.  In this one, the Little Critter brings home a puppy much to his parents’ surprise, and tries to train and care for his not-always-well-behaved puppy.

Just Me and My Puppy

Llama Llama Misses Mama, by Anna Dewdney: Now we own all 3 of the Llama books, and this one is perfect for us right now!  The Littlest Apple has started having some trouble again at dropoff at school, so he can relate to the Little Llama in this book who misses his Llama Mama while he’s at school, but eventually starts to have fun playing and coloring.  The best part?  Mama Llama always comes back!

Llama Llama Misses Mama

Apr 16 10
by cara
at 4:43 PM

A Friday Wishlist

I wanted to do a fun post today.  I haven’t done a wishlist in a while, but I thought I’d share a few things I’m currently wishing for:

A Lisa Leonard necklace…(order by April 28 for Mother’s Day!).  These are some of my favorites:

petite original necklace

itty bitty hearts necklace

teenie tiny initials necklace

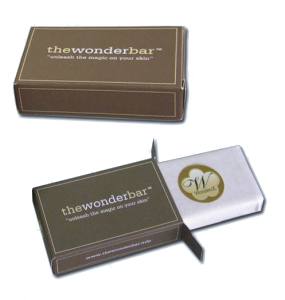
I’ve read so many glowing reviews of Wonderbar soap lately.  Now I want to try it, too!

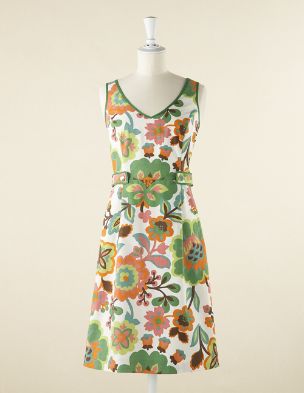
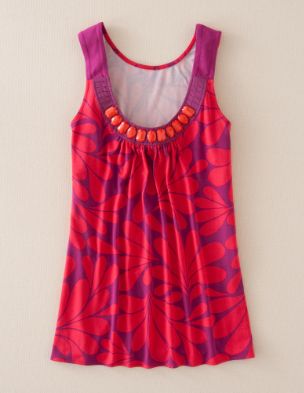
wonderbarAnything from Boden.  All of their clothes are so bright and cheery, and I’m completely in love with the Summer 2010 catalog.  I’ve got most of the catalog dog-eared.

Boden Dress

Boden Dress 2

Pink Suede Ruffle Heels

Boden Shirt

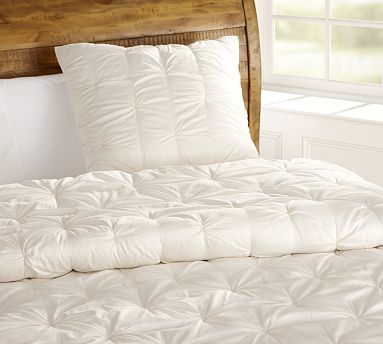
Pottery Barn Cloud Quilt…already sold out in ivory, the color I wanted.  Boooooo!  Maybe I can hunt it down on Ebay.

PB Cloud Quilt

Comfy Patio Furniture: This 6 piece set is less than $500 from Walmart!  But first I think we’ll need a new patio….

Patio Furniture

And since this is a WISH list, a weekend getaway to the gorgeous (and pricey) Lake Austin Spa Resort:

Picture 6

Picture 7

Picture 8

A girl can dream, right?

Blog Widget by LinkWithin