May 13 10
by admin
at 9:56 AM

What You’re Reading

I don’t really pay much attention to my blog rankings, site visits, and all of that nonsense.  I’m just here because I enjoy blogging!  But I did take a few minutes to check out Google Analytics this week, and found out some very interesting things….

Right now, the most popular posts on my blog include:

  • Beer Bread–I’m going to toot my own horn here a little, because this is currently Google rank #1 for “beer bread”!  (Is it a major faux pas to discuss Google ranks?  Is the first rule of Google rankings that you don’t talk about Google rankings?)  Well, I was excited.  I know rankings change daily, if not hourly, but I took a screenshot, just to prove it and to save it for posterity’s sake.  (And yes, I do have way too many tabs open on my browser.  Thanks for noticing that.)

Picture 4

Obviously the recipes still reign supreme, given that my original content was recipes, recipes, recipes.  I’m still glad I branched out, and I hope you are too.

And just for kicks, here are some other Google Searches that brought some of you here:

  • do fruit snacks make your butt look big?–Well, it might not be the fruit snacks, per se, but they sure aren’t helping matters.  Exactly how many fruit snacks are you eating?!  Also, if you have to ask, then the answer is undoubtedly YES.
  • Fiji water prices at HEB–Too expensive!  I know because I used to buy it all the time.  And why are you still buying bottled water anyway?  Get yourself a pitcher with a filter.  Drinking Fiji water will not make you cooler, but it will make you poorer.
  • my favorite appetizer of all time–well, I don’t know what YOUR favorite appetizer of all time is (and I’m not sure that Google is familiar with your particular food preferences), but one of mine is Warm Goat Cheese Toasts with Rosemary, Pecans and Honey.  The other is Buffalo Chicken Dip (recipe coming soon).  I can’t get enough of either of these!  And they WILL make your butt look big.
  • mcmama’s kids names–Well, I know one of them is Stellan, but you should probably ask McMama, don’t you think?
  • potty monster–are you talking about the loud automatic flush toilets in some public restrooms?  If so, those ARE scary.  No wonder The Littlest Apple refuses to use public restrooms!
  • what to read after twilight and outlander–Those are tough acts to follow, but if you want another series may I suggest Into The Wilderness, by Sara Donati?
May 12 10
by cara
at 2:02 PM

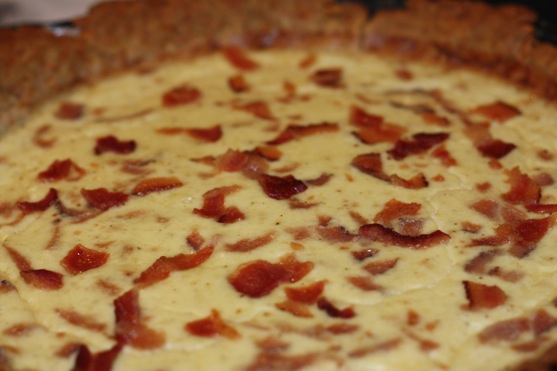
Quiche Lorraine

For someone who doesn’t really like eggs that much, I really love a good quiche.  Especially Quiche Lorraine, an open pie filled with eggs, cream custard, bacon, and Gruyere cheese (in this case, though according to Wikipedia, the addition of cheese makes it a different kind of quiche).  I’ve been craving quiche since our Easter Brunch.  The Picky Apple (who DOES love eggs) isn’t a big quiche lover.  You know, because Real Men Don’t Eat Quiche.  I’m not sure if that’s the reason or not, but he’s not crazy about it.  Anyway, I decided to bake one last week while my Real Man was out of town, using a recipe from Cooks Country Magazine.  I adore Cooks Country and Cook’s Illustrated magazines for all of the research and testing they put in to each recipe.  They may not have big beautiful color photos, but the recipes are always solid and reliable.  This recipe for Quiche Lorraine is certainly one I’ll be using again and again.

Quiche Lorriane

Quiche Lorraine

from Cooks Country April/May 2009

Crust Ingredients:

  • 1 cup all-purpose flour
  • 1/2 cup finely grated Parmesan cheese
  • 1/4 teaspoon salt
  • 6 tablespoons unsalted butter, softened
  • 2 ounces cream cheese, softened

Custard and Topping Ingredients:

  • 5 slices bacon, chopped fine
  • 3/4 cup half-and-half
  • 3/4 cup sour cream
  • 2 large eggs plus 1 yolk
  • 1/4 teaspoon salt
  • 1/4 teaspoon pepper
  • pinch nutmeg
  • 1/2 cup finely shredded Gruyere cheese

Make Dough: Adjust oven rack to lower-middle position and heat oven to 375 degrees.  Whisk flour, Parmesan and salt in bowl.  With electric mixer on medium-high speed, beat butter and cream cheese until smooth and creamy, about 1 minute.  Reduce speed to low, add flour mixture, and mix until dough forms large clumps, about 1 minute.  Reserve 3 tablespoons dough.  Flatten remaining dough into 6-inch disk and transfer to center of 9-inch pie plate.

Blind Bake: Press dough evenly into bottom and sides of pie plate and use reserved dough to form crimped rim.  Refrigerate dough for 20 minutes, then transfer to freezer until firm, about 10 minutes.  Spray two 12 inch square pieces of foil lightly with cooking spray and arrange greased-side down in chilled pie shell.  Top with pie weights (Picky Apple note: I didn’t use pie weights, and mine turned out just fine) and fold excess foil over edges of dough Bake until surface of dough no longer looks wet, 15 to 20 minutes.  Carefully remove foil and weights and continue to bake until crust begins to brown, about 5 minutes.  Transfer to wire rack and cool until just warm, about 15 minutes.  Reduce oven temperature to 350 degrees.

Mix Custard: While crust cools, cook bacon in large skillet over medium heat until crisp, about 8 minutes; transfer to paper towel-lined plate.  Whisk half-and-half, sour cream, eggs, yolk, salt, pepper, nutmeg, Gruyere, and 3/4 of bacon in a large bowl.

Bake: Pour custard mixture into warm pie shell and bake until crust is golden and custard is set around edges, about 25 minutes.  Sprinkle remaining bacon over surface of quiche and continue to bake until center of quiche is barely set, 5 to 10 minutes.  Cool on wire rack for 15 minutes.  Serve.  (Quiche can be refrigerated in airtight container or wrapped in plastic for 3 days.)

May 10 10
by cara
at 8:50 PM

Homemade Bath Scrubs

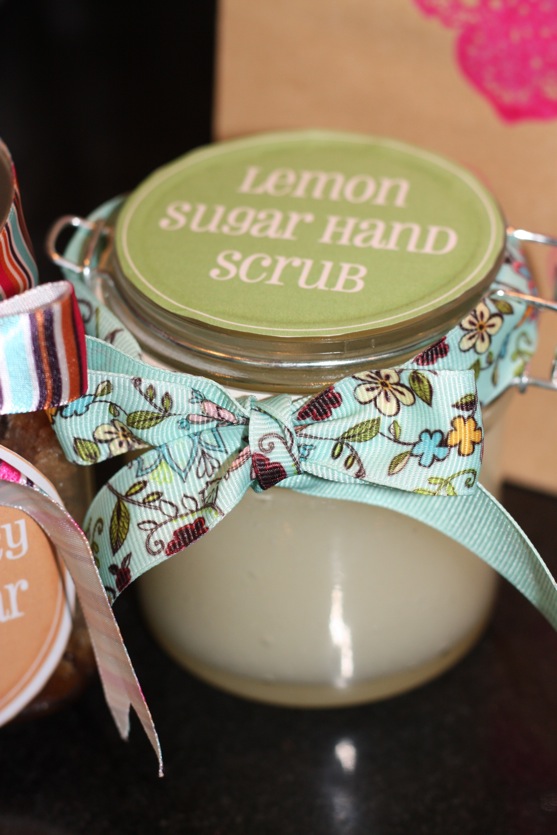
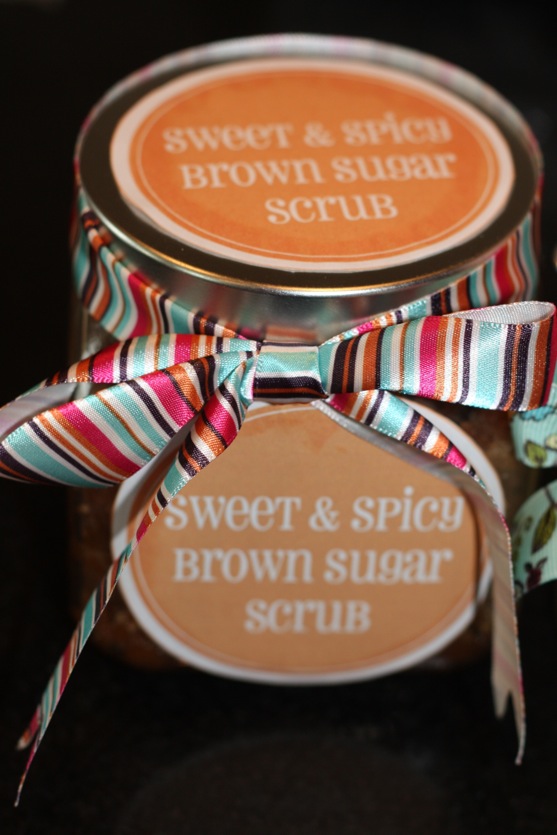
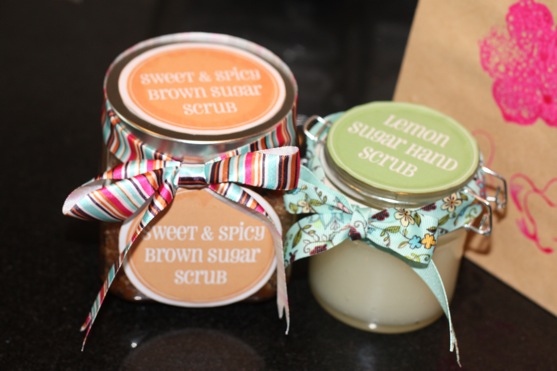
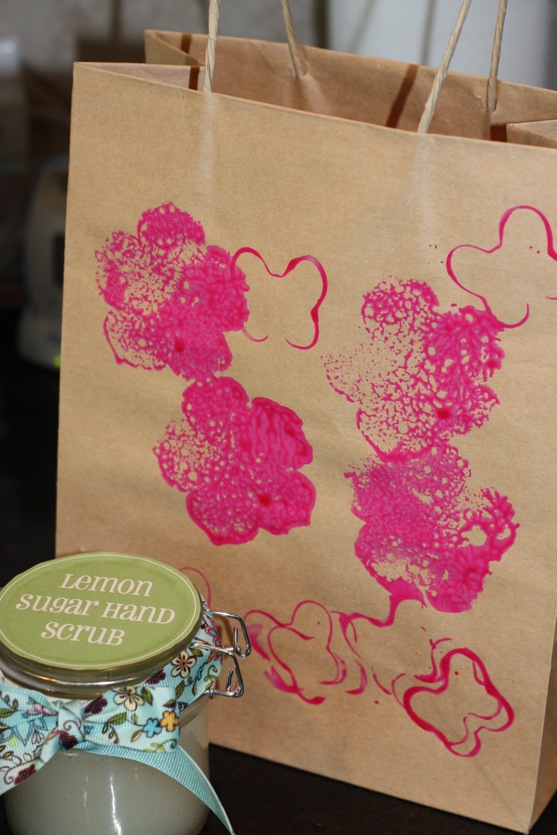
For this year’s Mother’s Day gifts, I decided to go the handmade route.  I made two different types of bath scrubs: Lemon Sugar Hand Scrub and Sweet and Spicy Brown Sugar Body Scrub.  These scrubs exfoliate, leave your skin feeling soft, and smell great too! They were extremely easy to mix up, using ingredients I already had on hand.  I bought the containers and ribbon at Hobby Lobby for 50% off(2 different kinds of containers, because they didn’t have 4 of either type).  The labels are courtesy of Martha Stewart, with a little help from my husband.  The Littlest Apple contributed too, by stamping paint on the gift bags with flower and butterfly shapes.  I was so happy with how they turned out, and both my mother and mother-in-law seemed happy too.  I’m definitely going to play around with other scents in the future.  My apologies for the slightly blurry photos!

Lemon Sugar Hand Scrub

Lemon Sugar Hand Scrub

from Under the Table and Dreaming

Ingredients:

  • 2 1/2 cups white sugar
  • 1 cup extra virgin olive oil
  • 4 tablespoons lemon juice (or essential oils…next time I’ll use essential oils and/or lemon zest for stronger lemon scent)

Mix until a gritty paste forms and pour into a container with lid that seals (a mason jar or similar).

Sweet and Spicy Brown Sugar Scrub

Sweet and Spicy Brown Sugar Scrub

from Domino Sugar

Ingredients:

  • 1 cup dark or light brown sugar
  • 1 cup granulated sugar
  • ¾ cup almond oil (I used olive oil, but almond oil would be great, I think!)
  • 2 tsp. ground cinnamon (I used more cinnamon, less ginger and nutmeg in the second batch I made)
  • 2 tsp. ground ginger
  • 2 tsp. ground nutmeg
  • 1 16 oz. glass container with lid

In a medium-sized bowl, combine all ingredients until thoroughly blended. Be sure to break up any lumps from the brown sugar or from the spices. Spoon into the glass container and secure with lid. Scoop a teaspoon or two of the scrub on your hands and gently massage in circular motions onto your skin. Leave on for 3 to 4 minutes before thoroughly rinsing. The scrub will tighten on your skin.

Bath Scrubs

Bath Scrub 2

May 9 10
by nathan
at 7:13 AM

Happy Mother’s Day

Hello there. I’m The Picky Apple. I don’t normally have a voice on this blog, but I read it avidly and I occasionally help out behind the scenes. I just wanted to sign on here to salute my wife. She’s an incredible mom.

She and I are lucky enough to have a smart, funny, sweet, and extremely energetic little boy. He doesn’t seem to have an off switch. (I’ve checked.) We sometimes joke that I have to go back to work on Mondays just to catch my breath! All kidding aside, raising a child is no easy task. It takes only a single day of stay-at-home-daddy duty to gain a permanent appreciation for the job that she makes look so easy. What’s more, she fills The Littlest Apple’s days with fun: arts, crafts, cooking, learning games, … All the sorts of things you read about on this blog. It’s amazing.

As is often the case, our life as parents hasn’t traversed the path we originally expected. We have good times to be sure, but we’ve had our share of rough times. Through it all, Cara has managed to stay positive. She’s our rock.

Now I’ll let The Littlest Apple take over for a moment (I don’t know how you bloggers do this… my fingers are getting tired.):

fmmmmeoimef ew  eweoieinnne

Cara clearly hasn’t started the typing classes with him yet – must be next month. Nevertheless, I’m confident that his message is clear. We love you, Mommy! Happy Mother’s Day!

-The Picky Apple

May 7 10
by cara
at 8:09 PM

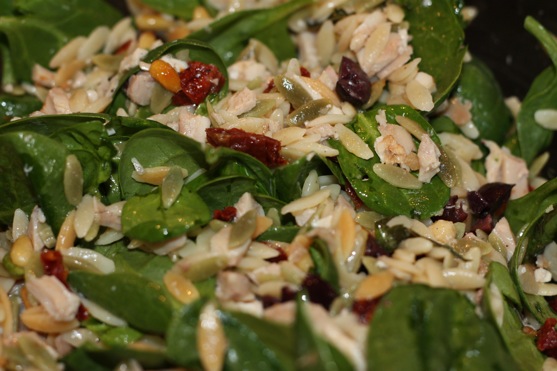
Mediterranean Chicken and Orzo Salad With Sun-Dried Tomatoes and Pine Nuts

Longest recipe title ever, isn’t it? The title doesn’t exactly leave much to the imagination, but I didn’t make it up.  Jamie and Bobby did.  This is a recipe from the Deen boys’ cookbook, The Deen Bros. Take it Easy.  I loved this simple meal!  It was my first time using orzo, which provided a nice contrast to the the crunchy pine nuts.   I absolutely loved all of the flavors of this dish, along with the simple dressing.  This makes a great dish for lunch or a light dinner, and would be perfect to bring to a potluck or BBQ.

Mediterranean Orzo Salad

Mediterranean Chicken and Orzo Salad With Sun-dried Tomatoes and Pine Nuts

from The Houston Chronicle, September 16, 2009

Ingredients:

  • 8 ounces (1 1/2 cups) orzo
  • 1 cup diced cooked chicken (I used leftovers from Perfect Roast Chicken)
  • 1/2 cup chopped oil-packed sun-dried tomatoes, drained
  • 1/2 cup chopped fresh basil (fresh from our garden)
  • 1/2 cup chopped pitted kalamata olives
  • 1/4 cup toasted pine nuts
  • 2 tablespoons olive oil
  • 1 1/2 teaspoons freshly squeezed lemon juice
  • 1 garlic clove, finely chopped
  • 1/4 teaspoon salt
  • 1/2 teaspoon freshly ground black pepper
  • 4 cups (about 3 ounces) crisp greens, such as romaine or Boston lettuce, for serving (I substituted spinach)

Bring a large pot of salted water to a boil.  Cook orzo according to package directions.  Drain well.  In a large bowl, combine orzo with chicken, sun-dried tomatoes, basil, olives and pine nuts.  To make the dressing: in a small bowl, whisk together the olive oil, lemon juice, garlic, salt and pepper.  Pour the dressing over the salad and toss to combine.

May 6 10
by cara
at 1:58 PM

Strawberry Fruit Leather

This recipe falls in to the category of “things I want to make at home just to see if I can.”  The Littlest Apple likes fruit roll-ups and all of those other junky dye-filled “fruit” products.  In an effort to cut back the junk and dyes I’m feeding him (while still giving him lots of calories…it’s a tough balance), I decided to attempt this recipe at home.  It’s time consuming and a little labor intensive, but I was so proud of the final product (though I’m lacking a photo of the final product).  It was really cool to be able to say “I did it!  I MADE these!”  The Littlest Apple never touched them though…they didn’t come in a wrapper with tie-dye colors.  What a shame.  They were SUPER delicious!

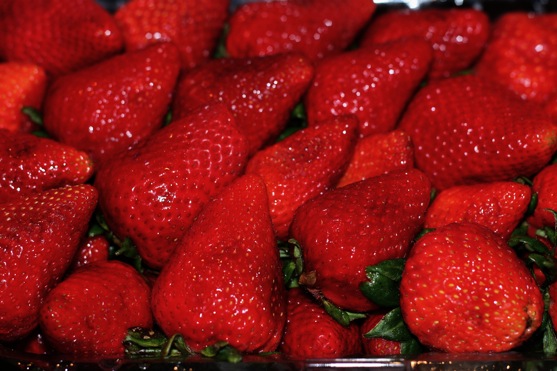
Strawberries

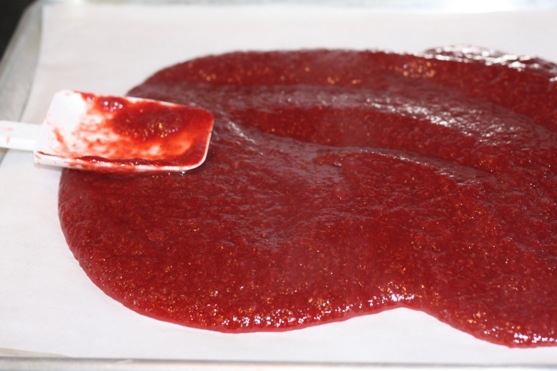
Strawberry Fruit Leather

recipe from Fly Through My Window

Ingredients:

  • 4 lbs of strawberries, cleaned, stemmed and chopped
  • 2 cups of unsweetened applesauce
  • Juice of 1/2 lemon
  • 1/2 to 3/4 cup of sugar (optional)

Blend strawberries and applesauce in blender until smooth (Picky Apple note: I had to do this in batches).  Add to a heavy saucepan and add sugar if needed or desired, bringing to a boil while stirring constantly.  Reduce heat and skim foam from the top with a spoon.  Simmer over low/medium heat for 30 to 45 minutes (Picky Apple note: mine took twice as long, but maybe I didn’t have the temperature high enough), stirring frequently, continue simmering/stirring until mixture has properly reduced to the consistency of thick applesauce (when running a rubber spatula across the bottom of the pan the mixture should stay separated-pan should still be visible once you reach the other side).  Pour mixture onto a parchment or heat-safe plastic wrapped cookie sheet, spread evenly and bake at 145 for 8 to 10 hours.  (Picky Apple note: My oven’s lowest setting is 170, and I still cooked mine for close to 11 hours).  Cut into strips and roll up…or roll up and cut into strips!  They will keep in the fridge for up to a couple weeks.

Strawberries 2

May 2 10
by cara
at 7:39 PM

Tot School, May 2

TotSchool2

The Littlest Apple is  32 months old.

I haven’t been doing a very good job of planning ahead for our Tot School activities, and that’s going to be one of my goals for the month of May.  Here are a few activities The Littlest Apple and I have done lately:

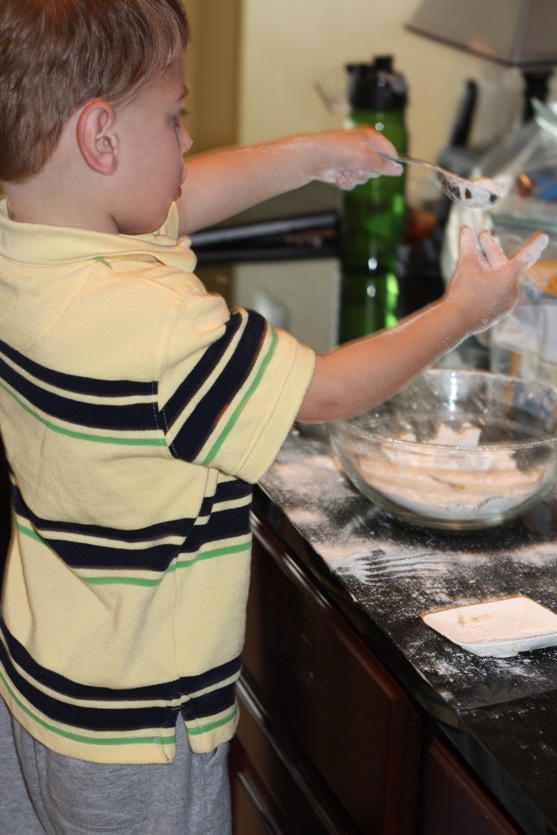
The Littlest Apple helped me bake banana bread.  I really want to share my love of cooking and baking with The Littlest Apple, but he’s always a little over-eager and grabby when we’re cooking and baking together.  This time, I tried a new technique I read about on Steady Mom.  I gave The Littlest Apple his own bowl, and added ingredients to his bowl as I added them to my mixing bowl.  This worked out great, because he could play to his heart’s content with his ingredients, I wasn’t worried about messing up my recipe, and nibble without contaminating my bread.  It also gave him a bit of control too, in that he got to say “yes” or “no” to each ingredient.  I was making banana bread, but he actually said “no” to bananas for his bread!  It did get a little messy….

Baking Banana Bread

Baking Banana Bread 2

The Littlest Apple helped plant the Spring 2010 Garden.  He also helps water the plants with a spray bottle (as opposed to a watering can, which he just dumps indiscriminately).

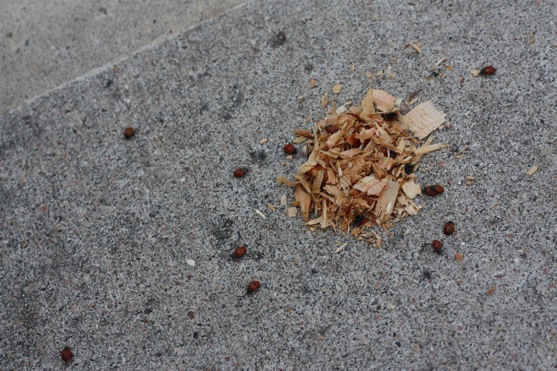
Last week, The Littlest Apple’s theme at Mother’s Day Out was ladybugs, and he brought home a jar full of ladybugs.  We released them in our backyard, and spent a really long time watching them crawl around before they flew off.  I’m thinking about ordering a Butterfly Kit.  He LOVES bugs!

Ladybugs

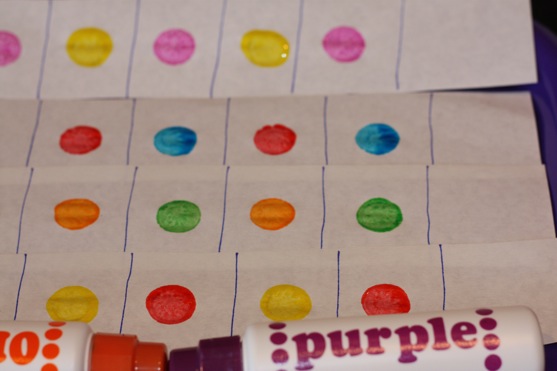
I introduced The Littlest Apple to his very first pattern activity.  Honestly, he needed some help, and wasn’t that interested.  But he did enjoy playing with his Do A Dot Markers!

Pattern Dots

We painted with golf balls:

Golf Ball Painting 3

We blew feathers across the kitchen floor…

Blowing a Feather

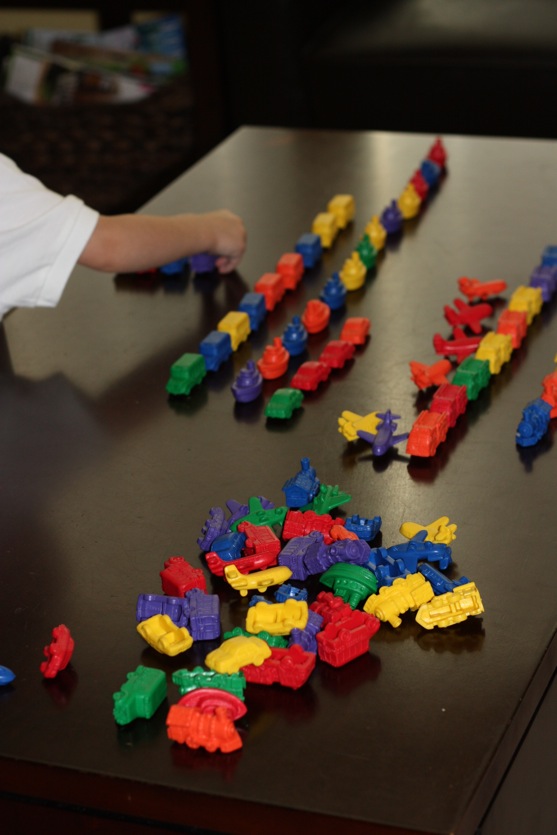
The biggest hit of the week was this tub of Vehicle Counters from Lakeshore Learning (LOVE that store!).  The Littlest Apple has played with these for HOURS.  They are such a versatile toy: we have sorted them by vehicle type, by color, counted them, lined them up, matched them, etc.  These were such a great buy!

Vehicle Counters

Vehicle Counters 2

Practice washing dishes:

Washing Dishes May 2

Yesterday we went to this neat church fundraiser called Touch A Truck, where preschoolers could explore and touch various trucks and other vehicles up close.  Vehicles we explored: firetruck, police cars, school bus, mail truck, RV, skid steer, heavy duty pickup trucks, sports cars, and a police horse named Buzz.  The Littlest Apple had a great time.  This was our first public outing since he got his NG tube, and I’m definitely going to have to get used to all of the staring, especially from other kids.  (The Littlest Apple didn’t notice at all.)  I know it probably looks scary to the other kids though.  We did have a lengthy conversation with the constable helping Buzz whose son had a feeding tube while in the NICU.

But the Touch a Truck event-I think this is SUCH a neat idea, don’t you?!  The one we attended was near my parents house, about 30 minutes away, but I’m thinking that this would be a HUGE hit in our suburb, too.  I’m halfway thinking about starting one myself in our community as a fundraiser for something (you know, because I don’t have enough going on right now!).  Obviously I haven’t put much thought in to it yet, but there is such potential here with all of these truck-loving boys (and girls!) in our kid-filled suburb.  The Littlest Apple would love to have seen a cement mixer and other construction vehicles, a garbage or recycling truck, a tractor or other farm equipment, and maybe an ambulance too.  Ooh!  And an airplane and/or helicopter!  See?  There are so many possibilities!

Skid Steer

May 1 10
by cara
at 6:08 PM

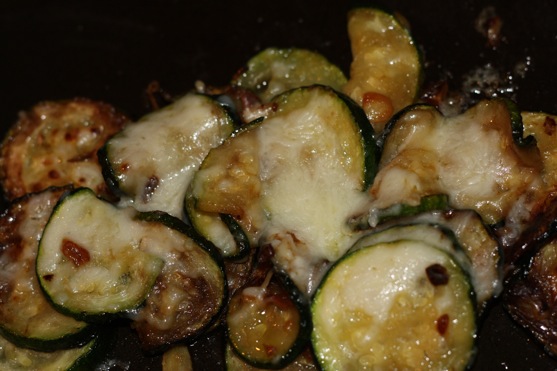
Cheesy Zucchini

I love, love LOVE this zucchini recipe!  I served it with Spicy Fish for an extra delicious meal.  I’m adding more veggies to our dinners, but we’re taking baby steps.  This recipe has quite a bit of cheese, but it could be cut back with equally delicious results.

You know what I learned though?  The Picky Apple hates zucchini.  Even zucchini cooked up with garlic and cheese.  He finds the texture slimy and the taste yucky.  Is there any doubt about where The Littlest Apple got his picky eating habits?!  But this zucchini is so delicious that I won’t mind cooking it up just for me!

Cheesy Zucchini

Cheesy Zucchini

from Food to Live By: The Earthbound Farm Organic Cookbook, by Myra Goodman

Ingredients:

  • 2 tablespoons extra-virgin olive oil
  • 4 large cloves garlic, thinly sliced
  • 1 1/2 pounds medium-size zucchini or other summer swash, cut in 1/2 inch-thick slices (about 4 cups)
  • 2 tablespoons coarsely chopped fresh flat-leaf parsley (omitted)
  • 1/4 teaspoon salt
  • 1/3 cup freshly grated Parmesan cheese
  • 1/2 cup freshly grated mozzarella cheese

Heat the olive oil in a large nonstick skillet over medium heat.  Add the garlic and cook, stirring frequently until softened, 1 to 2 minutes.

Add the squash and stir to coat with the garlic-oil mixture.  Cover the skillet (Picky Apple Note: I left mine uncovered) and cook the squash, stirring occasionally, until it is glossy and crisp-tender, 4 to 6 minutes.

Sprinkle the parsley and salt evenly over the squash and cook, stirring frequently, until the parsley wilts, about 1 minute longer.  Stir in the Parmesan cheese and stir constantly until it melts, about 1 minute.

Sprinkle the mozzarella cheese evenly over the squash, cover the skillet again, and remove it from the heat.  Let the squash sit until the mozzarella cheese melts, 1 to 2 minutes.  Serve immediately.

Ultimate Recipe Swap

May 1 10
by cara
at 5:26 PM

Spicy Fish Seasoning

I’m trying to serve fish more frequently at our house, but it has been a very gradual process.  I’ve only shared two fish recipes EVER on this blog, if that’s any indication of how slow Project More Fish has been progressing.  The Picky Apple just started eating fish a few years ago (after our trip to Hawaii), and The Littlest Apple occasionally eats fish sticks.  When he feels like it, and he’s yet to try any fish I’ve prepared.

This technique is so simple and quick to throw together.  I made a big batch of the blackening seasoning, and that made it even quicker to prepare this fish the second time.  I cooked this recipe two weeks in a row, and I have a feeling it’ll be popping up on our menu again soon!  Delicious!

Spicy Fish Seasoning

from Kitchen Stewardship

Ingredients:

  • 2 tablespoons garlic powder
  • 2 tablespoons salt
  • 2 tablespoons paprika
  • 1 tablespoon onion powder
  • 1 tablespoon black pepper
  • 1 tablespoon dried oregano
  • 1 tablespoon dried thyme
  • 1 ½  teaspoons cayenne pepper, or to taste (I like it hot)
  • cornmeal (amount is up to you)
  • 4 tilapia fillets (or another white, flaky fish)

In an empty spice jar or small bowl, make the blackening seasoning by combining all of the above dry spices. The mix stores great for as many fish dinners as you can cover.

Heat a heavy skillet (preferably cast iron) on high for a few minutes. (Picky Apple Note: I added 1-2 tablespoons of butter to the skillet).  Sprinkle some cornmeal on a plate with the seasoning on top and coat both sides of thin tilapia (or other mild fish) fillets with the mixture.  You may want to add a little water to the fish if the cornmeal isn’t sticking.  Sear fillets in hot skillet for about 2-3 minutes on each side (until they are blackened and cooked through).

Apr 30 10
by cara
at 9:21 PM

GI Update: Phone Calls Galore

I promised something happier today, after yesterday’s GI Update, and I promise I’ll post a yummy recipe next.  However, I know some of you want the latest installment in the saga of The Littlest Apple’s feeding tube.  Or maybe you don’t, but I’m going to share anyway because I need to vent.  The rest of you can just skip on to the next post.

First of all, you’re probably wondering how The Littlest Apple is doing….

He’s doing great!  He slept soundly all night long (unlike me…I was awake at 3:45am with a huge knot in my stomach thinking about all of this).

He’s mostly back to his normal self.  Lots of talking, running around, getting in to stuff he shouldn’t be.  And even a little bit of giggling and laughing.

He didn’t pull his tube out last night.  In fact, he’s become FIERCELY protective of his tube.  He’s very worried about it getting pulled out.  He doesn’t really want us touching it or messing with it, or trying to feed him through it via syringe (which we’ve done twice).

As for the administrative stuff….

Today, I called 29(!) home health companies.

I talked to my insurance company 4 times.

I talked to the doctor’s office 3 times.

I talked to a social worker and vented to her about all of this, too.

I still didn’t get anything scheduled.  I never actually found a home health company covered by our insurance to provide the specific services we need (and I was calling companies from a list provided BY THE INSURANCE COMPANY!).

BUT,  right around 5pm (on this Friday afternoon) I had a small breakthrough.  I figured out what I need to do to make things happen.  Essentially, I am going to pick a home health company I found helpful and apply to our insurance company for a waiver/exception, showing that despite extensive searching, I can’t find the services we need unless I go with an unauthorized provider.  And hope they agree with me and allow the exception, covering our expenses.

So here’s what has to happen: I need to get a doctor’s order for home health care services, which the doctor’s office hasn’t provided yet since we didn’t have a home health care company determined.  Then I need to get that order to the home health company I have selected.  Then the home health care company has to apply for a waiver from our insurance company.  Then that claim has to be reviewed and approved (Please Lord, let it be approved!!).  THEN the home health care company can start ordering the stuff they need to help us and come out and train us!

Piece of cake, right?

I’ll be starting that process bright and early Monday morning.  We’ll see how long it takes to get through all of those steps.  I’m currently hoping to get things finalized sometime before The Littlest Apple starts college.

I’ll be taking the weekend off from thinking about all of this (as much as possible) and enjoying some quality time with my two favorite guys, but I’m hoping to share some non-GI posts tomorrow.

If you are a new reader, and wonder what is going on with The Littlest Apple, start reading here.

Blog Widget by LinkWithin