Mar 23 12
by cara
at 2:38 PM

Excuses, Excuses

I have about a million reasons why I haven’t been blogging lately….

My husband was out of town for 5 days.

Spring Break.

The Picky Apple, The Little Apple and I all had The Plague.

Busy watching Mad Men.  (Slow to get on board with that one…)

Busy watching Downton Abbey. (Ditto.)

Busy re-reading The Hunger Games series and dreaming of how fun it would be to go see the movie.

Working out.  About 10 couples we know are doing a Biggest Loser Challenge from March 1-May 31.  We log our weights and get ranked weekly.  No pressure like posting your weight publicly for all the world to see.  The Picky Apple is currently in 3rd place, and I’m somewhere in the middle of the pack.

Doing laundry and piling it up all over the place.  Who has time for folding and hanging things up?!

Project Life.  Week 11, and still loving it!

Oh, and probably the biggest excuse of all…life with a new baby.  When do they stop being newborns?  Slingshot’s 2 1/2 months old now, but we’re definitely still adjusting.

Mar 4 12
by cara
at 10:55 PM

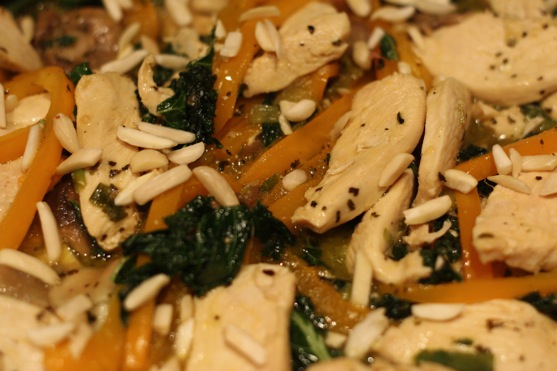
Ginger Citrus Skillet Chicken

Stir fries are a quick and easy way to get some protein and a bunch of vegetables all at once.  Almost every stir fry I’ve ever tried has had soy sauce in it.  But not this one.  The citrus and ginger based sauce is light and refreshing.  This stir fry is a a bit different from what we’re used to, but we both really enjoyed it!


Ginger Citrus Skillet Chicken

from Everyday Paleo by Sarah Fragoso

Ingredients:

  • 4 tablespoons coconut oil
  • 2 lbs boneless, skinless chicken thighs, cut into bite-size pieces (I substituted chicken breasts)
  • 1/2 cup cremini mushrooms, sliced
  • 1 red bell pepper, thinly sliced (Mine was orange)
  • 4 green onions, diced
  • 1/4 cup chicken broth
  • 1/2 teaspoon fresh ginger, grated
  • Juice from 1 medium orange
  • 1 tablespoon dried basil
  • 1/2 jalapeno minced (optional)
  • Black pepper to taste
  • 1 bunch kale, chopped with tough stems removed
  • 1/4 cup sliced almonds (I used slivered almonds)

In a large skillet, heat 2 tablespoons of the coconut oil and saute the chicken for 5-7 minutes.  To the chicken, add the sliced mushrooms, red pepper, and onions, and saute another 2 minutes.  Add the remaining ingredients except for the kale and almonds, stir well, bring to a simmer, and cook for another 2 minutes.  Remove all ingredients from the pan and set aside.  In the same pan, add the remaining 2 tablespoons coconut oil and the kale.  Saute the kale until tender, about 4 minutes.  Serve the chicken on top of the kale, and add a sprinkle of the sliced almonds on top.

Feb 25 12
by cara
at 8:56 PM

Postpartum Favorite Things

Since my life for the last 7 weeks has pretty much consisted of feeding, changing diapers, and sleeping in the spare moments, I thought I’d share a few things that have been helping me through these early days with a newborn.  And a special shout out to my good friends who are bringing home their new baby girl today!  Congrats!!
My Favorite Things: The Postpartum and Breastfeeding Edition
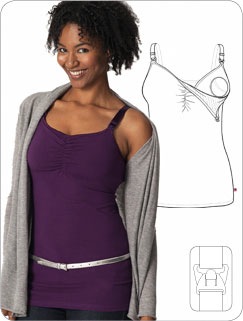
1.  Glamourmom nursing camis: I tried several different brands of nursing camis after The Little Apple was born, but I was never all that happy with any of them.  After reading glowing reviews a few months ago of Glamourmom camis, I ordered the Nursing Bra Full Bust Long Top in black.  I loved it so much my first week home that I ordered two more (white and heather gray).  I’ve been wearing one of these every single day for the last 7 weeks.  I love the coverage they provide while I’m nursing.  They are thick enough that I could wear them alone, but I typically wear them under another shirt for a layered look.  I love the length of these camis as well as the support they provide up top- these camis have an actual (wireless) bra built in to them, with an adjustable band in the back.
I’d also like to give their customer service a big thumbs up.  When I placed my order recently, there was some kind of glitch and I thought my order didn’t go through. So I redid the order.  The next day I got a call from the company saying that they had 2 orders for the same thing, and were going to hold the orders until they talked to me about whether or not it was a mistake.  I love that they were on the ball with that!
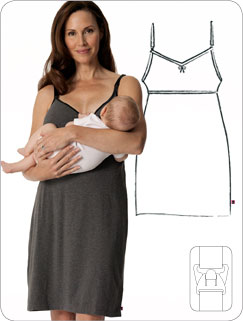
2.  Nursing night gown: I’m a nightgown girl.  I don’t wear pajamas, so a nursing nightgown is a must have.  I have 2 old ones from when The Littlest Apple was born, and since I loved my Glamourmom nursing cami so much, I ordered a Glamourmom Nursing Bra Nightgown too.
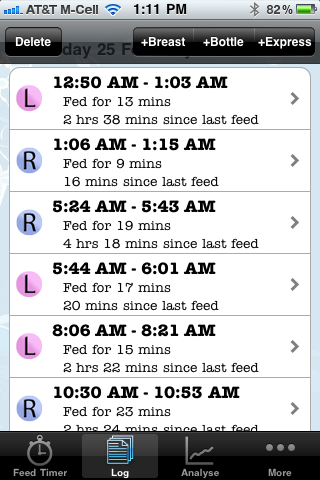
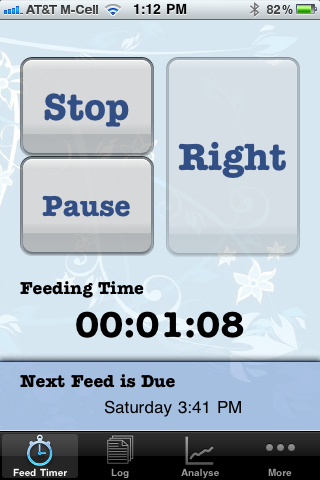
3.  iBaby Feed App: I use this app for keeping track of how long I’ve been nursing Slingshot, which side I last nursed on, and when his next feeding should be (especially useful for the early days when I needed to wake him up to feed him.  Now I just nurse on demand).  You can also use this to keep track of pumping.  Very user friendly!
4.  www.kellymom.com: My go-to website for all questions about breastfeeding.
5.  The Womanly Art of Breastfeeding: My go-to BOOK about breastfeeding.
6.  Thermos Water Bottle (18 oz): The great thing about this water bottle is that it keeps your cold water cold.  If you put ice in it, the ice will still be there hours later.  I carry this with me at all times.  The Little Apple has 2 water bottles like this as well (his have Batman and Starwars, not flowers!).
7.  Moby Wrap: Wearing Slingshot in this Moby Wrap has been a lifesaver for mornings when I need to take The Little Apple to preschool.  This allows me to have my hands free to hold The Little Apple’s school bags (and his hand) to get him to and from his preschool classroom.  No lugging the car seat, no fussing with a stroller.  One tip: Since it does take a minute to get the wrap on properly, I put it on before I leave the house, then just pop Slingshot in it when we get out of the car.
8.  Trail Mix: This was my go-to snack in those first few weeks.  I’m super addicted to this stuff, so in recent weeks I’ve stopped making it as frequently.  I will eat WAY too much of it one sitting.  I would advise dividing it in to serving size baggies and keeping a few baggies on your nightstand or in the nursery.
What did you find useful in your first few weeks with a baby?
Feb 23 12
by cara
at 10:12 PM

Project Life

As Slingshot’s birth approached, I knew I wanted to be a little more intentional about documenting his life for a baby scrapbook.  I have a baby book for The Little Apple, but I was never really good about filling it out.

I started reading about Project Life last year.  I am NOT a scrapbooker (though I do have a few from junior high and high school).  Many years ago, I bought a whole bunch of scrapbooking supplies, but all of the paper, the cutting and arranging and adding embellishments just completely overwhelmed me.  So at first I was skeptical about Project Life.  But as I read about it more and more, I realized that it is intended to simplify scrapbooking.  You can add all that fussy stuff if you want, but you can also keep it super simple with just pictures and a note or memory.  You can just put your pictures and notes in the plastic protectors and be done with it.

The ultimate goal of Project Life is to document the every day.  To remember all of the little things.  But also to live your life.  And as a busy mom of two young boys, I absolutely LOVE that.  Through this blog, I have documented some stuff.  Big projects around the house.  Fun things I do with the kids (crafts and activities).  Big events like birthdays.  My passion for cooking and baking.  But what about all of the day to day?  The things The Littlest Apple says.  What shows we watch, the books we read, the music we listen to.  The errands we run.  Our daily routines.  Our fun family bonding times.  The mundane and ordinary parts of our days.  I’d love to be able to look back in 15 years and reminisce about those little things.  So that’s what Project Life is to me.

I decided that not only did I want to make a Project Life album to document Slingshot’s first year, but I’m also making a Family album that is for all 4 of us (mostly from my perspective, of course).  It’s hard to decide how to document the kids…do they each get their own album every year?  Do they each get a baby album (for the first year or so) and then just the Family Albums?  I’m still figuring it all out right now, especially what I want to do with The Little Apple’s first 4 years.

But for now, I’m jumping in.  I’m doing a page for each week.  Since I’m still learning about the process, I’m keeping it super simple right now.  Pictures (many of which were taken from an iPhone) and notes on the journaling cards popped in to the plastic protectors.  Every once in a while I’ll throw in a receipt, keepsake paper, or other bit of ephemera.  Maybe a few stickers.  No real embellishing or fancy papers or fancy cuts.

Just memories, plain and simple.

Here is Week 7 completed…. (since these are pictures of the pages protectors, there’s a bit of reflection in places)

Slingshot’s Album:
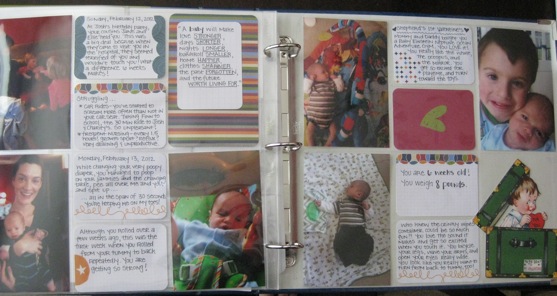
Close-up of the left side….
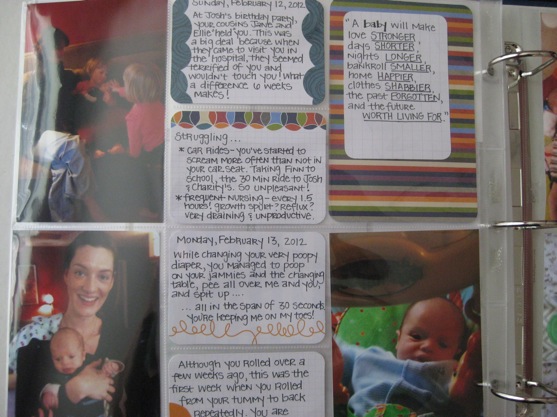
Close-up of the right side…
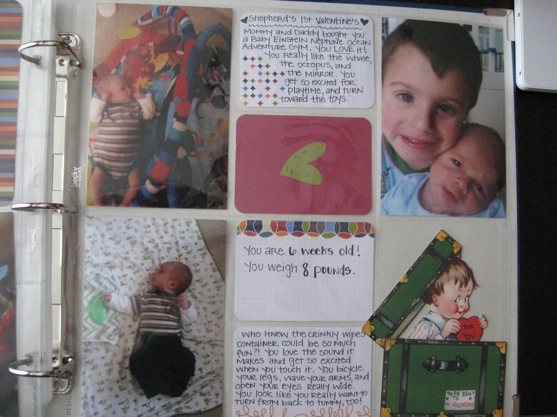
Family Album:
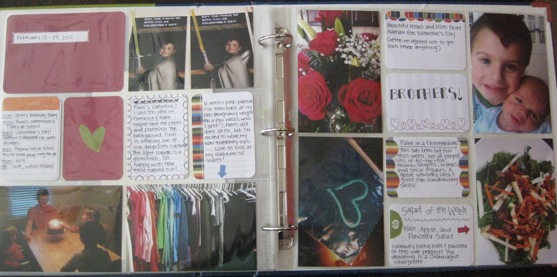
(Yes, I used that picture of the boys in both albums. Love that one!)

Close-up of the left…
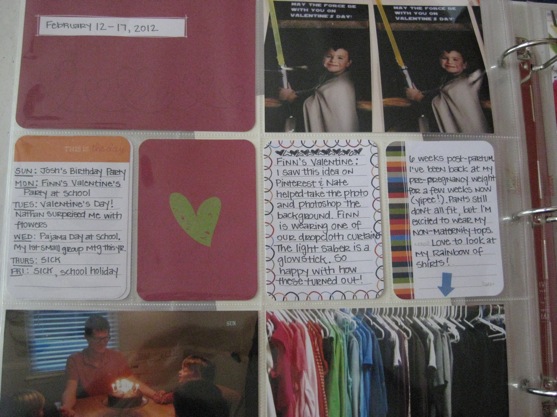
Close-up of the right…
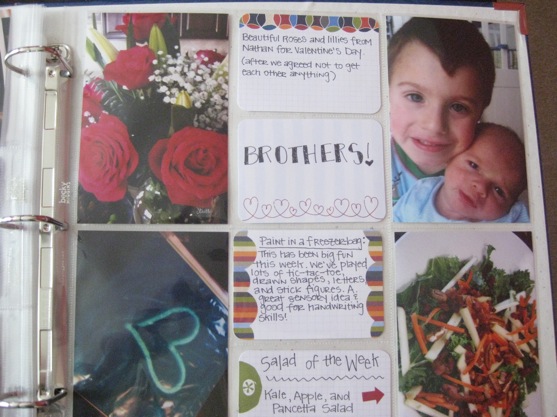
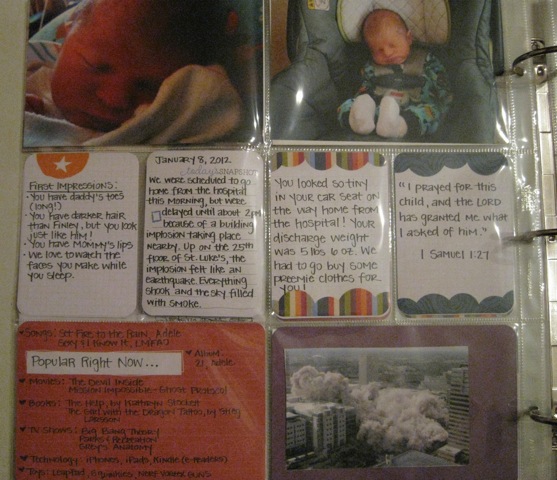
And here is a page from Slingshot’s second weeks.  Even though he’s only 7 weeks old (today!), I’m already finding myself forgetting the little things from those first few weeks of his life.  And I don’t want to forget!  It’s so nice to be able to look back at these pages and remember it all.  THIS is exactly why I’m doing Project Life.
Do you scrapbook?  Are you doing Project Life?  Did you make a baby book for your kids?

Disclaimer: Becky Higgins, creator of Project Life, has no idea who I am.  She isn’t paying me for this post.  This is just an amazing product that I wanted to share with you!!
Feb 22 12
by cara
at 11:35 AM

Kale, Apple, and Pancetta Salad

I’m still here!  Just not much time or brain power for blogging right now.  Slingshot’s been nursing every hour and a half (reflux?  growth spurt?) for the last week or so, and that hasn’t left much time for…. well…..anything.  Everyone at our house has also been sick off and on for the last few weeks.  I’m hoping we can kick the germs to the curb for good sometime soon because that’s really getting old!

I’m still enjoying salads for lunch, and this is my latest Salad Of The Week.  I have prepared kale in at least 4 or 5 different ways in the last 2 weeks.  I had 3 bunches of kale on my grocery list last week, and The Picky Apple (who has been doing the grocery shopping lately) thought it was a mistake.  Nope.  I just love my kale these days!  Kale is the new spinach, don’t you think?

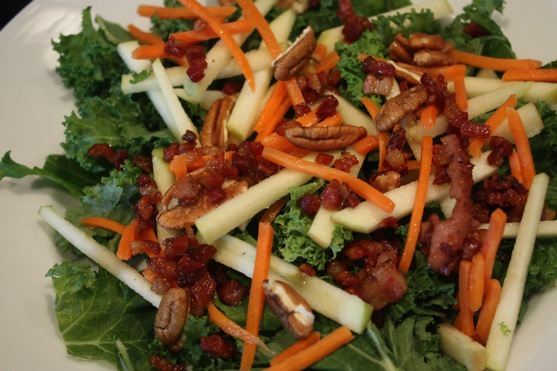
This salad uses kale as the base with yummy toppings including pancetta, apples and pecans.  This flavor combo was delicious!  I added grilled chicken to beef up (chicken up?) the protein for a more filling meal.

Kale, Apple, and Pancetta Salad

recipe adapted from Once Upon a Chef

Ingredients:

  • 1/3 cup extra virgin olive oil
  • 4 ounces sliced pancetta, diced
  • 1/4 cup Champagne vinegar
  • 1/4 cup pure maple syrup
  • 1/4 teaspoon salt
  • 1/4 teaspoon freshly ground black pepper
  • 1 8-ounce bunch kale, stems discarded, leaves shredded
  • 1/2 cup matchstick carrots
  • 2 tart yet sweet apples, sliced into thick matchsticks
  • 3/4 cup pecans, toasted if desired

Combine the olive oil and pancetta in a small saucepan over medium heat. Cook, stirring frequently, until pancetta is golden and crispy. Strain the pan drippings into a small bowl and leave the crispy pancetta off to the side to cool. Add the Champagne vinegar, maple syrup, salt and pepper to the pan drippings and whisk well.

Combine the kale, carrots, apples and pecans in a large bowl. Toss while adding the dressing, little by little, until salad is well dressed. Taste and adjust seasoning with salt and pepper. Garnish with crispy pancetta.

Feb 13 12
by cara
at 10:51 PM

May the Force Be With You Valentines

I was really close to sending store-bought Valentines with The Little Apple to preschool for his Valentines party today.  (I KNOW!!  Gasp!!)  But I’m exhausted.  Slingshot has reflux and is super fussy right now.  I’ve got the perfect 5 week old excuse not to be crafty, right?

But I just couldn’t let it go.  For the last 2 years, we made melted heart crayons for The Little Apple’s classmates.  This year I wanted to do something different.  And so this is what we came up with…

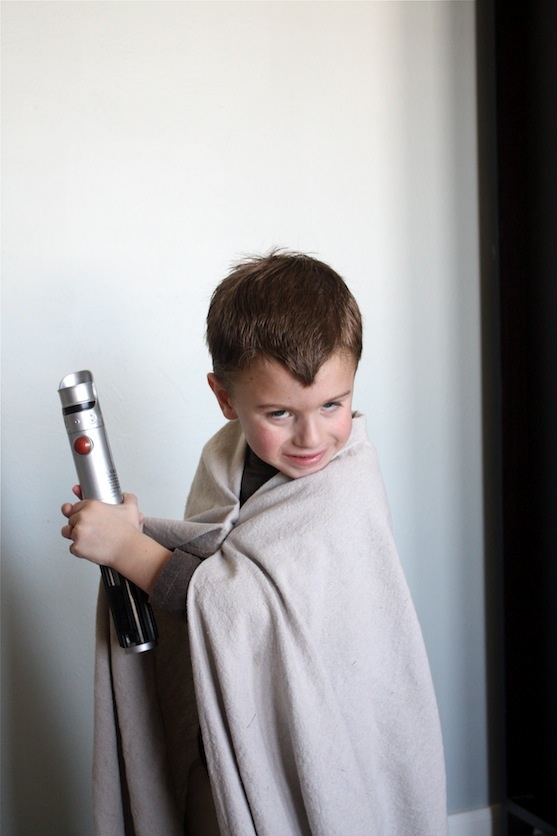
Star Wars Valentines for my little Star Wars enthusiast!  I pinned several Valentine ideas on Pinterest that were variations on the glow-sticks-as-light-sabers theme.  So after I found the perfect glow sticks in the dollar bins at Target, I decided to make a go of it.  And to give credit where credit is due, at this point in the process, I showed The Picky Apple the pictures on Pinterest and said “Do this.  Make it happen.”  And then he worked his magic.

Here’s what the photo originally looked like:

The Little Apple is wearing a too-small brown shirt backwards so the logo is hidden.  And The Picky Apple was genius enough to fashion a “robe” out of our Drop Cloth Curtains.  I’m so glad he was in charge of the photo-taking, because I never would have thought to do that!  Conveniently, The Little Apple has a toy light saber, so that was the easy part!

There was a bit of silliness trying to get the right photo….

But once we got the right photo, The Picky Apple got busy Photoshopping.  I know nothing about Photoshop.  But I can tell you that he found the background using a Google Image search.  The Font is SF Distant Galaxy.

I ordered 4×6 photos of the final image.  Then I punched 3 holes right above the light-saber handle, slipped the glow stick through and taped it in place on the back of the photo.  We found that more than 1 hole was needed in order to make the glow stick lay flat.

These Valentines cost less than $5 ($3.80 for 20 photos and $1 for the glow sticks).  Of course, The Picky Apple’s Photoshop skills are priceless, and I am so thankful to have a husband who is willing to help out with my projects!

Happy Valentine’s Day!!

Jan 27 12
by cara
at 9:48 PM

Trail Mix

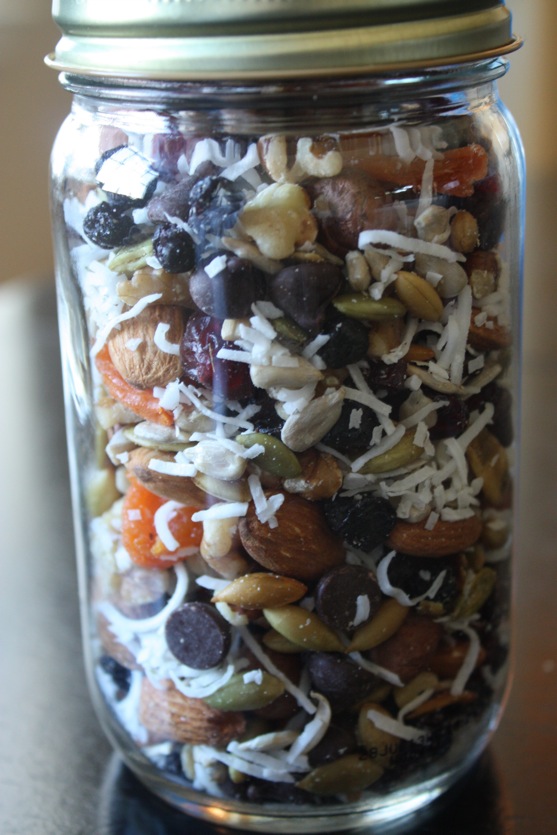
Since going Primal, I’ve been making batch after batch of this trail mix.  It makes a great on-the-go snack, and now that I’m up most of the lots at night with Slingshot, this has become my go-to midnight/2am/4am snack as well.  I keep a container of this trail mix next to my rocker in Slingshot’s nursery.  At some point, I’ll need to cut back my consumption of this yummy treat to a more occasional occurrence, but as as long as my weight loss continues (I’m only 2 lbs from pre-pregnancy weight!), I see no reason to give it up!  This trail mix tastes great, satisfies my craving for something sweet/crunchy/salty, gives me energy, and is full of those good fats that keep me feeling satiated until my next meal.

There’s no real recipe here, just a list of the usual ingredients I throw together.  Just use what you have on hand, and mix it to suit your personal tastes!  Like it sweet?  Add more dried fruit.  Like it salty?  Use salted nuts or seeds.  (I typically use unsalted).  Need your chocolate fix?  Add some chocolate chips.  I either use the highest quality chocolate chips I can find or I roughly chop a bar of 85% chocolate.

Trail Mix

Ingredients:

  • Almonds
  • Macadamia nuts
  • Hazelnuts
  • Walnuts
  • Dried cranberries
  • Dried apricots
  • Dried cherries
  • Sunflower seeds
  • Pumpkin seeds
  • Coconut flakes (unsweetened, you can toast it or not)
  • Chocolate chips or chopped chocolate

Combine in a jar and enjoy!

What are your favorite trail mix ingredients?

Jan 26 12
by cara
at 10:11 PM

Cupcake Liner Wreath

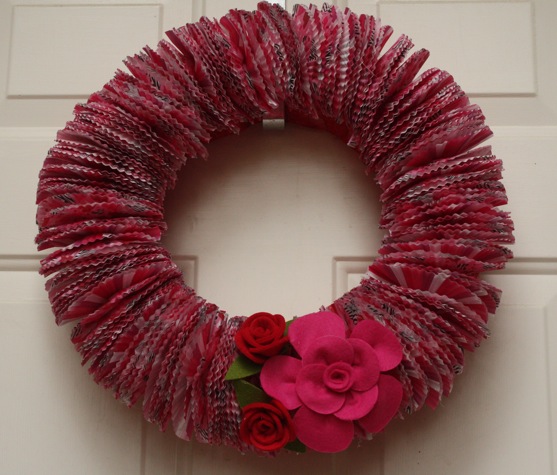
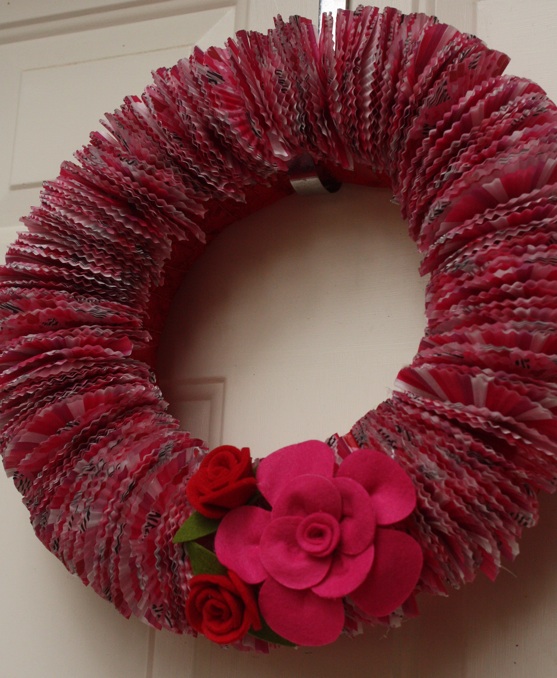
I’m normally quite the homebody, but over the weekend, I really just reached a point where I needed to get out of the house for a little bit.  My destination?  Hobby Lobby!  I had the crafting bug, and wanted to do something for Valentine’s Day.  I don’t have ANY Valentine’s decorations.  Not a one.  So I thought I’d remedy that, starting with this wreath.  Now I’m know I’m a few years behind the curve with using cupcake liners for wreaths, but I’ve run across a few of these on Pinterest lately and thought this would be an easy, relatively mindless craft for me to tackle in this post-baby haze I’m in right now.  (My pictures aren’t the greatest…they were taken on a particularly stormy day here…)

First, I covered the wreath with ribbon.  I actually forgot to buy ribbon for this step, but I found some red glittery ribbon in my stash to use.  It was sheer, but I made it work anyway.

It seems there are several different techniques for how to fold your cupcake liners for a wreath.  I decided to keep things simple and just folded my cupcake liners in half.  I originally tried folding the cupcake liners more, didn’t like the section I glued, and ripped them all off.  I’ve seen that technique used effectively, but for some reason I couldn’t get the hang of it.

I applied hot glue to a small section (maybe 1 inch) then stuck on the cupcake liners as quickly as possible.  Then repeated all the way around the wreath.  I used about 250-275 cupcake liners.

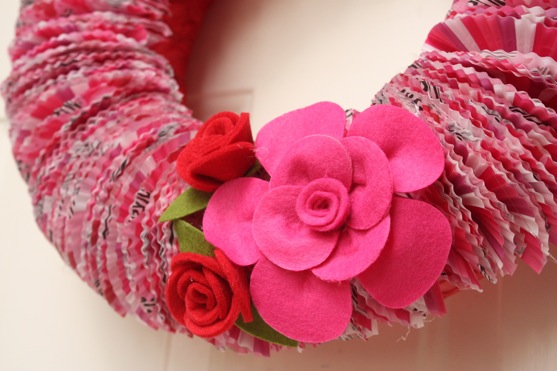
Once I finished the cupcake liners, I hot-glued these felt flowers (also purchased at Hobby Lobby).

An easy wreath for Valentine’s Day!

Jan 23 12
by cara
at 9:47 PM

2012 Weekly Household Planner

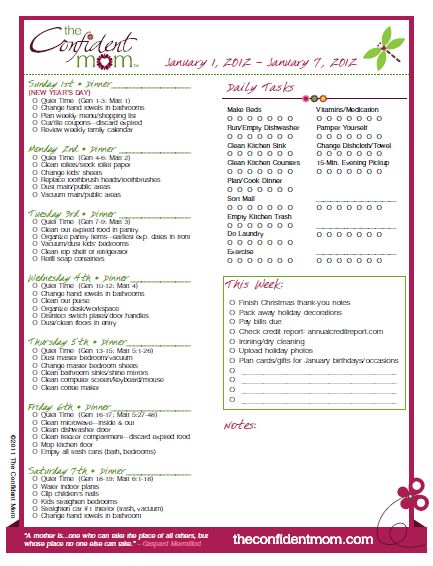
Last year I created my own cleaning calendar, and that worked fairly well for me (see sample in the right sidebar).  But with Slingshot’s arrival at the beginning of 2012, I knew I would need to switch things up this year.  Sometimes I find it much easier when someone else does all the thinking and planning.  Sometimes I need someone else to just tell me exactly what I need to do.  That’s where the Weekly Household Planner comes in.  The Weekly Household Planner was created by Susan Held of the Confident Mom.  I’ve been a follower of The Confident Mom blog for quite some time.  Susan is always full of great ideas, and this planner definitely falls into that category!

Here’s a sample page (and you can download a free sample here):

With a newborn in the house, I’m currently focusing on the Daily Tasks on the right side of the page (laundry, load the dishwasher, etc).  If I get through those and still feel like doing a bit more, I start working through the tasks on the left side of the page, broken down by the day.  The first week of January before Slingshot was born, I completed ALL of the tasks each day, and my house was sparkling clean.  It was amazing how just a few things each day made such a big difference!  The other thing I LOVE about this planner is that I can leave it out for my husband, and he can see exactly what needs to be done each day.  This type of planner makes it easy to delegate tasks to your husband and kids (assuming they’re old enough to help out).

You can also choose to have a Scripture Reading Plan included.  I opted to included it in mine, though I’m doing good if I get the New Testament scriptures read.

This planner is available for download for only $9.  You can print all the weeks out and create your own binder, take them to a copy place and have them spiral bound, or simply print one week at a time.  So flexible!  Definitely worth the $9!

Disclosure: I have not been asked to write this review, nor am I being compensated for it.  This is just a great planner that I’m currently using, and I thought you might like it too!

Jan 22 12
by cara
at 7:43 AM

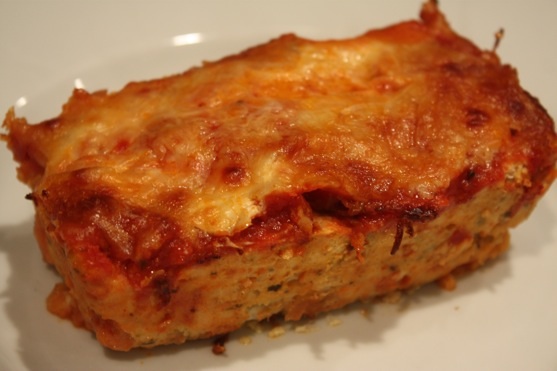
Chicken Parmesan Meatloaf

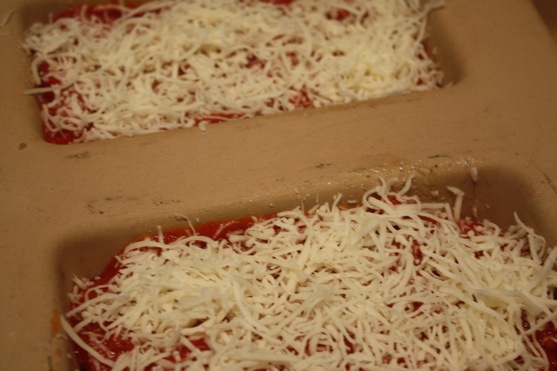
I hate meatloaf.  The Picky Apple hates meatloaf.  The Little Apple?  Well, he just hates meat, period.  So I tend to gloss over any recipes for meatloaf that come my way.  BUT The Picky Apple and I DO love Chicken Parmesan, so when I saw this recipe for Chicken Parmesan Meatloaf, I decided to check it out.  Chicken Parmesan in meatloaf form.  An interesting concept!  This is a meatloaf I like!  I cooked ours in a Pampered Chef mini loaf pan.  Next time I make it, I will add a bit more sauce to the top.

Chicken Parmesan Meatloaf

recipe from What’s Cookin’ Chicago?

Ingredients:

  • 1 lb ground chicken
  • 1 egg
  • 1/4 cup breadcrumbs (Picky Apple Note: I substituted almond meal to keep it gluten-free)
  • 1/2 teaspoon dried basil
  • 1/2 teaspoon dried thyme
  • 1/2 teaspoon dried oregano
  • 1-2 cloves garlic, finely minced
  • 1 small onion, grated
  • 1/2 teaspoon salt
  • 1/4 teaspoon ground black pepper
  • 1/2 cup grated Parmesan cheese
  • 1/2 cup pasta sauce (homemade or store bought)
  • 1/2 cup shredded Italian cheese blend
  • minced parsley for garnish

Preheat the oven to 350 degrees. Lightly grease a loaf pan with cooking spray, set aside.

In a large bowl, combine the ground chicken, egg, breadcrumbs, thyme, oregano, basil, garlic, onion, salt, pepper and Parmesan cheese. To not over handle the mixture otherwise it will get tough. Place the mixture in the greased loaf pan and form into a loaf. Top the meatloaf with pasta sauce.

Place filled loaf pan on a baking sheet and bake in the preheated oven for 40-45 minutes. Remove the meatloaf from the oven and sprinkle the top with the remaining shredded cheese. Place the meatloaf back in the oven and bake until the cheese is melted.

Remove the meatloaf from the oven and allow to rest for 5-10 minutes before serving/slicing. Garnish with parsley if desired.

* To make ahead/freezer meal – Prepare the meatloaf mixture as directed and place in a disposable loaf pan. Cover and freeze. When ready to prepare and serve, defrost the meatloaf completely and preheat oven to 350 degrees. Top with pasta sauce and place filled loaf pan on a baking sheet. Bake in the preheated oven for 40-45 minutes. Remove the meatloaf from the oven and sprinkle the top with the remaining shredded cheese. Place the meatloaf back in the oven and bake until the cheese is melted. Remove the meatloaf from the oven and allow to rest for 5-10 minutes before serving/slicing. Garnish with parsley if desired.

Blog Widget by LinkWithin