Nov 20 10
by cara
at 1:48 PM

Turkey Playdough

I planned to make homemade playdough as a party favor for the The Littlest Apple’s Thanksgiving Party.  The original plan was to do Pumpkin Spice Playdough with fall leaf cookie cutters just like last year, but guess what?  If you wait until the week before Thanksgiving it is impossible to find anything fall because the stores have moved on to Christmas.  So, no fall cookie cutters to be found.

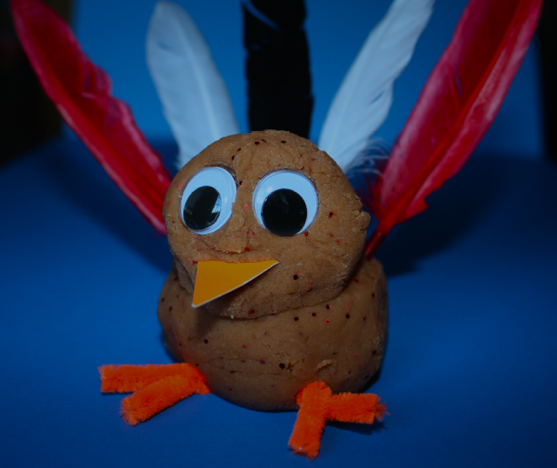
Time for Plan B.  I remembered seeing some adorable Turkey Playdough at both Counting Coconuts and Just Deanna (who actually made for a Thanksgiving party favor), and decided to run with that idea.  No cookie cutters needed!  BUT I did need feathers.  And you know what else is hard to find the week before Thanksgiving?  FEATHERS!!  Everyone is doing Thanksgiving projects with feathers.  I had to go to 3 stores before I found what I was looking for, and the color selection was limited.  I wound up with bags of white, red, and black feathers.  Not the original “rainbow” palette I had in mind, but real turkeys have white, black and red coloring, right?  I decided to make it work.

Lesson learned for next year:  plan ahead for Thanksgiving crafts and purchase your supplies early!

I used my standard playdough recipe and added a bit of brown food coloring and lots of red glitter.

I packaged the playdough just like last year, tied off with a fall ribbon (also tricky to find the week before Thanksgiving!).  In addition to the playdough, each favor bag included 2 googly eyes, a beak (a triangle of scrapbook paper) and 2 feet made out of pipecleaners.  I also included a picture of this little guy….

The Littlest Apple has had so much fun sticking the feathers in his playdough turkey, and doing silly things like putting the feathers on top of the turkey’s head or in between the turkey’s eyes.  He also enjoyed “carving” the turkey with a knife….slicing off the tail feathers, cutting off the beak, the eyes.

I’m hoping all of The Littlest Apple’s classmates enjoyed their playdough turkeys too!
Nov 19 10
by cara
at 4:00 PM

Not Exactly What We Had In Mind….

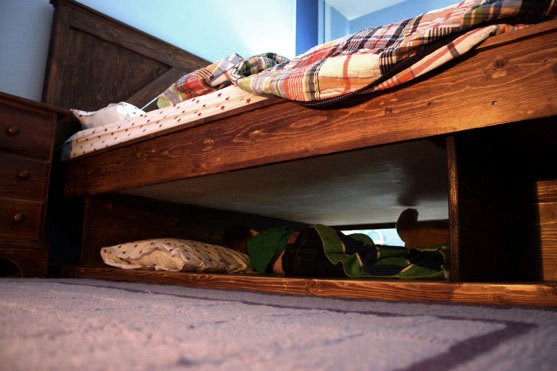
This wasn’t exactly what we had in mind when we built The Littlest Apple’s new bed with storage space underneath.


But as long as he’s taking a nap (which has been a huge struggle this week), I guess that’s okay.  Hope he doesn’t bump his head when he wakes up…..

Nov 19 10
by cara
at 2:37 PM

Favorite Things

I’m participating again this year in the Favorite Things party over at 320 Sycamore.  Check out my list from last year for more of my favorite things.

Here are a few of my favorite things right now…..

Ruffle/blanket/coat sweaters-Not quite sure what to call these types of sweaters, but I can’t get enough of them.  I included one last year, and this year my favorite is a ruffle one like this.  It always gets compliments when I wear it:

Air purifiers-Since my allergy testing, I’ve purchased 2 of these big boys for my house.  One for our master bedroom and one for the living room.  Love at first breath!

Big earrings– I wear my hair pulled back in a ponytail about 90% of the time, so throwing on a pair of big dangly earrings is my easy/lazy way of looking more put together.  I don’t have these, but they are from Stella & Dot, and I think they’re great!

Eucalyptus Mint Body Wash and Foam Bath-My favorite bubble bath for stress relief and sinus headaches.  So refreshing and relaxing!

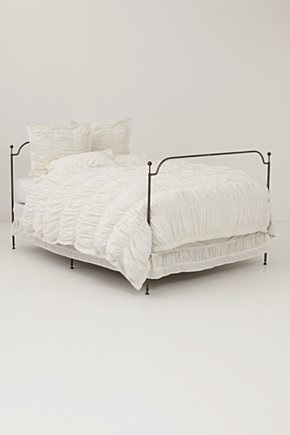
Cirrus Bedding from Anthropologie-got it for my birthday, and LOVE the feminine ruffles!

Jalapeno Chips–any brand will do, but Zapp’s and HEB’s store brand are my favorites.  This is one of those foods I can’t have in the house because I will eat a whole bag in one sitting.  I don’t feel that way about other chips, but Jalapeno Chips?  Can’t resist!

And, since we’re on the subject of junk food, my favorite candy is Sour Patch Kids.  Chocolate, I love but can eat a little and be satisfied.  Sour Patch Kids I could just keep on eating.  Next year I WON’T be buying these for Halloween because I barely had any left to pass out the trick or treaters!  My Kryptonite.

Parenthood on NBC.  Love Peter Krause, Lauren Graham, and Dax Shepard most of all, but the whole cast is great.  I laugh, I cry, I get home decorating ideas from their amazing sets.

The Mom to Mom group at my church, ours is called iBloom. Amazing speakers, always relevant topics, excellent mommy mentors, wonderful friendship and mom support.

Aside from the air purifier and moms’ group, none of these are particularly deep or life altering, but they all make me happy!

What are some of your favorite things?

Nov 18 10
by cara
at 8:19 PM

Turkey Paper Bag Puppets

One of my favorite parts of being Room Mom for The Littlest Apple’s preschool class is that I get to be in charge of the crafts.  And the favors.  Oh, and the menu selection, cute snacks and the decorations too!  Okay, I love everything about it, and this year I’m fortunate enough to have a co-room mom to share the responsibilities with who is enthusiastic and reliable, so I don’t actually have to worry about all of those things on my own each time.   We’ve also got a fantastic group of very involved parents.  For that I am truly thankful!

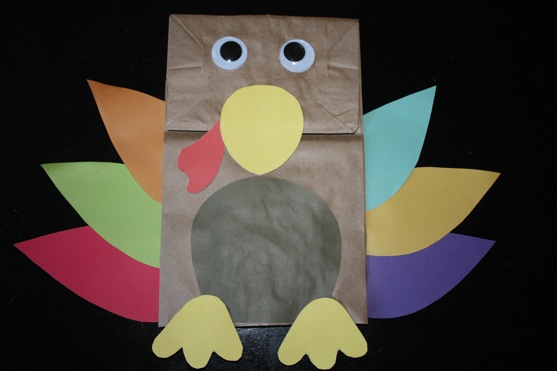
So here’s the craft I’ve been busily prepping today for tomorrow’s Thanksgiving Party.  These adorable Turkey Paper Bag Puppets!  Do you remember the other Paper Bag Puppets we made?  Well, I took that idea and transformed it into turkeys just in time for Thanksgiving.

This craft is fairly self-explanatory, but please email me or comment if you want more details about anything.  I tried putting the feathers up top, but ultimately decided they looked better on the sides.  I also cut a few inches off the bottom (top?) of the paper bag so that the turkey looked more proportional.

I could have kept adding more and more details (wings, dots on the beak, the underside of the mouth, a pilgrim hat, etc) but I reminded myself that these are THREE YEAR OLDS!!  I kept all of the feathers the same size for simplicity’s sake (and for my sanity while cutting out 120 feathers in addition to all the other parts!)  I used a combination of cardstock (beak, feet, and wattle) and thinner decorative paper (feathers, stomach).  Everything is cut and ready to go.  All the kids have to do is glue the pieces in place.  It should be interesting to see how this goes tomorrow!

I’m also eager to share the party favors I made.  That’s coming up in just a few posts!

What kinds of Thanksgiving crafts are your kids doing?

I’m sharing this post with:

Nov 16 10
by cara
at 2:02 PM

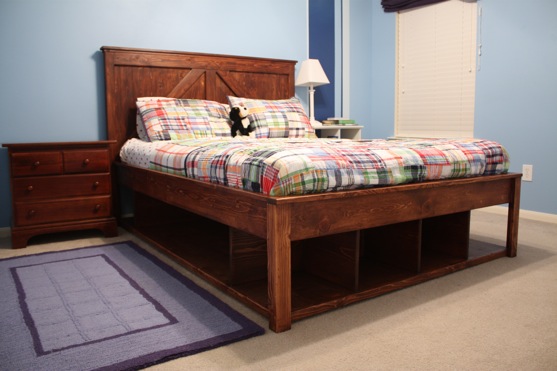
Brookstone Bed and Headboard

At long last, I can share with you this amazing project we just completed!

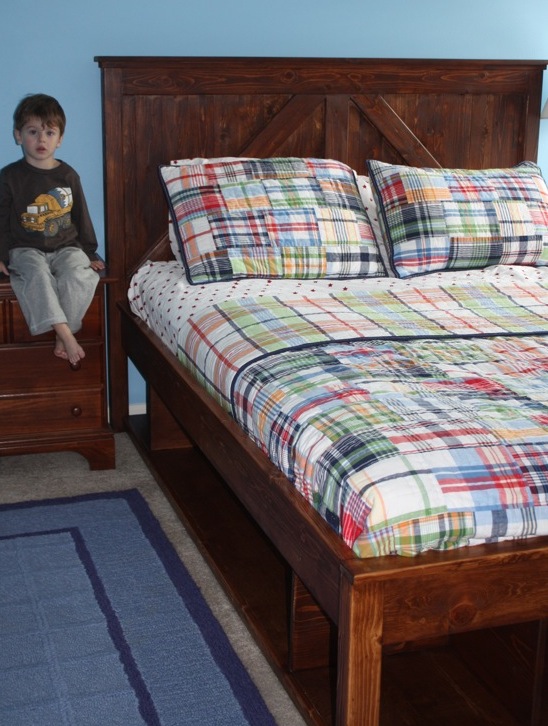
My husband built The Littlest Apple a new bed!  It was his first building project, and I am so so proud of him!

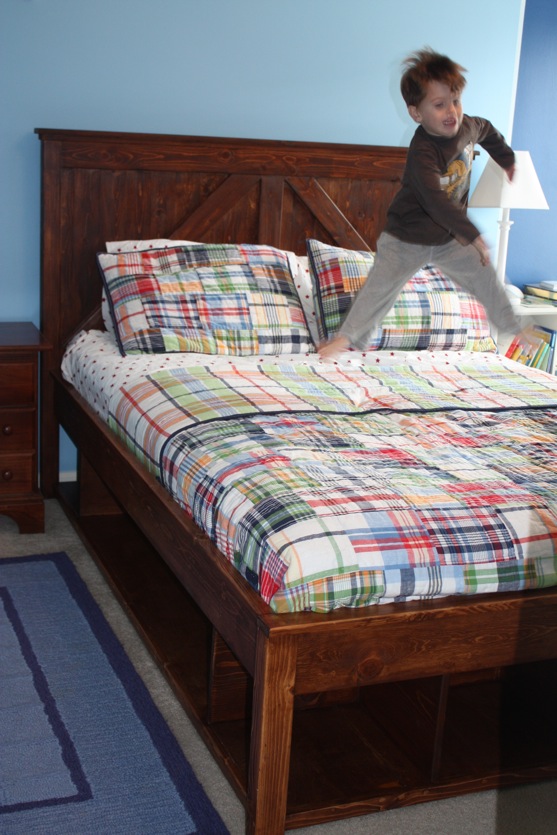
The Littlest Apple is so excited about his new bed that he had a hard time staying out of these photos!

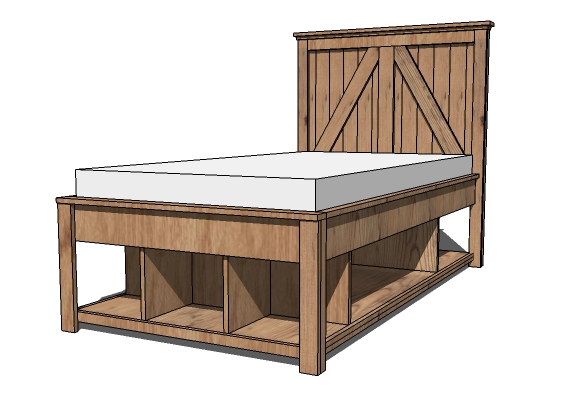
The Picky Apple used plans from Ana White’s Knock Off Wood website for the Brookstone Headboard and Bed.

BUT, those plans are for a twin size bed, so being the math (and apparently carpentry) genius that he is, he whipped up new plans for a queen sized bed.  Yes, we gave our 3 year old a queen sized bed- we had one on hand that wasn’t being used.  Mattresses are expensive!

So, back to the bed….

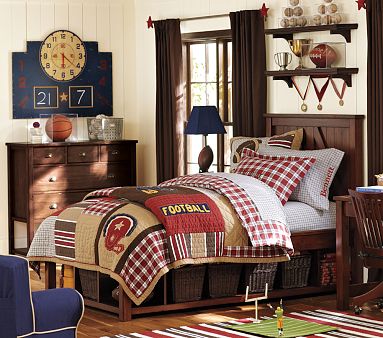
It was inspired by the Brookfield Bed from Pottery Barn Kids, pictured below.

image from Pottery Barn Kids

Their TWIN bed, the only size they offer, costs $999 (currently on “sale” for $799).  And there is a delivery fee of $175.

Our version?  LESS THAN $250!! For a QUEEN sized bed and headboard!

I think you’d be hard pressed to find a new queen sized- bed and headboard ANYWHERE for less than $250, don’t you?

I will say that this was a LOT of hard work (and I was only minimally involved in that).  The Picky Apple certainly put tons of effort into this!  Here are some of the issues that came up:

  • It was tricky selecting out 2x4s that weren’t warped to use on the headboard.
  • There were some hiccups in the bed building based on changing the dimensions of the bed plans from twin to queen.
  • It took us a LONG time to get this project finished, but that was mostly due to getting sidetracked with other projects, The Littlest Apple’s g-tube surgery, etc.  We only worked on it the weekends, and there was usually only one of us working on it at a time while the other supervised The Litttlest Apple.
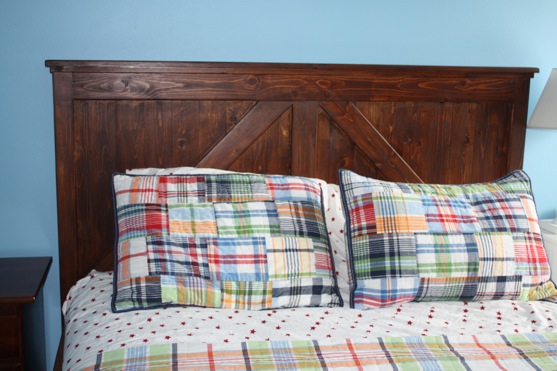
  • We had lots of trouble deciding on a stain color.
  • I applied the stain (and accidentally got the headboard a little darker than the bed in an attempt to “even things out”)  Thank goodness you can’t really tell, because I felt AWFUL for “ruining” my husband’s beautiful carpentry.
  • Trying to get this bed upstairs (with a turn and landing on our stairs) was a big ordeal.  I watched from the top of the stairs, and was fairly convinced the whole thing was going to topple down the stairs on top of my FIL!
  • It was an even bigger ordeal getting the bed through The Littlest Apple’s door.  In fact, it didn’t fit at first.  We had to remove part of the facing on the door jamb and cut holes in the door jamb itself.

BUT, even with those minor problems, I am so AMAZED at how well this project turned out.  I am so proud of my husband!  He did the majority of the work (I just did a little bit of the stain and poly coat).

As you can see,  The Littlest Apple is already right at home with his new bed, jumping away!  I still need to buy some baskets to go under the bed (and I’m thrilled about all this new storage space!), but I was too excited not to share this project right now!

Sources:

Quilt and Shams: Madras Quilt (in Navy) from Pottery Barn Kids

Sheets: Organic Star Sheets (in Red) from Pottery Barn Kids

Rug (leftover from “nursery“): Ethan Rug from Pottery Barn Kids

Bed Stain:  MinWax English Chestnut

Wall Colors:  Main wall color is Benjamin Moore Faded Denim.  Stripes are Benjamin Moore Mystical Blue (the light color) and Blue Suede Shoes (the dark color).

I’m sharing this post with…

Nov 15 10
by cara
at 10:46 AM

Thanksgiving Snacks

At the end of my post last week about the Indian Corn Craft, I mentioned a special Thanksgiving snack “coming up next.”  Then I posted about Pepperoni Rolls.  And although Pepperoni Rolls can make a delicious snack, that wasn’t the Thanksgiving snack I was referring to!

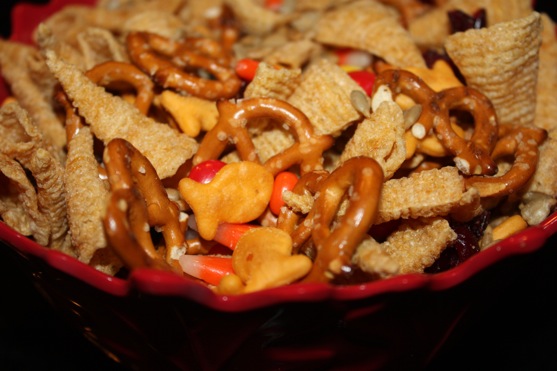
I was talking about this great Blessings Mix I created after reading about it on Red Couch Recipes.  I served this at Art Playgroup last week, but it would also be perfect for school Thanksgiving Parties (it’s even nut free!).  Each of the ingredients is a symbolic representation of some of the things we have to be thankful for at this time of year.  No cooking or baking involved!

Blessings Mix

recipe from Red Couch Recipes

  • Bugles (2 cups) — Shaped like a cornucopia or Horn of Plenty, a symbol of our nation’s abundance .
  • Pretzels (1 cup) — Arms folded in prayer, a freedom sought by those who founded our country.
  • Candy Corn (1 cup) — Sacrifices of the Pilgrims’ first winter. Food was so scarce that settlers survived on just a few kernels of corn a day.  (The Picky Apple Note: I had a HARD time finding candy corn this week…most stores have moved on to Christmas stuff.)
  • Sunflower Seeds (1 cup) — Promise of a a future harvest, one we will reap only if seeds are planted and tended with diligence.
  • Dried fruits (I used 1/2 cup dried cranberries) — Harvest gifts of our bountiful land.
  • Fish Crackers (1 cup) –A remembrance of the abundant sea life and the blessing it was to the Pilgrims.

I also added 1/2 cup M & Ms.  Not symbolic, but who isn’t thankful for a little bit of chocolate, right?!

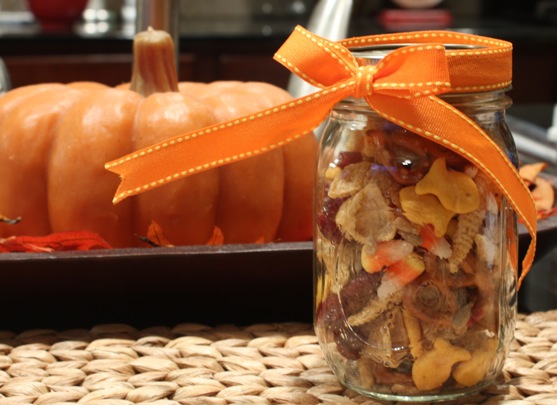
This mix also makes a great teacher/friend/family gift!  Just package it up in a mason jar or other container with a cute ribbon (I used leftover ribbon from my Halloween Ribbon Wreath).

Looking for something a little healthier, but equally Thanksgiving-y?  Check out this Turkey Fruit Snack I made last year…

Gobble gobble!

Nov 14 10
by cara
at 1:47 PM

Apple Picks

The beginning of the holiday season also brings lots of great new recipes, crafts, and posts on how to make the most out of the holidays.  Here are a few of my favorites from the last two weeks….

A Simple Gift Giving Philosophy: Want, Need, Wear, Read @ Simple Kids

Salted Caramel Pumpkin Pie @ Baking Bites

Becoming A Stay At Home Mom- An Evolution @ Steady Mom

Where To Start? (in decorating a room) @ Emily A. Clark

Pumpkin Spice Sugar Cookie Bars With Cinnamon Buttercream @ goodLife {eats}

Oreo Turkeys and Cookie Pilgrim Hats @ Our Best Bites

DIY Faux Curled Rosewood Wreath @ Under the Table and Dreaming

Peek Inside My Pantry @ Delightful Order

How to Have a Restful, Memorable and Meaningful Holiday Season @ Life as Mom

Nov 13 10
by cara
at 9:31 PM

Pepperoni Rolls

The Picky Apple and The Littlest Apple LOVE pizza.  I like it, but it’s not usually my first choice.  Always on the search for something The Littlest Apple will eat, I decided to try a new spin on homemade pizza and calzones by making pepperoni rolls.  These turned out better than expected, and The Littlest and Pickiest Apple even nibbled a few bites and said “I LIKE pepperoni rolls!”  The ultimate compliment indeed!

Pepperoni rolls are best when fresh, so after preparing them, I’d advise freezing any extras before baking.  This recipe is more about the method than the exact measurements, but I’ve tried to note approximate measurements below.

Pepperoni Rolls

recipe by me

Ingredients:

  • Frozen bread dough (I used Rhodes rolls)
  • Pepperoni
  • Italian blend cheese (0r mozzarella), shredded
  • Garlic Salt
  • 2 tablespoon Butter
  • Pizza Sauce

Place frozen rolls on a pre-greased cookie sheet and cover with plastic.  Allow to thaw in a warm place for 3-5 hours, or until rolls begin to rise.  (I used my oven with just the oven light on.)

Using a rolling pin, roll out each roll to a 6-8″ diameter.  Cover with a layer of pepperoni (between 6 and 9 pepperoni) then sprinkle about 2 tablespoons of cheese.  Starting at one side, gently roll up the dough, being careful to keep the pepperoni and cheese in place.  Place the pepperoni roll seam side down on a cookie sheet.  Continue this process until you have assembled all of the pepperoni rolls.  Melt butter in a small bowl in the microwave.  Brush butter lightly over the tops of each pizza roll, then sprinkle each roll with garlic salt.  Cook at 350 degrees F for 25-30 minutes or until golden brown.  Serve with warm pizza sauce.

Nov 11 10
by cara
at 2:55 PM

Indian Corn Craft

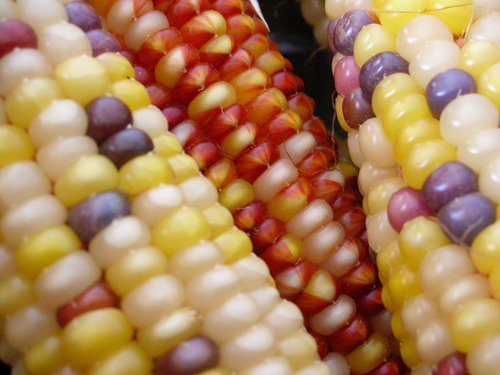
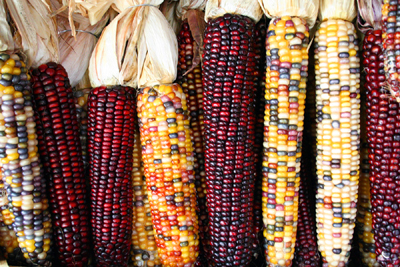
Aren’t the colors of Indian Corn amazing?  For me, Indian corn ranks right up there with fall leaves and pumpkins in terms of beautiful fall things.

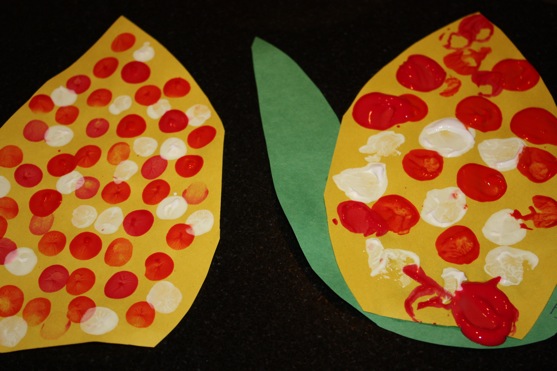
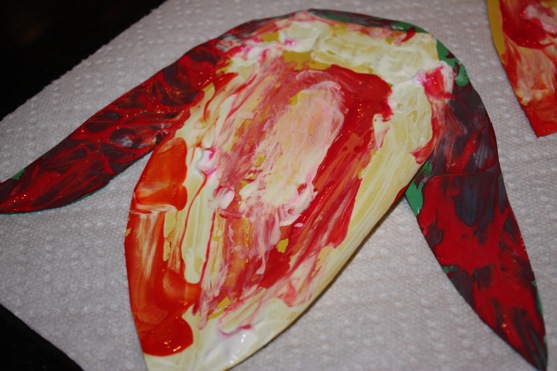
We painted our own Indian Corn at Art Playgroup this week, with this quick little craft (and by quick, I mean that most of the kids were done in less than 5 minutes!).  This would be a great craft for a preschool Thanksgiving party!  I pre-cut the yellow corn shapes and glued them to green leaves.  Then I gave the kids small bowls of red, orange, and white paint.  Most chose to stamp the paint with corks, but finger paint also works well for this craft.  (Now that I’m thinking about it, q-tips would be excellent too and might keep the kids occupied a little longer.)

Pictured below, my fingerpainted version on the left, and one of our young artist’s cork stamped versions on the right.

And I loved this interpretation of Indian Corn….

Stay tuned for a special Thanksgiving snack, coming up next!

Nov 10 10
by cara
at 11:05 AM

Easy Taco Soup

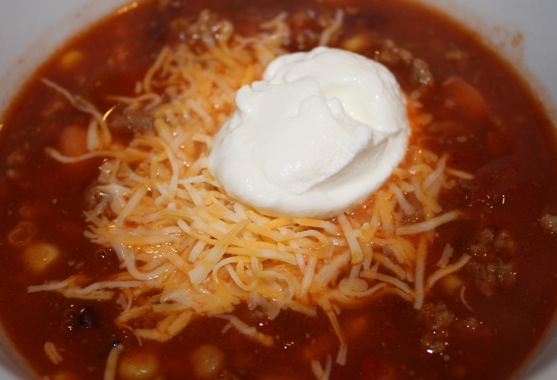
I just checked and double checked my archives to see if I had posted this recipe before, but apparently I haven’t.  This is an “old” favorite that is beyond easy (as the recipe title implies) to throw together.  I also call this 8 Can Soup, because the recipe calls for 8 different canned goods.  It’s just a matter of opening all the cans and pouring the ingredients into the pot with some browned ground beef.  It’s not particularly spicy, so feel free to add in a jalapeno or some extra pepper if you like it hot.  It does take an hour to simmer, but the prep work is minimal and you get lots of leftovers!

(I like mine with lots of cheese, as you can see below.  I also added even more sour cream after I took this photo, along with some crumbled tortilla chips.  Yum!)

Easy Taco Soup

from Cooking With Paula Deen, September/October 2008

Makes 10-12 servings

Ingredients:

  • 1 pound ground chuck
  • 1 large onion, chopped
  • 4 cups water
  • 1 (16-ounce) can light red kidney beans, drained
  • 1 (15.5 ounce) can pinto beans, drained
  • 1 (15.25 ounce) can niblet corn, drained
  • 1 (15 ounce) can black beans, drained
  • 1 (15 ounce) can tomato sauce
  • 1 (10.75 ounce) can tomato soup
  • 1 (10 ounce) can diced tomatoes and green chilies (Rotel)
  • 1 (10 ounce) can enchilada sauce
  • 1 (1.25 ounce) package taco seasoning mix (or make your own, like I do!)
  • 1 teaspoon salt
  • Garnish: shredded cheese, sour cream, tortilla chips

In a large Dutch oven, combine ground chuck and onion.  Cook over medium-high heat until beef is browned and crumbles; drain.  Stir in water, kidney beans, pinto beans, corn, black beans, tomato sauce, tomato soup, tomatoes and green chilies, enchilada sauce, taco seasoning mix, and salt.  Bring to a boil; reduce heat, and simmer for 1 hour.  Garnish with cheese and sour cream if desired, and serve with tortilla chips.

Blog Widget by LinkWithin