Bathroom Makeover (In Progress)
We’re in the middle of giving The Littlest Apple’s bathroom a makeover from the boring builder basic it once was. I was planning to wait until this project was complete to reveal the marvelous before and after photos, but I’ve hit a wall with this project and am in serious need of motivation. Melissa at The Inspired Room is hosting a Procrastinator’s Party, so I’m submitting this project. The idea is that all the particpants check back in 2 weeks down the road with our after photos. So I’ve got two weeks to make some serious progress!
I really wish I had taken some before pictures! I have some “during” pictures, and I guess they might as well be the “befores” since there is so much left I want to do!
This bathroom started out with your basic oak cabinets, beige walls, big mirror, and cheap looking light fixture over the mirror. This is The Littlest Apple’s bathroom, but also the “guest” bathroom upstairs just next to the playroom and guest bedroom, so I wanted to keep it child friendly without going overboard with cutesy children’s themes. My vision for the room includes light blue walls, white beadboard and cabinets, a row of hooks for towels, bright and cheery striped shower curtain. A cottage coastal look, but not overly nautical, if that makes sense.
What I’ve done so far:
Painted the walls a pale blue. We used Mystical Blue by Benjamin Moore. (This color was also the lightest color in the stripes on the walls in my son’s room, so there’s a little unity there). It looks more green here than in real life…more closely matches the lightest blue color in the shower curtain and towels below (a happy accident).

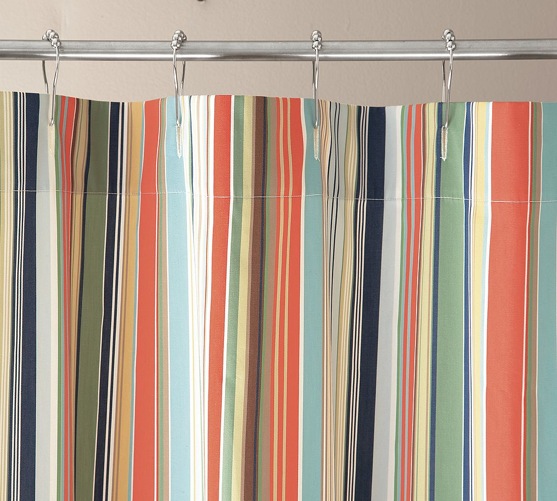
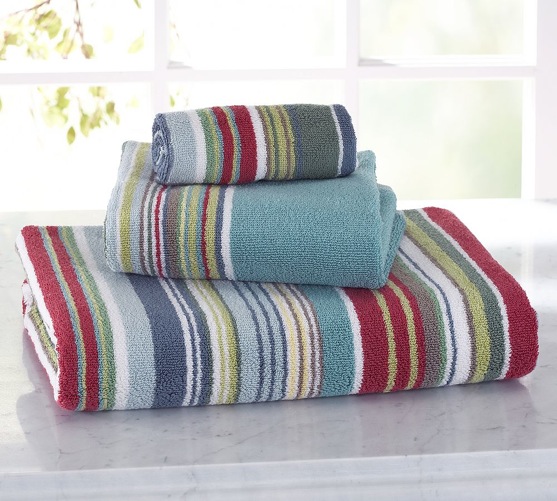
Purchased a cheery striped shower curtain and hand towels. I ordered the Boathouse Stripe Shower Curtain from Pottery Barn. The red stripes look kind of pink in the picture below, but they are much more red looking in real life. (The colors are much more accurately reflected in the hand towels below).
I also ordered the Boathouse Stripe Hand Towels:
Started painting the cabinets a crisp white. This is the step I’m on right now, the main one I’m trying to complete in the next 2 weeks. I’ve got 2 cabinet doors left to paint, and a few touchups left. This was my first time painting cabinets. After reading many many blog posts about techniques for painting cabinets, I finally decided to try Remodeling Guy’s suggestion to use spray paint. Crazy right?! Maybe a little. I would never have done this untested on the kitchen, but this bathroom isn’t as front and center. And it’s just paint, afterall. The cabinet doors were easy peasy to paint outside on a nice afternoon, though I’ve been stalled by rain lately (hence the 2 cabinet doors remaining). After that initial afternoon, I was patting myself on the back for how great they looked and how easy this method was. And the best part? No brush strokes!
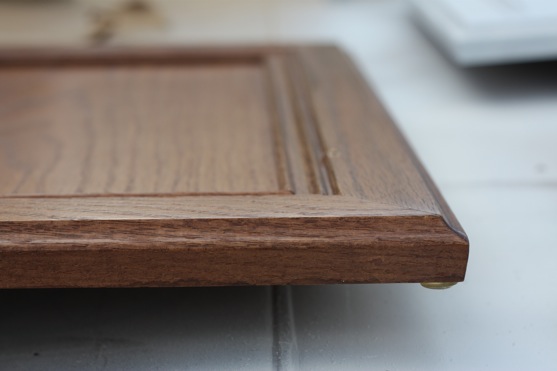
Here’s the only before I have of the cabinet color:
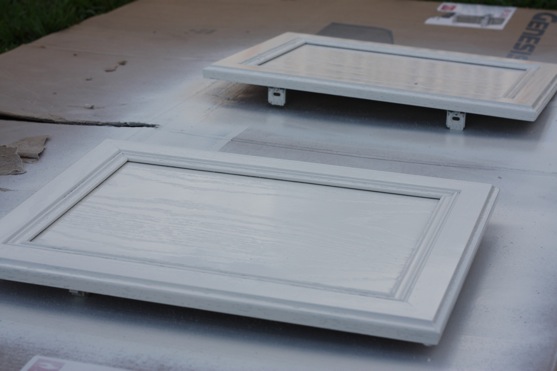
Here’s what the cabinets looked like after 2 coats of primer and 2 coats of gloss paint…the grain of the wood still shows through a little, but I am pleased with the results given the ease of painting:
Now we get to the tricky part….painting the cabinet frame in the bathroom. Can’t exactly take that outside can you? So, we’re talking spray paint in a small, enclosed space. This part was definitely not ideal. I had to cover lots of the surrounding area. I used newspaper (also not ideal…lesson learned: use plastic or cloth, people! And be sure to tape it all down really thorougly, because the spray paint will creep under the paper!) I also could have covered more….spray paint is tricky because it floats in the air for a while before it settles down…on to everything. And there were lots of fumes in that little space. I wore a mask, but it was still not the smartest thing I’ve done.
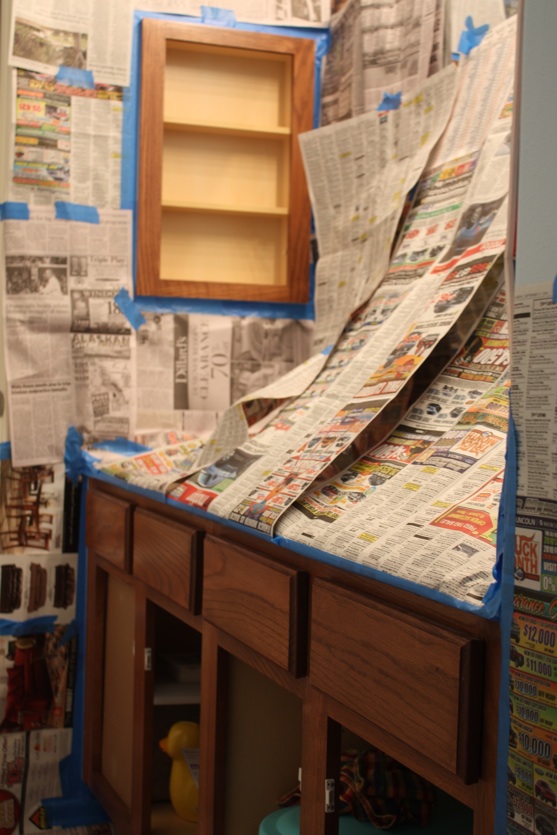
Ok, stop laughing…it was a LOT of newspaper!! In this angle, you can see the blue walls (and check out the early bird deals at Kohls, hee hee!):
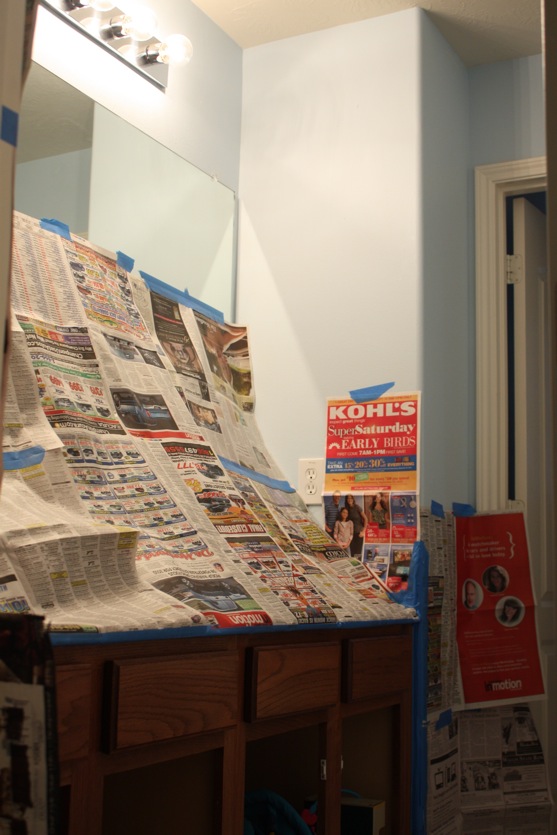
Let’s just say that this part definitely made me question whether spray paint was the best choice for this project. I had quite a bit of tile cleaning to do where I didn’t cover enough (against the opposite wall from the cabinets, and also in some areas near the bathtub, about 4 feet away from where I was painting.) That part was not fun (and maybe still not really finished, but thankfully we have tile that has some white in it already!).
And that’s where I’m going to leave you hanging, folks. You’ll have to check back in 2 weeks to see what this bathroom looks like once I’ve finished the white cabinets!
What I still want to do:
- Finish painting cabinets white (this is the main step I’m hoping to accomplish for the Procrastinator’s Party, but perhaps I can get some of the other things started too!)
- Add white beadboard to walls
- Add towel hooks
- Add decorative touches
- Replace large mirror with 2 smaller mirrors
- Replace light fixture
- Add window treatment to small window


Wow! That looks like fun! So, I’d love to hear your feedback… what was the hardest part? The masking or the fumes?
I’m thinking the best overall solution for the kitchen might be to brush or foam roller the cabinet boxes and spray paint the doors outside. The doors are where the brush strokes look bad and they cover most of the cabinets….
Sometimes it’s just trial and error! But you did it! That’s what matters most!
I’d love to get a conversation going on Facebook about this… there is a link to my Facebook page on my blog. It would be fun to send everyone over here to see your newspaper work!
Have a great week!
Tim
Wow! What a project-can’t wait to see how it all turns out-I’ve wondered about doing the same thing in our bathrooms….like Time, I’d love to hear how it goes!
WOW!
I really can’t wait to see the updated bathroom! I have light fixtures just like that in my bathrooms. I’m having trouble convincing my husband that we should change them since they through off so much light (especially compared to the fixtures with only 3 bulbs). I’m not sure how to convince him.
Good luck!
I love that striped shower curtain and bath towel set! So classy. So fun. I can’t wait to see the finished product!
I wish I’d read this two hours ago – before I taped up my ceiling and floor and spray-painted the horrendously ugly ceiling fan that I can’t dismantle! Definitely not the way to spray paint, but I’m very pleased with how it’s turning out.
Hang in there, it will look terrific!
I cannot wait to see the afters!!!! One week left!!
I can’t wait to see the after. I love the blue. I am going to do my great room and kitchen blue, but it’s so hard to pick the perfect blue.
Lol! Our house came with the builders basic everything in our bathrooms and I ‘upgraded’ ours the same way you did. Instead of spray painting I actually used a brush and a roller and it was pretty easy. I about to venture onto the kids bathroom this week, maybe I will take pictures too!
I’ll post the same information to my blog, thanks for
ideas and great article.
I’ll post the same information to my blog, thanks for
ideas and great article.
Hi,
Thanks for sharing your experience with all of us.. I am glad I visited here and come to know about the steps of remodeling.. I was wondering to know when it will be completed and you share the pictures?
bathroom remodeling
I must say that overall I’m really impressed with this blog.It is easy to see that you might be passionate about your writing.
Great writter, Thank you for delivering the outstanding article. I found it informative. Best wishes !!
Â
Interesting blog. It is always good if you can provide additional information about it. Thanks a lot!
I want to thanks for the time you’ve contributed in composing this article.Â