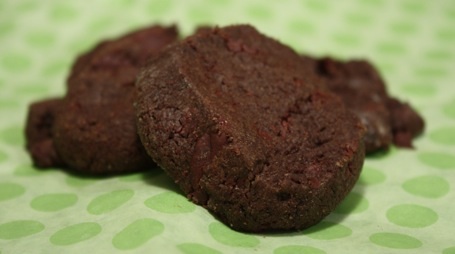
World Peace Cookies
Buttery, chocolate-y, salty cookies. Called World Peace Cookies because a daily dose of these cookies “is all that is needed to ensure planetary peace and happiness.” Amen to that. I love the idea of keeping several logs of this dough in the freezer to slice and bake as needed. I think it could be argued that I need to eat them every single day….chasing around a super active 16 month old is lots of work!
World Peace Cookies
from Baking, From My Home to Yours, by Dorie Greenspan
Ingredients:
- 1 1/4 cups all-purpose flour
- 1/3 cup unsweetened cocoa powder
- 1/2 tsp baking soda
- 1 stick plus 3 tbsp unsalted butter, at room temperature
- 2/3 cup (packed) brown sugar
- 1/4 cup sugar
- 1/2 tsp fleur de sel or 1/4 tsp fine sea salt
- 1 tsp pure vanilla extract
- 5 ounces bittersweet chocolate, chopped into chips, or a generous 3/4 cup store-bought mini chocolate chips
Sift the flour, cocoa and baking soda together. Working with a stand mixer, preferably fitted with a paddle attachment, or with a hand mixer in a large bowl, beat the butter on medium speed until soft and creamy. Add both sugars, the salt and vanilla extract and beat for 2 minutes more.
Turn off the mixer. Pour in the dry ingredients, drape a kitchen towel over the stand mixer to protect yourself and your kitchen from flying flour and pulse the mixer at low speed about 5 times, a second or two each time. Take a peek-if there is still a lot of flour on the surface of the dough, pulse a couple of times more; if not, remove the towel. Continuing at low speed, mix for about 30 seconds more, just until the flour disappears into the dough-for the best texture, work the dough as little as possible once the flour is added, and don’t be concerned if the dough looks a little crumbly. Toss in the chocolate pieces and mix only to incorporate.
Turn the dough out onto a work surface, gather it together and divide it in half. Working with one half at a time, shape the dough into logs that are 1 1/2 inches in diameter. Wrap the logs in plastic wrap and refrigerate them for at least 3 hours. (The dough can be refrigerated for up to 3 days or frozen for up to 2 months. If you’ve frozen the dough, you needn’t defrost it before baking-just slice the logs into cookies and bake the cookies 1 minute longer.)
Center rack in the oven and preheat to 325 degrees F. Line two baking sheets with parchment or silicone mats. Using a sharp thin knife, slice the logs into rounds that are 1/2 inch thick. (The rounds are likely to crack as you’re cutting them-don’t be concerned, just squeeze the bits back onto each cookie.) Arrange the rounds on the baking sheets, leaving about 1 inch between them.
Bake the cookies one sheet at a time for 12 minutes-they won’t look done, nor will they be firm, but that’s just the way they should be. Transfer the baking sheet to a cooling rack and let the cookies rest until they are only just warm, at which point you can serve them or let them reach room temperature.
Makes about 36 cookies.


I’ve been meaning to make these cookies for ages. Maybe I can make them as “New Years Cookies” to send to friends and family since I totally missed baking anything for Christmas this year.
These cookies were also one of my favorites. I will have to try these recipes.